
MS Entra ID SAML integration
In this article, you learn how to integrate OpenLearning with Microsoft Entra ID. When you integrate OpenLearning with Microsoft Entra ID, you can:
Control in Microsoft Entra ID who has access to OpenLearning.
Enable your users to be automatically signed-in to OpenLearning with their Microsoft Entra accounts.
Manage your accounts in one central location.
Note: This is taken to streamline and compile the steps that is required in OpenLearning and on the MS Entra site in one location so it's more clear for those that plan to utilise this to connect to OpenLearning.
The scenario outlined in this article assumes that you already have the following prerequisites:
A Microsoft Entra user account with an active subscription.
One of the following roles in Microsoft Entra:
Institution Administrator access to your OpenLearning portal.
Initial MS SAML SSO setup in OpenLearning
Step 1
Go to your OpenLearning portal's Institution Settings > Integration
Step 2
Scroll down to Manage Single Sign-on (SSO) connections and select SAML as the connection type, and click on Add new SSO connection.

Step 3
Enter the connection name. Leave the other information empty as you can fill that in later. Click Save.
Step 4
Click on the View Details button, of the connection that you set in Step 3
- a. Take note of the launch URL, you will need this later.
- b. Click on the Download XML file and save it to your device, you will need this later in Entra. Alternatively, download it from this link here: https://www.openlearning.com/saml-metadata
Add OpenLearning from the gallery to your Microsoft Entra ID.
To configure the integration of OpenLearning into Microsoft Entra ID, you need to add OpenLearning from the gallery to your list of managed SaaS apps.
Sign in to the Microsoft Entra admin center as at least a Cloud Application Administrator.
Browse to Entra ID > Enterprise apps > New application.
In the Add from the gallery section, type OpenLearning in the search box.
Select OpenLearning from results panel and then add the app. Wait a few seconds while the app is added to your tenant.
Alternatively, you can also use the Enterprise App Configuration Wizard. In this wizard, you can add an application to your tenant, add users/groups to the app, assign roles, and walk through the SSO configuration as well.
Microsoft Entra SSO initialization setup
Step 1
Sign in to the Microsoft Entra admin center as at least a Cloud Application Administrator.
Step 2
Browse to Entra ID > Enterprise apps > OpenLearning > Single sign-on
Step 3
On the Select a single sign-on method page, select SAML.
Step 4
On the Set up single sign-on with SAML page, click on the pencil icon for Basic SAML Configuration to edit the settings.
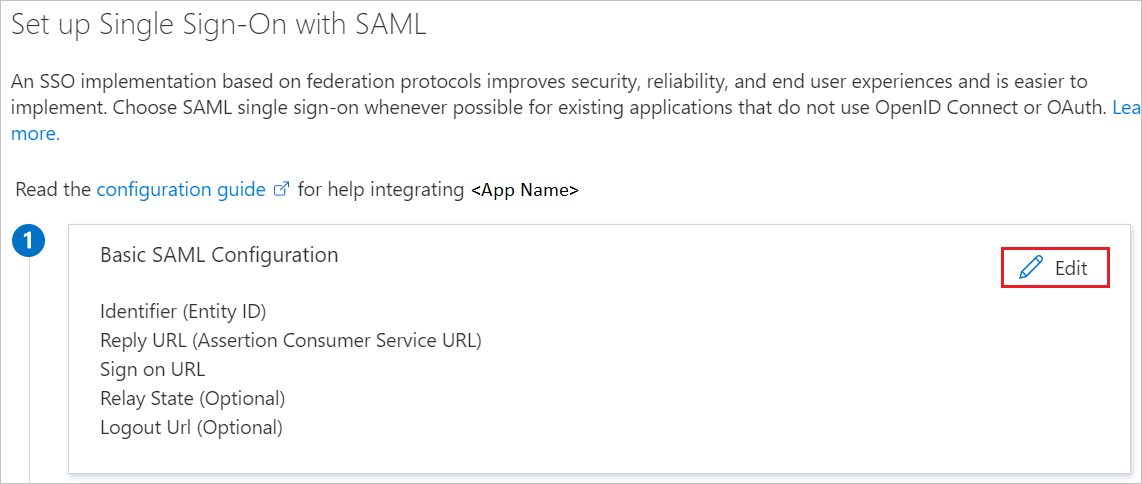
Step 5
On the Basic SAML Configuration section, if you have Service Provider metadata file, perform the following steps:
a. Select Upload metadata file.

b. Select folder logo to select the metadata file that you saved earlier from OpenLearning, and click Add.
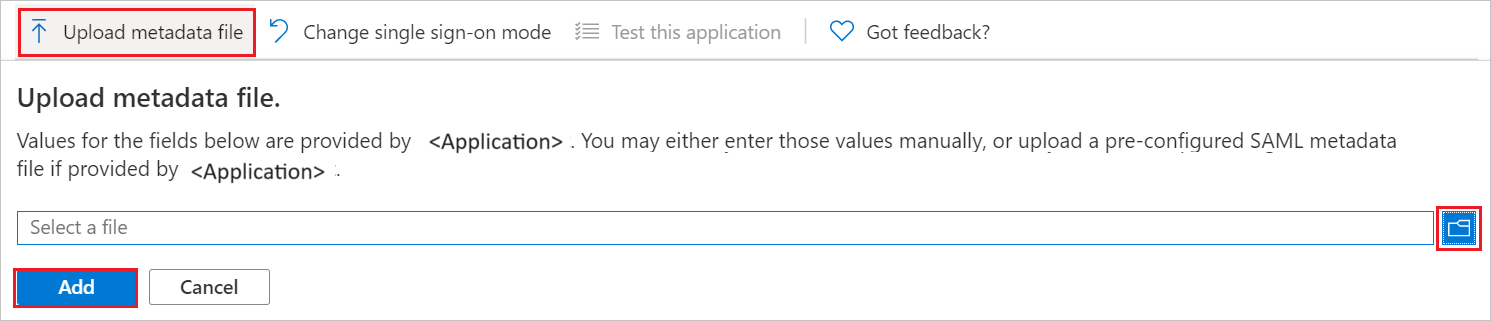
c. After the metadata file is successfully uploaded, the Identifier value gets auto populated in Basic SAML Configuration section.
d. In the Sign-on URL text box, type the Launch URL taken from the OpenLearning connection that you set. It would be in this pattern:
https://www.openlearning.com/saml-redirect/<institution_id>/<idp_name>/
Example:

Step 6
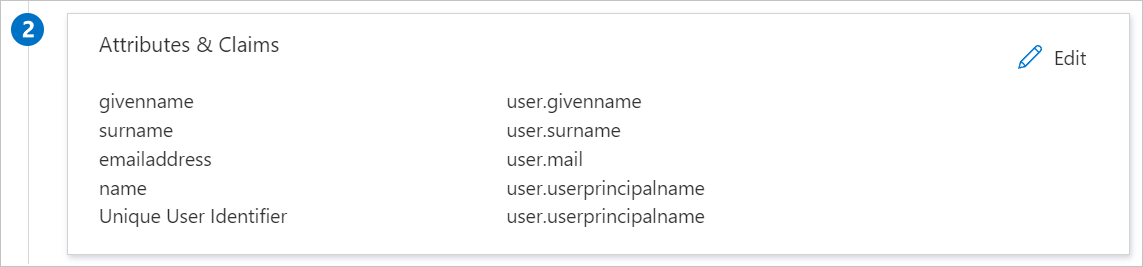
OpenLearning Identity Authentication application expects the SAML assertions in a specific format, which requires you to add custom attribute mappings to your SAML token attributes configuration. The following screenshot shows the list of default attributes.
In addition to above, OpenLearning Identity Authentication application expects few more attributes to be passed back in SAML response which are shown below. These attributes are also pre populated but you can review them as per your requirements.
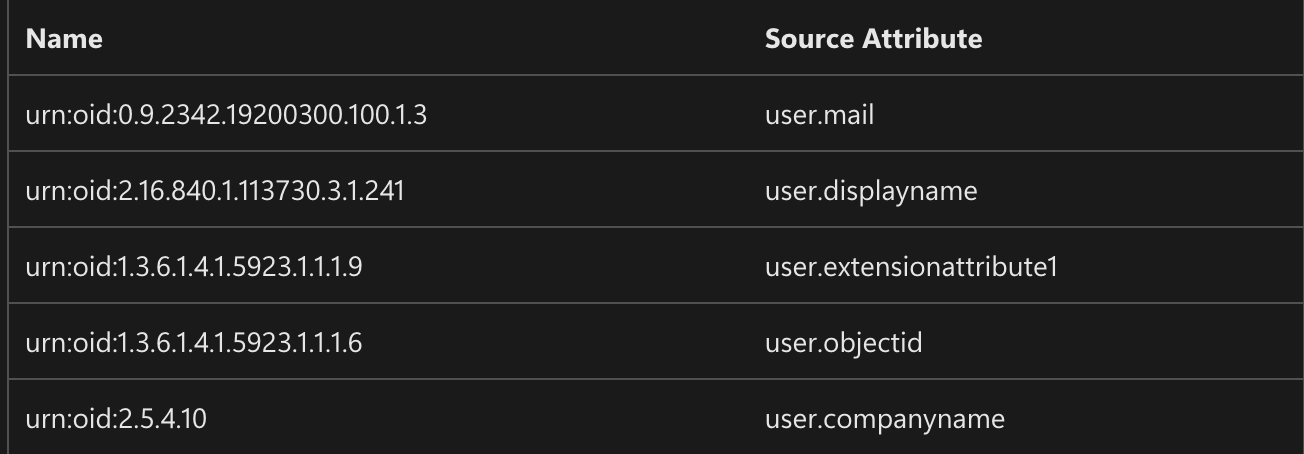
urn:oid:0.9.2342.19200300.100.1.3 |
user.mail |
urn:oid:2.16.840.1.113730.3.1.241 |
user.displayname |
urn:oid:1.3.6.1.4.1.5923.1.1.1.9 |
user.extensionattribute1 |
urn:oid:1.3.6.1.4.1.5923.1.1.1.6 |
user.objectid |
urn:oid:2.5.4.10 |
user.companyname |
Step 7
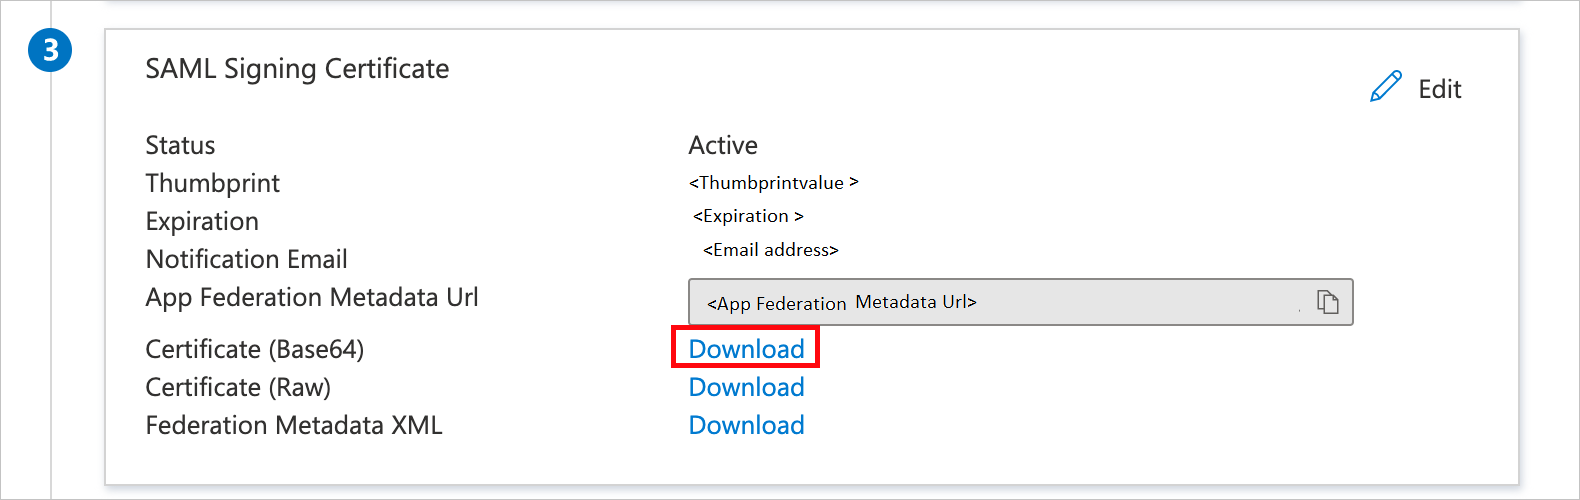
On the Set up single sign-on with SAML page, in the SAML Signing Certificate section, find Certificate (Base64) and select Download to download the certificate and save it on your computer.
Step 8
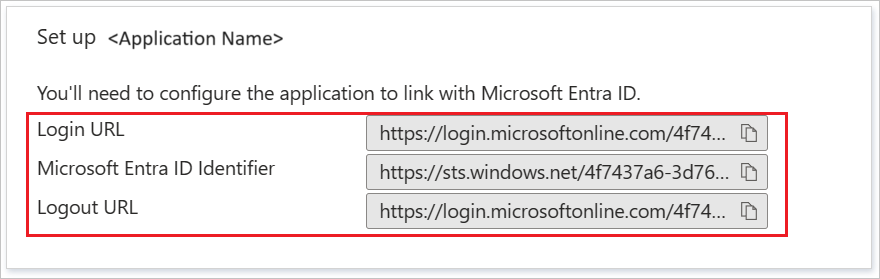
On the Set up OpenLearning section, copy the appropriate URL(s) based on your requirement.
Finalise MS SAML SSO setup in OpenLearning
Step 1
Head back into the OpenLearning Integration page and click on the Edit button for the SAML connection that you set.
Step 2
- In the Entity ID/Issuer URL (required) textbox, paste the Microsoft Entra Identifier value which you copied previously.
- In the Sign-In URL (required) textbox, paste the Login URL value which you copied previously.
- Open the downloaded Certificate (Base64) into Notepad and paste the content into the Certificate (required) textbox.

Step 3
Review the details and click Save.
Configure Microsoft Entra SAML token encryption
OpenLearning application expects to enable token encryption in order to make SSO work. To activate token encryption, follow the steps below.
Step 1
Browse to Entra ID > Enterprise apps > select the application OpenLearning > Token encryption.
Step 2
Download the OpenLearning-SAML.cer file that is attached to this article - download link
Note: please rename the extension from .txt to .cer for upload.
Step 3
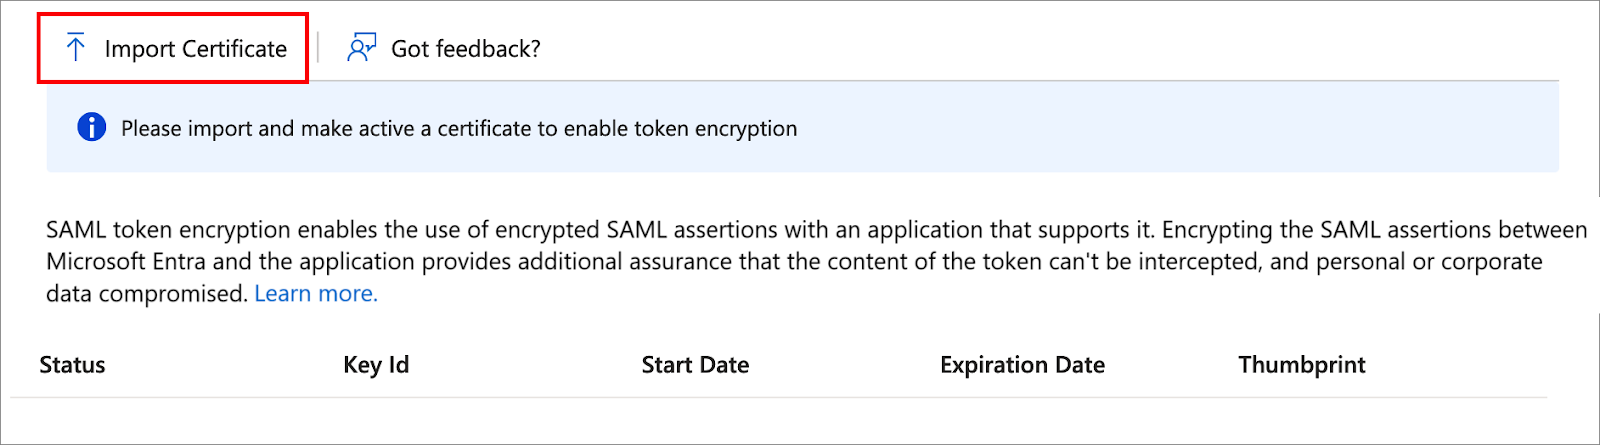
On the Token encryption page, select Import Certificate to import the .cer file that you downloaded that contains your public X.509 certificate.
Step 4
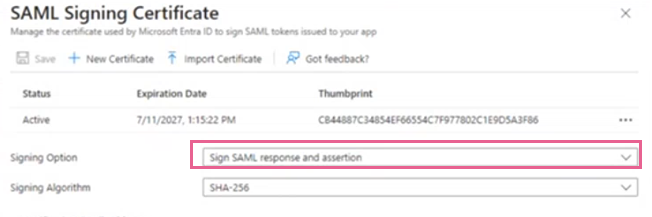
Once the certificate is imported, set the SAML Signing Certificate mode in MS Entra is set for both response and assertion.
Step 5
Select Activate token encryption from the options in the dropdown menu. Select Yes to confirm activation of the token encryption certificate.