
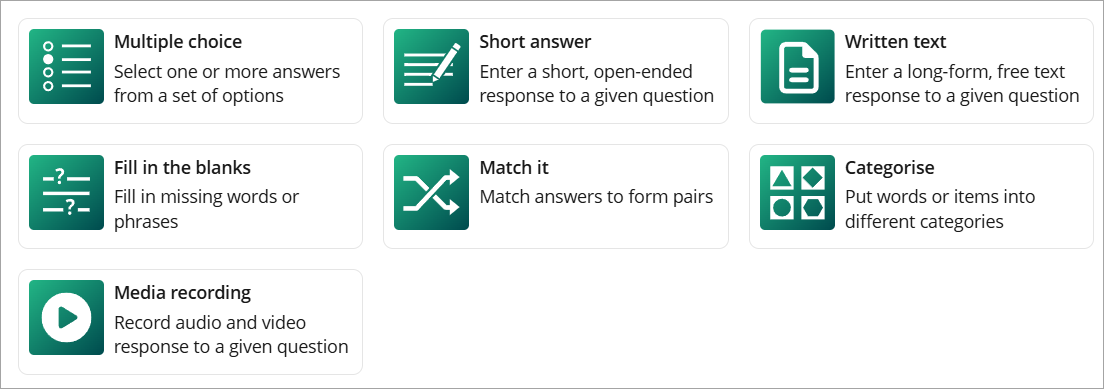
What is Exam on OpenLearning, and where can you create them?
What is an Exam on OpenLearning?
An exam on OpenLearning is a dedicated grade item within the Gradebook used for controlled assessments. It is a separate environment from regular course pages, designed specifically for assessments like midterms and final exams. Key features include:
- A separate exam environment
- A timer to set a time limit for completion.
- Integration with Question Banks for easy and secure question management.
How is this different to our quiz?
This feature is different from activities and quizzes created on a course page because it offers a more structured and secure environment, allowing Assessment Designers to manage attempts, randomise questions, and control access date and time.
Assessment tab in course sidebar
To create an exam, please make sure that you are able to see the Assessment tab in your course’s sidebar. The Assessment tab will appear to a Course Admin, Assessor and Assessment Designer.

Creating an exam from the Gradebook
Gradebook is the page where you add any grade item that you would like to be graded. For more information about the Gradebook, click here.
To create an exam:
Step 1
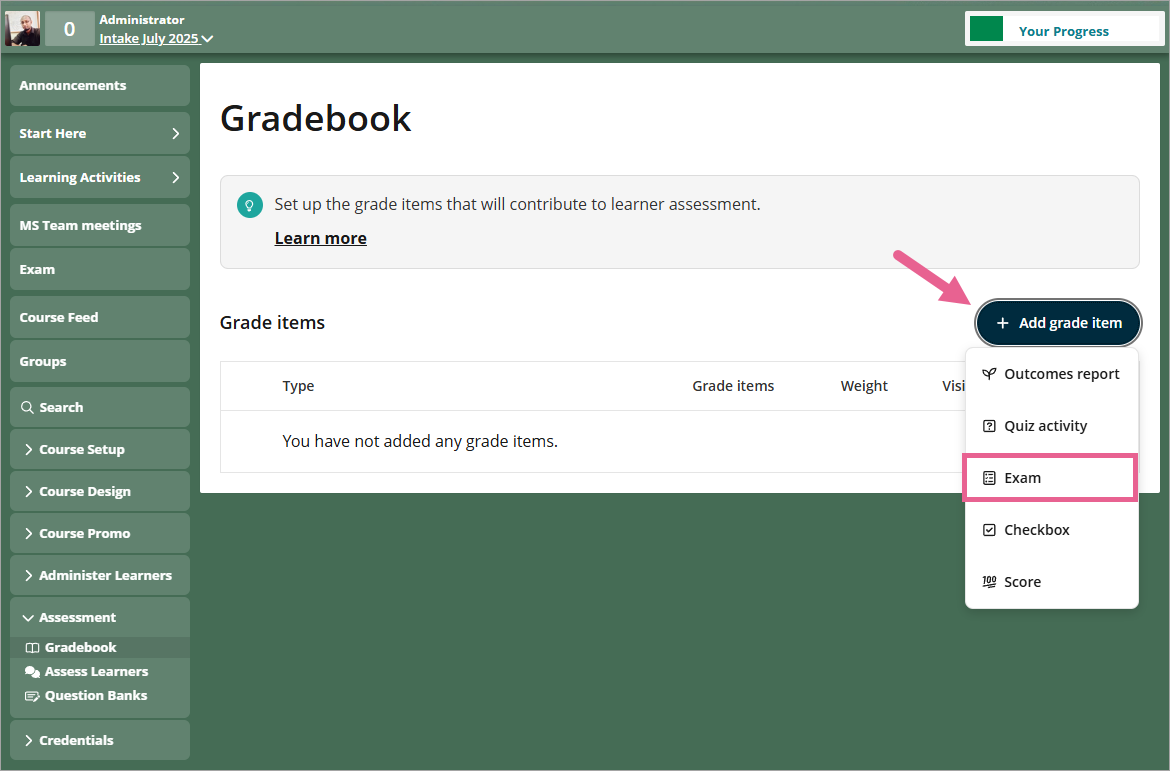
Go to Assessment>Gradebook
Step 2
Click the Add grade item button at the top of the table, then select Exam from the dropdown menu.
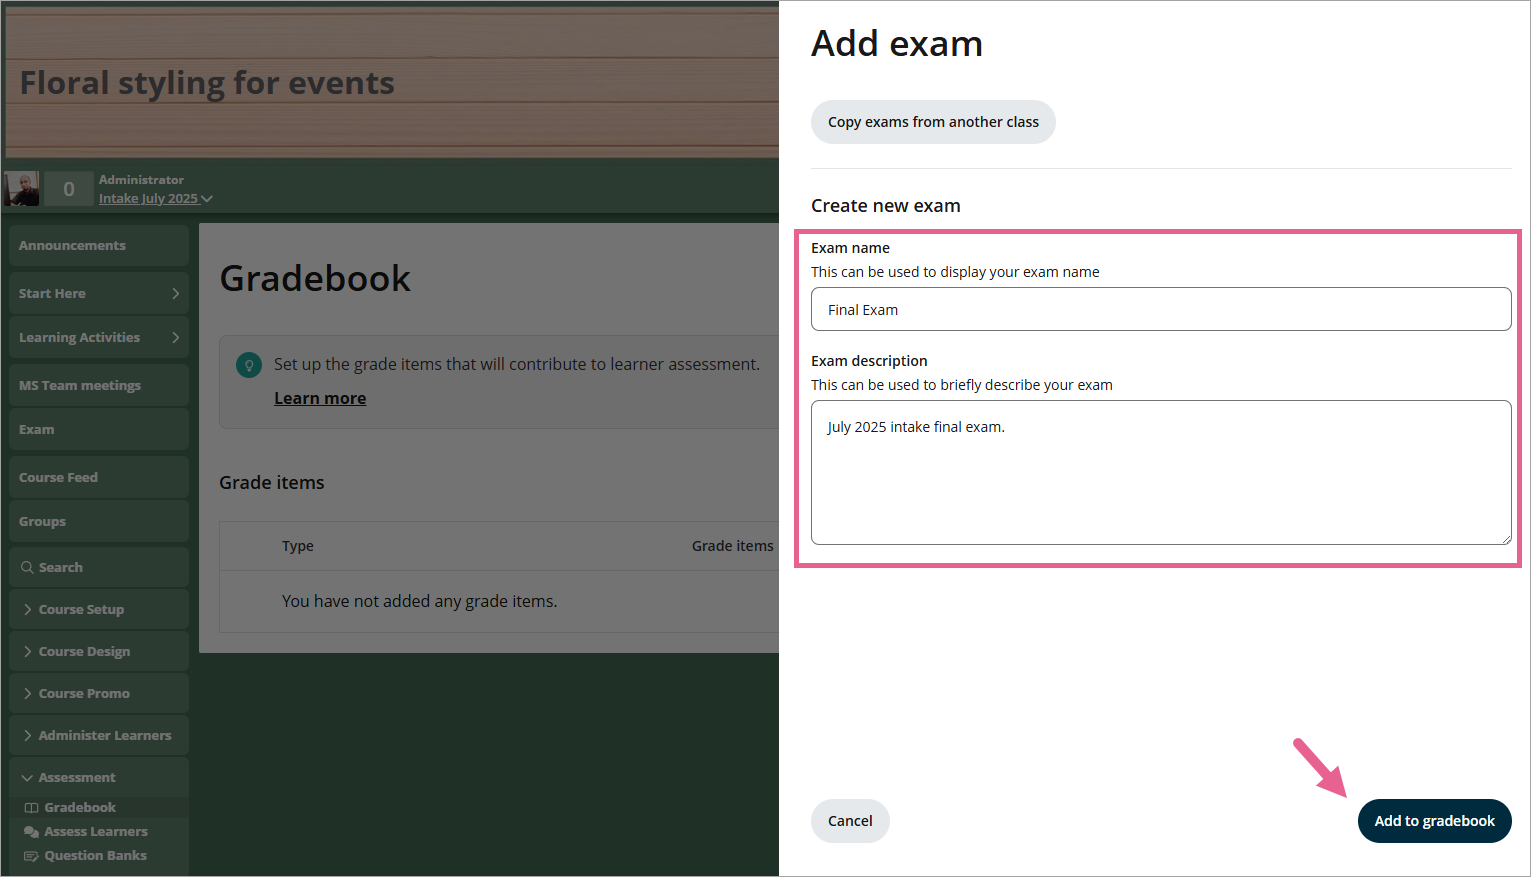
Step 3
Fill in your exam name and exam description and click Add to grade book.
Step 4
This will bring you to the main Gradebook dashboard. Here, you can configure:
1. Weight: Assign the weight for your grade item.
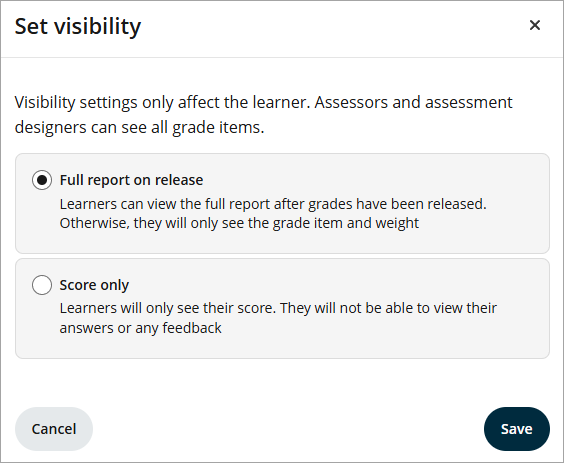
2. Visibility: Choose how results are shown to learners:
- Full report on release (default)
- Score only
3. Action: Click the three-dot menu to
- Set up: Edit exam grade item settings
- View exam: Preview the exam environment
- Delete: Remove the grade item

Edit your exam overview
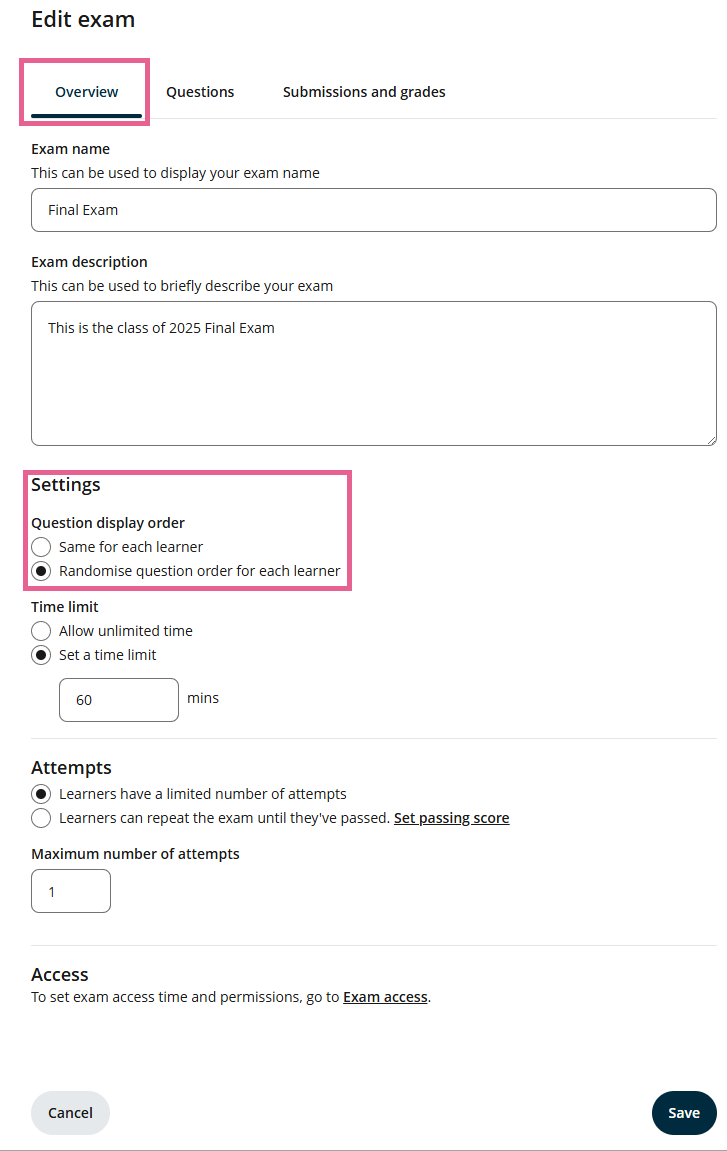
To continue setting up the exam, click the Set up button, where you can:
Change your exam name
Change your exam description
Select whether you’d like to randomise the order of questions in the exam
Set a time limit or unlimited time for your exam
Set a fixed number of attempts or enable unlimited attempts until a learner achieves a passing grade

Randomise the order of the questions of my exam to each learner
The Question display order feature changes the order of questions for each learner’s exam attempt. This helps minimise memorisation and sharing of answers between learners. In the Overview tab, under Question display order, choose:
- Same for each learner – All learners will see the questions in the same order, or
- Randomise question order for each learner – The order of questions will be different for each learner.
 Pro tip: You can combine this with Attempts and a Question Bank's randomisation to make each attempt unique. You can also shuffle the order of answer options within supported response types (e.g., multiple-choice), in addition to randomising question order and sets.
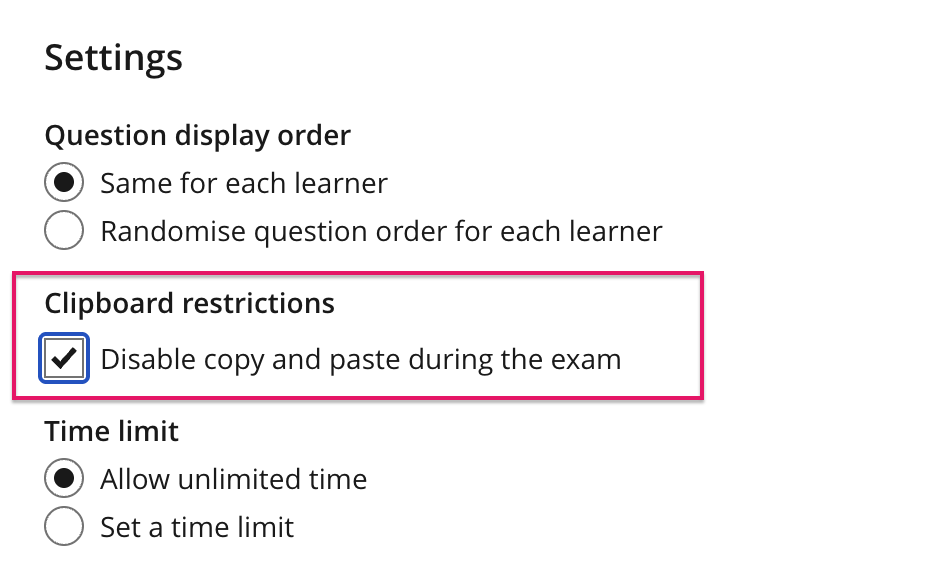
Clipboard restrictions
This option lets educators disable copy and paste actions during assessments. When enabled, learners won’t be able to copy or paste text using keyboard shortcuts, right-click menus, or browser options.
This feature helps discourage casual attempts to share or reuse exam content, giving educators greater confidence in the integrity of their assessments.
However, this restriction can be easily bypassed and may impair accessibility for users relying on assistive technologies. Consider whether the benefit outweighs the potential impact before you enable it. Read more on Disabling Copy-Paste in Exams
Adding a time limit to my exam
The Time limit feature controls how long a learner has to complete an exam attempt once they start. The countdown begins as soon as the learner clicks Start exam button. In the Overview tab, under Time limit, choose
- Allow unlimited time – Learners can access and work on the exam as long as they need within the access time window, or
- Set a time limit – Learners have a fixed countdown (e.g., 60 minutes) to complete the exam from the moment they click Start exam button.
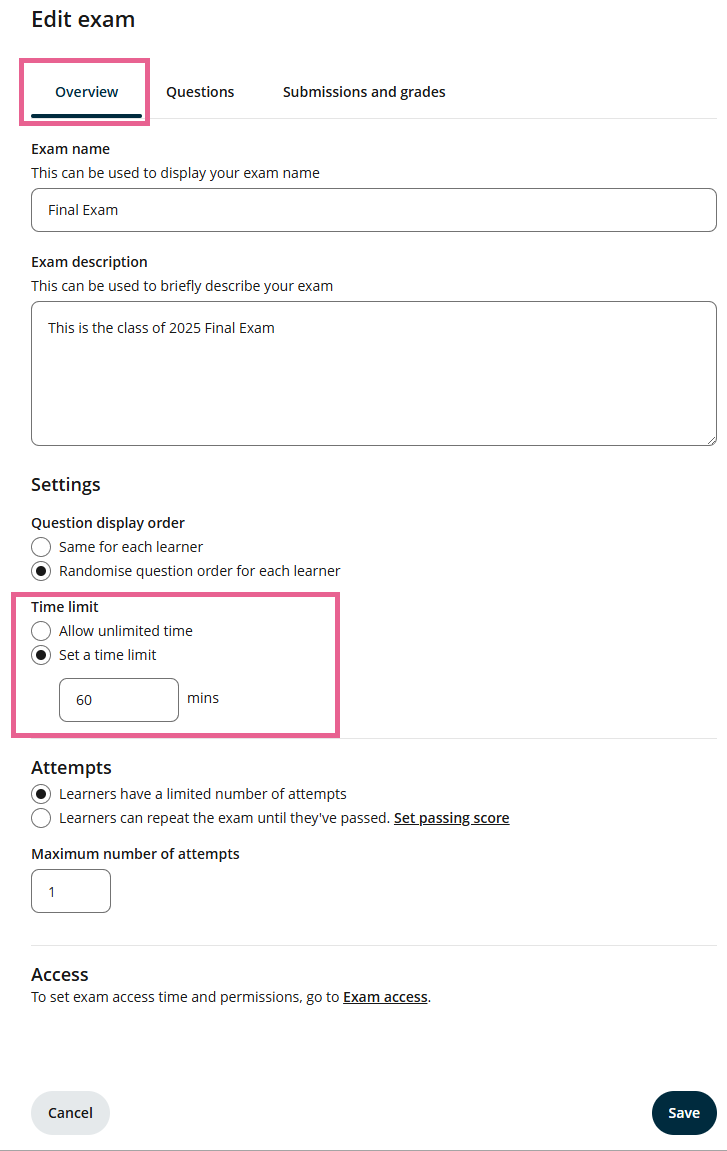
Note: The system will auto-submit the attempt when the time runs out or when the Access time window closes — whichever comes first.
Set the attempt limits for my exam
The Attempts feature allows learners to attempt an exam multiple times. In the Overview tab, under Attempts, choose:
- Learners have a limited number of attempts — Limited attempts and set the number. Default maximum number of attempts = 1 (same as current), or
- Learners can repeat the exam until they've passed — Repeat the exam until you pass. Set a passing score — either by percentage or exact score at the Submissions and grades tab
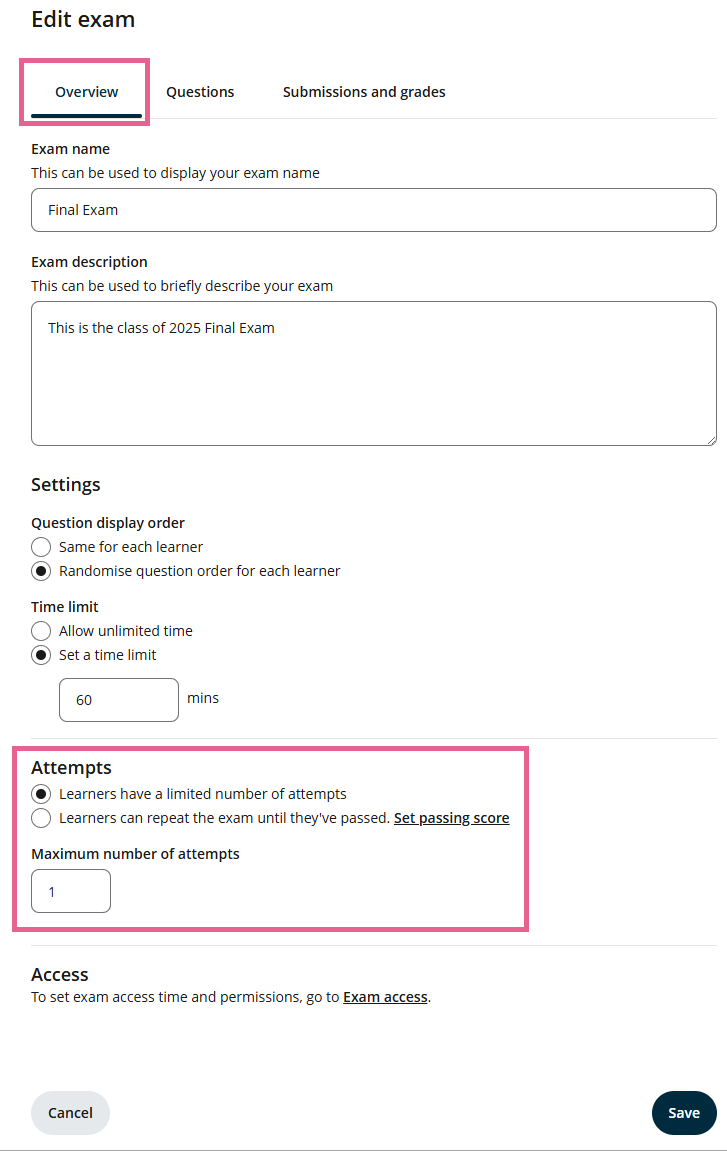
Note: Facilitators cannot manually reset an individual attempt. To give a learner another try, increase the total attempt count for the exam or duplicate the exam for specific users.
Currently, all existing OpenLearning exam response types are supported for multi-attempt exams.
Adding access time to my exam
The Exam access feature controls the window during which learners can start and complete the exam. This is different from the Time limit, which controls how long they have after starting. You can:
- Set the exam status (Live or inactive)
- Define a start date/time and end date/time for when the exam can be accessed.
- View and manage the list of learners who have permission to access the exam
- Combine with Time limit for stricter control.
To set the access time, go to Administer Learners> Exam access.

This will open a new page where you can configure the exam’s access. On this page, you can:
Toggle exam status
- Control whether the exam is currently live and accessible to eligible learners.

Click Edit button and you can:
Manage access permissions
- Every learner in this class – Allow all learners in the class to access the exam, or
- Specific learners only – View, add, or remove learners or groups who can access the exam
Set access time
- Anytime – The exam is available at all times (within the course availability period).
- During a specific time frame – Define the exact dates and times the exam should open and close. Learners will see the times in their own time zone.

Note: By default, every learner can access an exam at any time. Only learners on the access list can start the exam during the access window. Learners without access permissions will see this message:

Note: Difference between Exam access and Time limit
Exam access: the window during which learners can start and end the exam.
Example: 1 September, 10:00 AM MYT (GMT+8) – 7 September, 11:59 PM MYT
Learners will see these times automatically converted to their local timezone.
For example:
Cohort in Malaysia → 10:00 AM MYT start
Kelvin in Sydney → 1:00 PM AEST start (same moment, different timezone)
Time limit: the maximum time allowed to complete the exam once it has started.
Example: 60 minutes
If Kelvin in Sydney starts the exam on 2 September at 2:00 PM AEST, he will have until 3:00 PM AEST to finish.
If he starts on 7 September at 11:50 PM MYT (1:50 AM AEST on 8 September), he still has 60 minutes, but the system will auto-submit at the end of the access time — so he can only use the remaining 9 minutes before the Access time window closes.
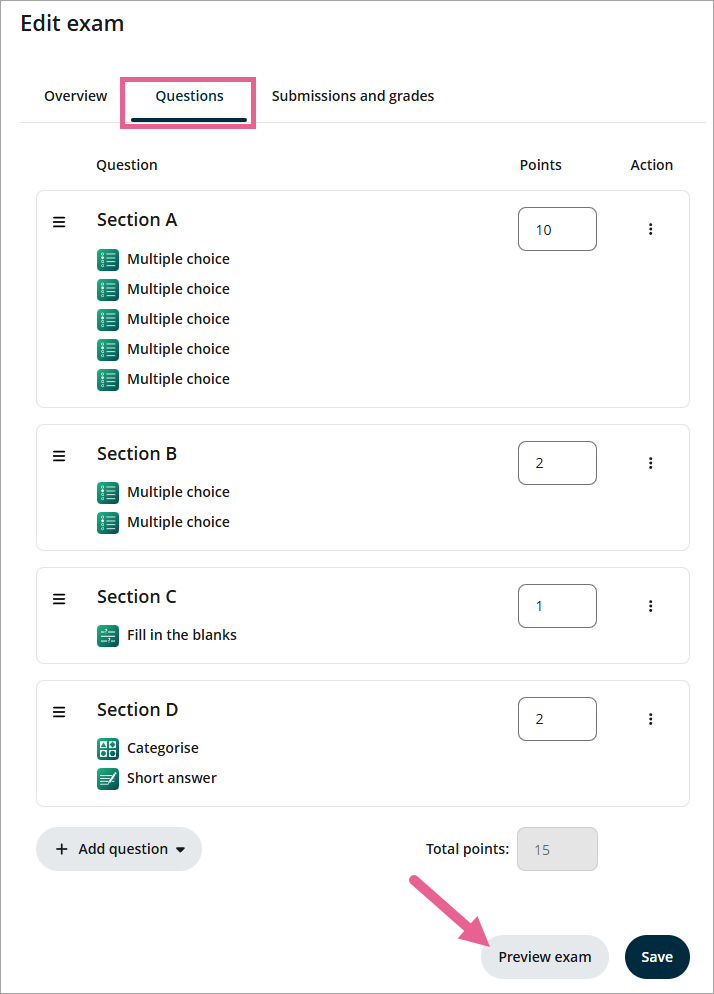
Add your exam questions
To add the questions in, click the “Questions” tab in the drawer. You will be given two choices:
To select manually which questions you would like to add from the question bank
To create a random question set from the question bank
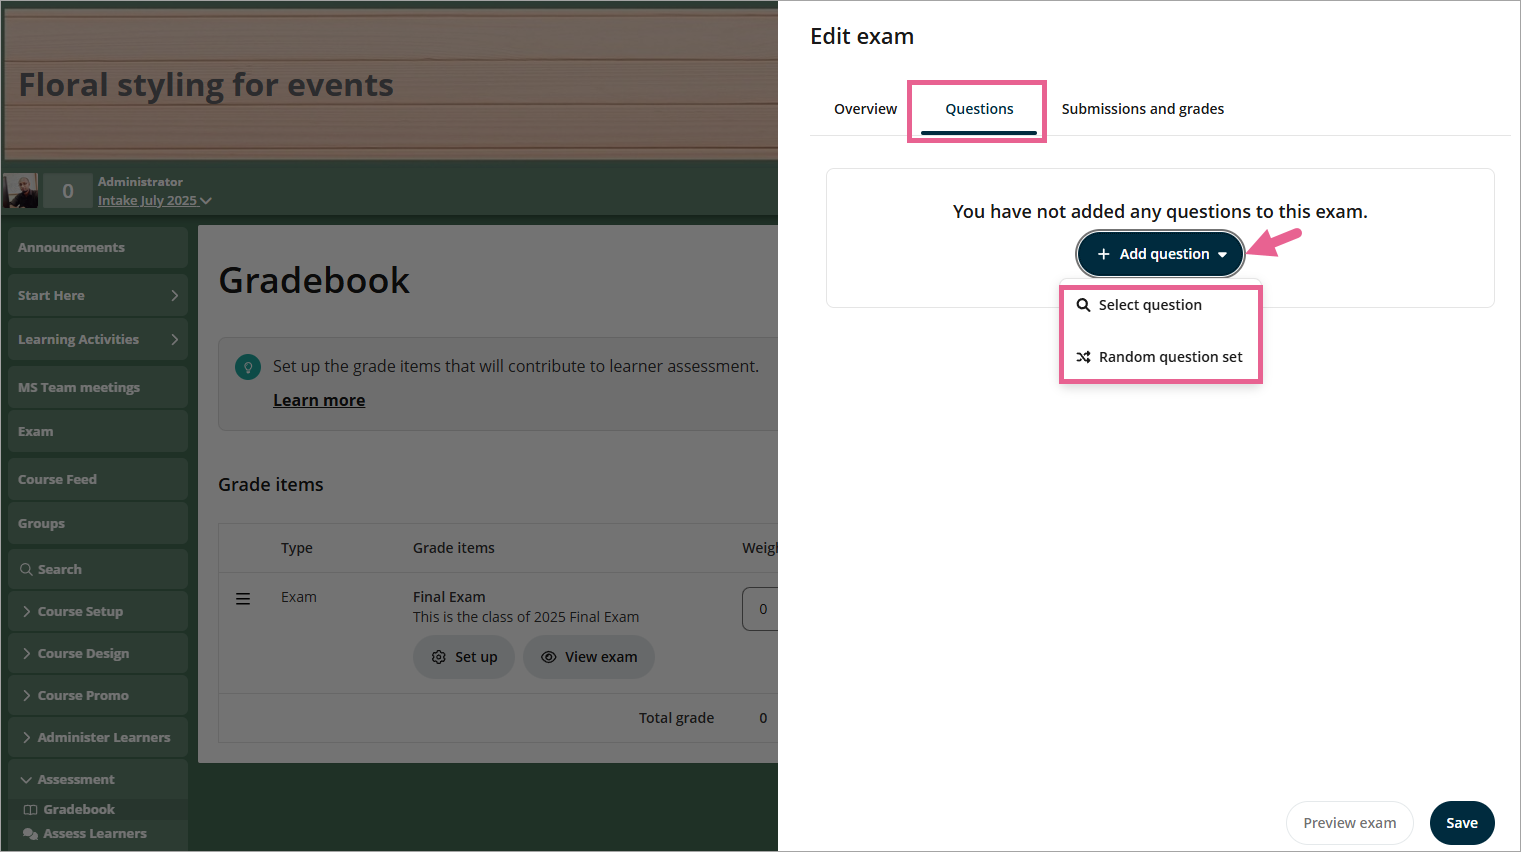
Note: The current Exam grade item don’t support direct question creation. To add questions, first create them in the Question Bank, then select them when building your Exam.
Selecting questions from the bank and adding them to the exam
1. To select manually which questions you would like to add to the exam, simply click Add questions.
2. A modal will open where you can select the question bank and the questions that you'd like to add. You can use the checkbox to add more than one question at one go.
3. To preview the question content, simply click the question name.
4. Once you are happy with your choices, click Continue.
5. It will close the modal and you will see the questions that you have added in the "Questions" tab.
6. Set points for each question type and click Save once you are done. You can also click Preview exam to see what the exam will look like in a real setting.

Create a random question and add them to the exam
If you choose to create a random question set for your exam, simply click the “Random question set” option. This tool is especially handy if you have a question bank with a lot of questions, and you’d like to create exams that pulls questions easily from that bank. Instead of all students receiving the exact same set of questions, the system draws different questions randomly for each individual or group of students, ensuring that each test or quiz is unique. In the modal, you will need to fill in:
The number of questions
Points per questions
From which question bank
Which question type
In the example below, I chose to create a random question set of four questions taken from my own question bank. Each question will have 2 points.

What happens if I have insufficient questions in my bank when I’m trying to set up my random question set?
You can still create a random question set even if your question bank has insufficient questions. This allows educators to set up their exams first and build their question banks later. However, an exam with a random question set that lacks sufficient questions cannot run in the exam runner.
To ensure educators complete their exam configuration, four labels will appear, indicating that the exam has insufficient questions and requires attention.
Label 1: “This is less than the number of questions you specified”

Label 2: “There are not enough questions to populate this question set”

Label 3 LEARNERS ONLY - In the block page, it will say, "exam is still under construction". The Start exam button will be disabled.

Label 3.1 EDUCATORS/COURSE ADMIN ONLY - In the block page, it will say that there are some issues with the exam setup and they need to resolve it.

Assign points to the questions that I have added
After adding the questions into the exam, you can assign points to the questions.
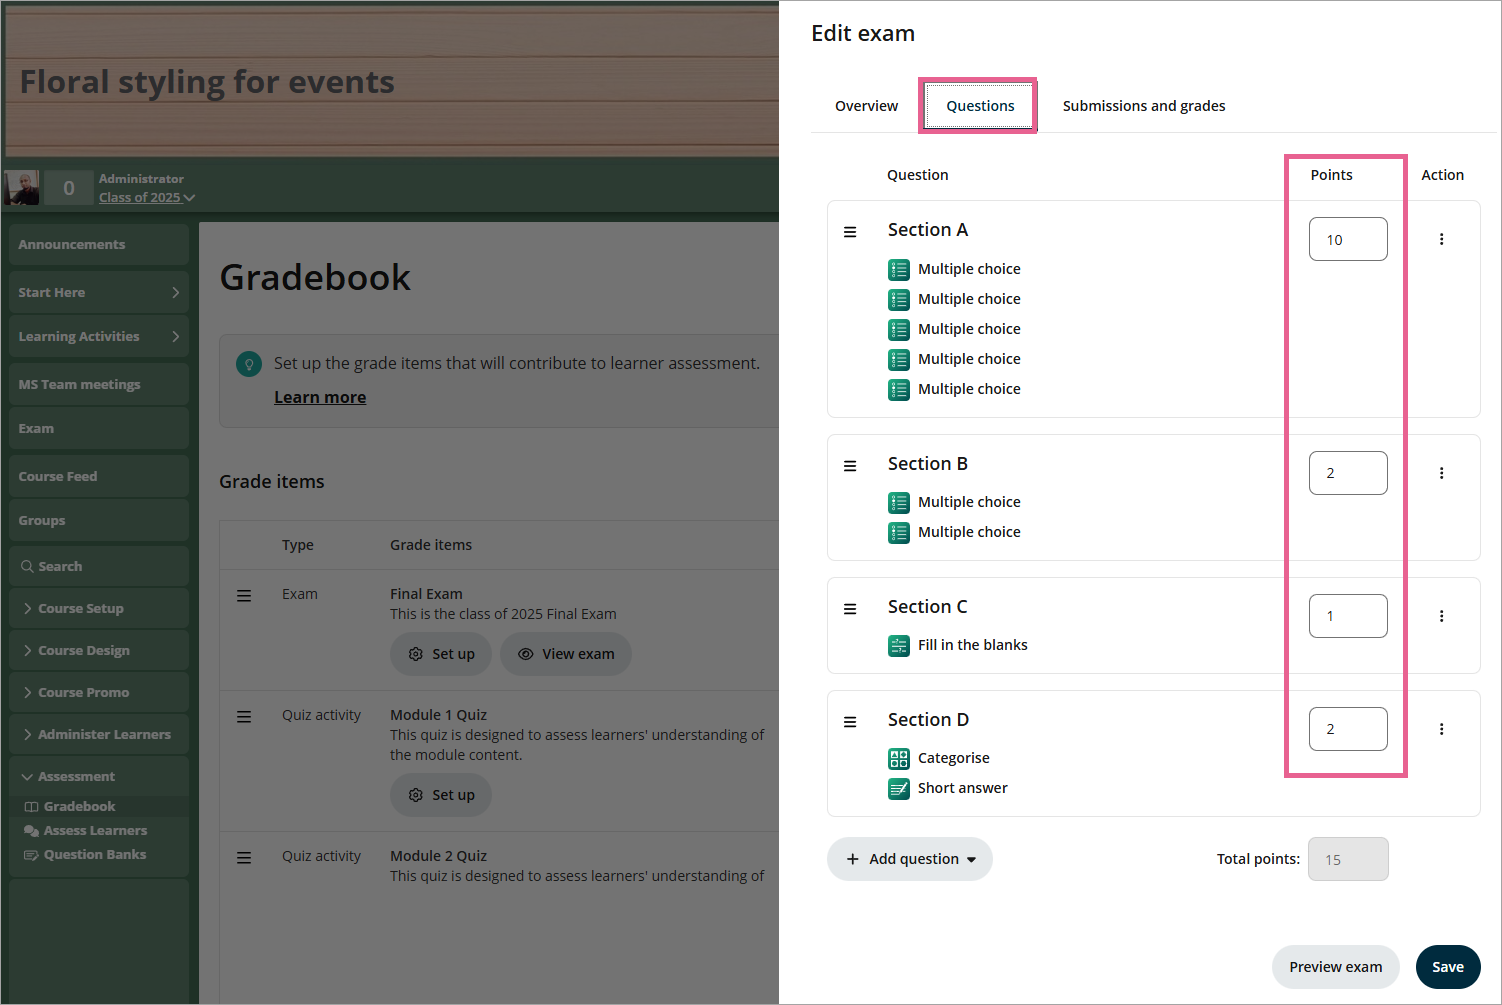
How are question points used in exams?
The points (or weights) stored at the question level determine how much each part of a question contributes to the learner’s score in the exam. This is especially important in multi-part questions.
In this example, the question consists of two response widgets — each worth 1 point in the Question Bank — so the total points of this question is 2.

When this question is added to an exam, it will have a default score of 2.
If the learner only answers one part correctly (e.g. the Categorise response) but not the other (e.g. Short Answer), they earn 1 out of 2 points for that question.
If this question is worth 10 marks in the exam, the learner’s score will be: (1 ÷ 2) × 10 = 5 marks
Understanding Question Bank and Exam points
Each question in the Question Bank has a point, and this point determines how much that question contributes to the exam grade item.
Even if you set points on the Exam page, the system still looks at the Question Bank point when calculating results.
If the Questions Bank is set to 0, that question contributes no marks — even if answered correctly.
To ensure scores are calculated correctly:
- Keep each question’s point greater than 0 (for example, 1).
- You can still use higher points (e.g. 2 or 3) for questions that should carry more marks.
Example: Multi-part question scaling
In this example, the exam includes three questions. Question 1 (Q1) contains two sub-parts (Q1.a and Q1.b).
| Question | Question Bank point | Exam point | Correct? | Weighted score |
| Q1.a | 3 | 1 | ✅ | (3 / 4) * 1 = 0.75 |
| Q1.b | 1 | Same as above | ❌ | (0 / 4) * 1 = 0 |
| Q2 | 2 | 1 | ✅ | (2 / 2) * 1 = 1 |
| Q3 | 0 | 1 | ✅ | (0 / 0) * 1 = 0 |
| Total | 3 | 1.75 out of 3 weighted marks |
If the exam is worth 100 points total, the learner will get (1.75 ÷ 3) × 100 = 58.33 points.
Please note that in the example above, Q1.a and Q1.b are sub-questions under Q1, which has a total question bank point of 1 and the exam point of 1.
If the learner answers Q1.a correctly, they will receive 0.75 points. If Q1.b is answered correctly, they will receive 0.25 points. If both Q1.a and Q1.b are answered correctly, the learner will receive the full 1 point for Q1 in the exam.
If all points were 0, the learner would get 0/100, even with correct answers.
Protip: Before adding questions to your exam, double-check that each question in your Question Bank has points set above 0.
Note on Scaling: The points you set here are "Weights." The platform will automatically scale your total Exam score to match the Grade Item Weight in your Gradebook. To learn how to align your Question Bank points with these Exam weights, see this article.
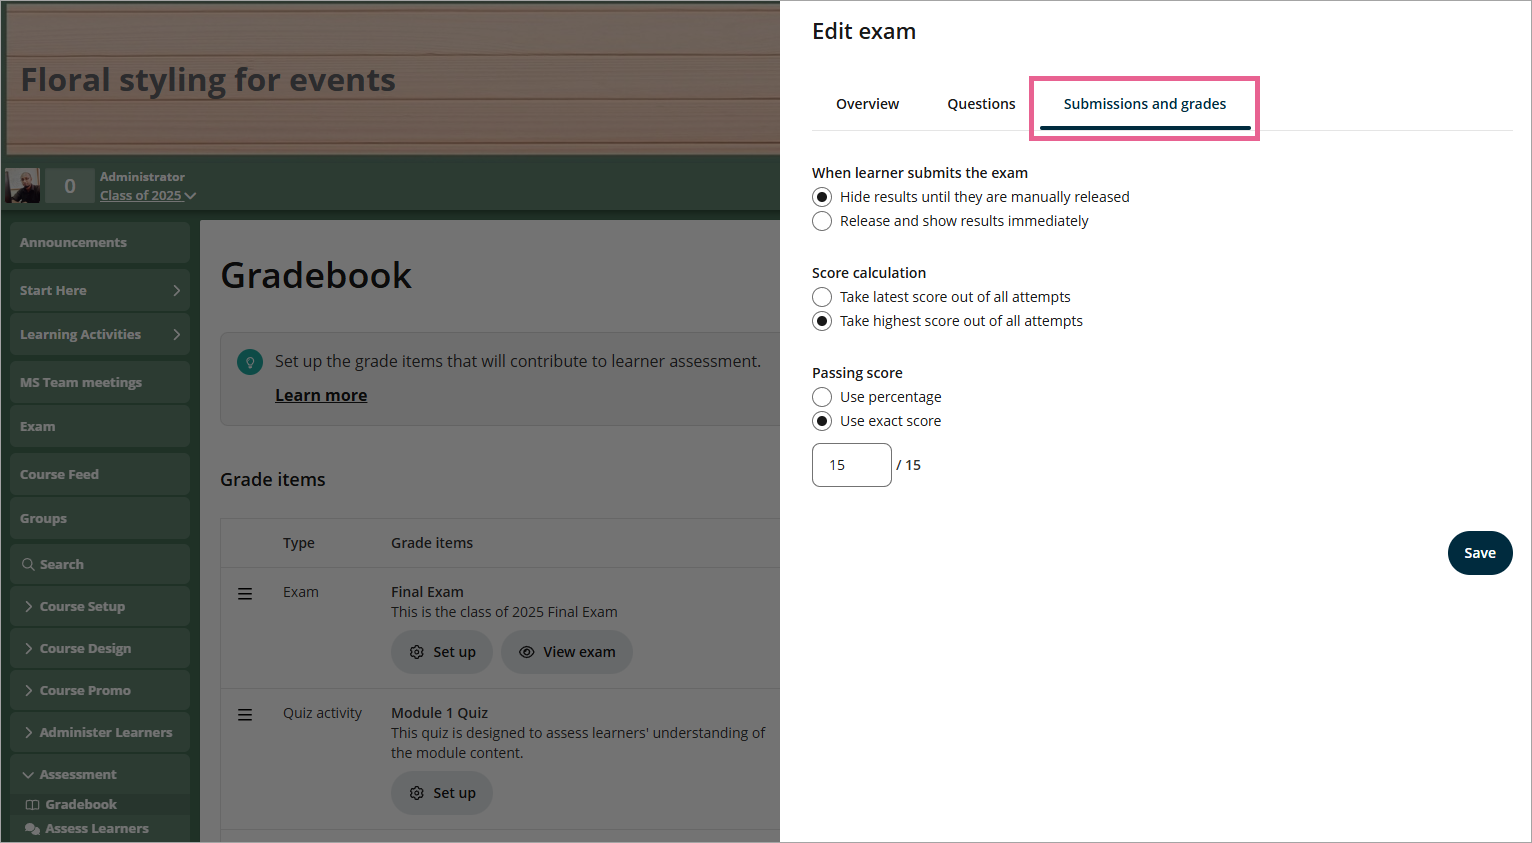
Setting submissions and grades
The Submissions and grades tab allows you to control how results are released, how scores are calculated, and what constitutes a passing score. Options include:
1. When learner submits the exam
- Hide results until they are manually released – Review submissions before releasing scores. This is also the default option.
- Release and show results immediately – Results are shown as soon as the learner submits the exam.
2. Score calculation
- Take latest score out of all attempts – Only the most recent attempt is counted
- Take highest score out of all attempts – The highest score across all attempts is counted
3. Passing score
- Use percentage – Enter a passing percentage (e.g., 80%).
- Use exact score – Enter a specific score learners must achieve to pass.
Pro tip: In Submissions and Grades, you can decide whether to count the highest score or the last attempt for grading. If learners are allowed to repeat the exam until they pass, you can also set a passing score using either:
Percentage (default: 100%)
Exact score (default: maximum score
For multi-attempt exams, you can control whether learners see only their score (without detailed feedback), the full report immediately, or results only after manual release. This behaviour depends on the visibility settings you choose for the exam grade item here.
Previewing an exam that I just created
Click Preview exam (after saving) to see the learner’s view.

Copy an exam from another class
If you have created an exam for one class (e.g., Class of 2023) and want to use the same exam in a different class, you can simplify the process by using the Copy exams from another class option.

How do I run an exam on OpenLearning?
1 reply
-
Thank you for sharing.