
How to set up automated grading via code execution
By integrating the Code Execution service into your course, you can transform a standard post widget into a powerful, automated grading tool. This allows your learners to submit programming code (like .py or .c files) and receive automated, background-processed results based on your specific configuration.
- Iterative Learning: :Learners can write, compile, and run their code directly within the platform. Depending on the widget's settings, they can be encouraged to resubmit and test their logic as many times as they need until they reach the correct result, or you can limit the number of attempts.
- Automated Testing: You can upload a configuration file to define exactly how the code is executed and how the automated feedback is triggered. This allows you to set specific parameters for success, giving learners instant validation of their work.
This process involves two main steps: configuring the widget to accept the right files and linking it to the execution engine.
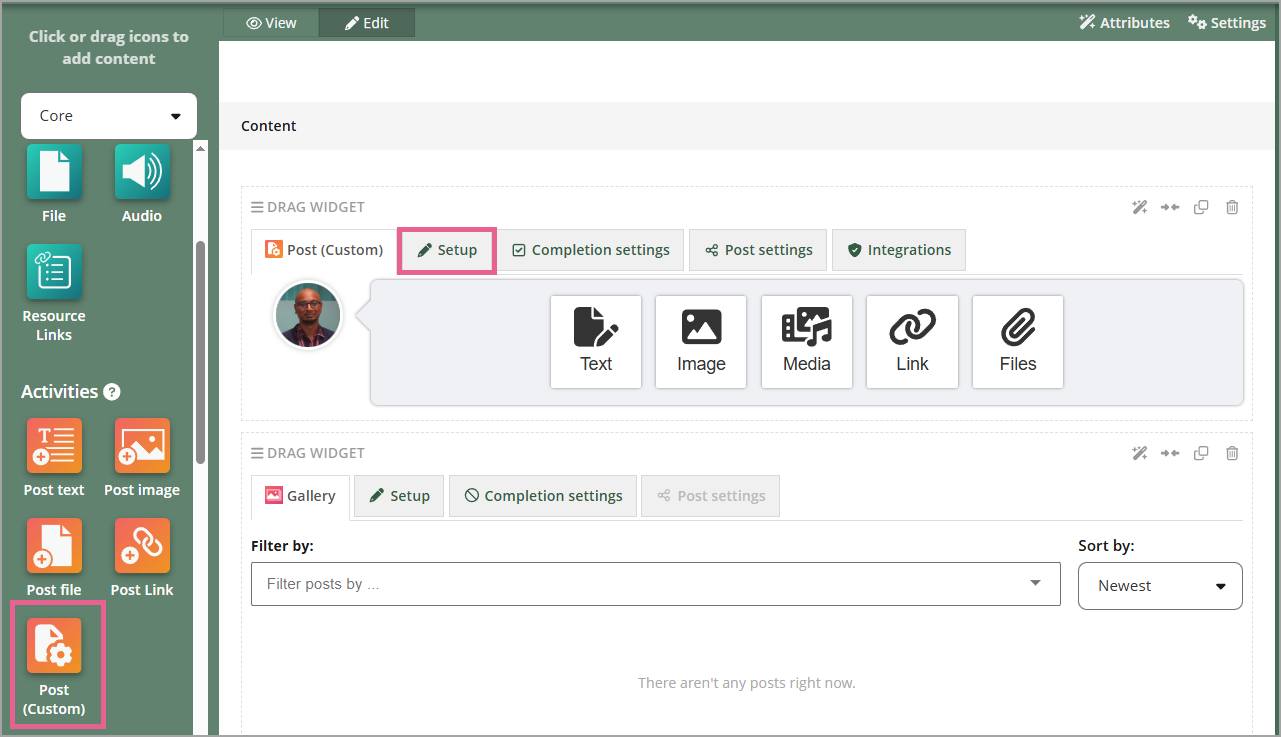
Part 1: Configure the Post (custom) widget
Step 1
Go to your course page and add a Post (custom) widget.
Step 2
Go to the Setup tab.
Step 3
Uncheck all options under the submission settings except for Files.
Step 4
Under the file upload options, select Restrict upload file types to match the specific files required for your activity.
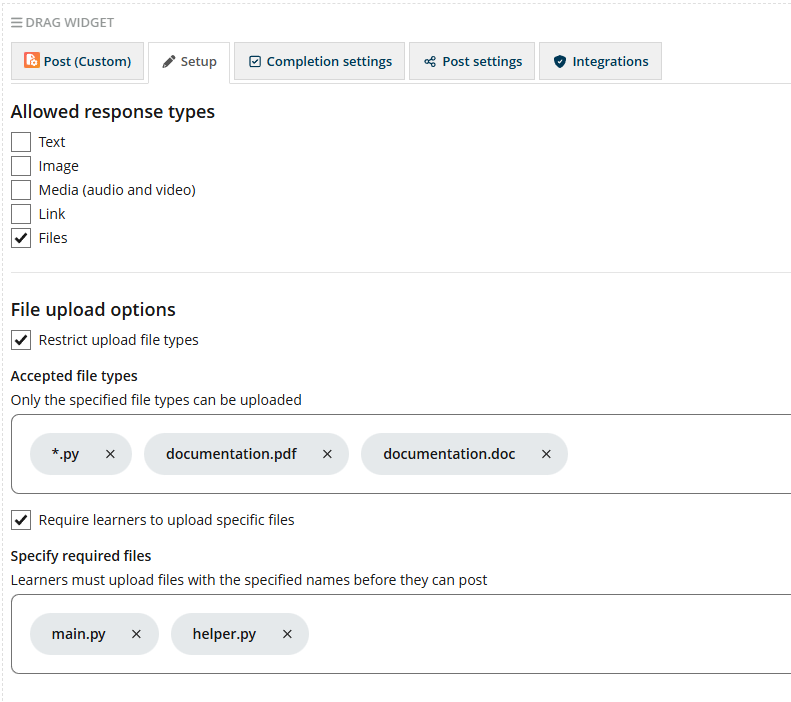
In this example the learner
- MAY upload the following files:
- any
*.pyfile- a file called
documentation.pdf, or- a file called
documentation.doc- MUST upload the following files:
- a file called
main.py, and- a file called
helper.py
Note: non-code files such as pdf or doc files will be ignored by the code execution service.
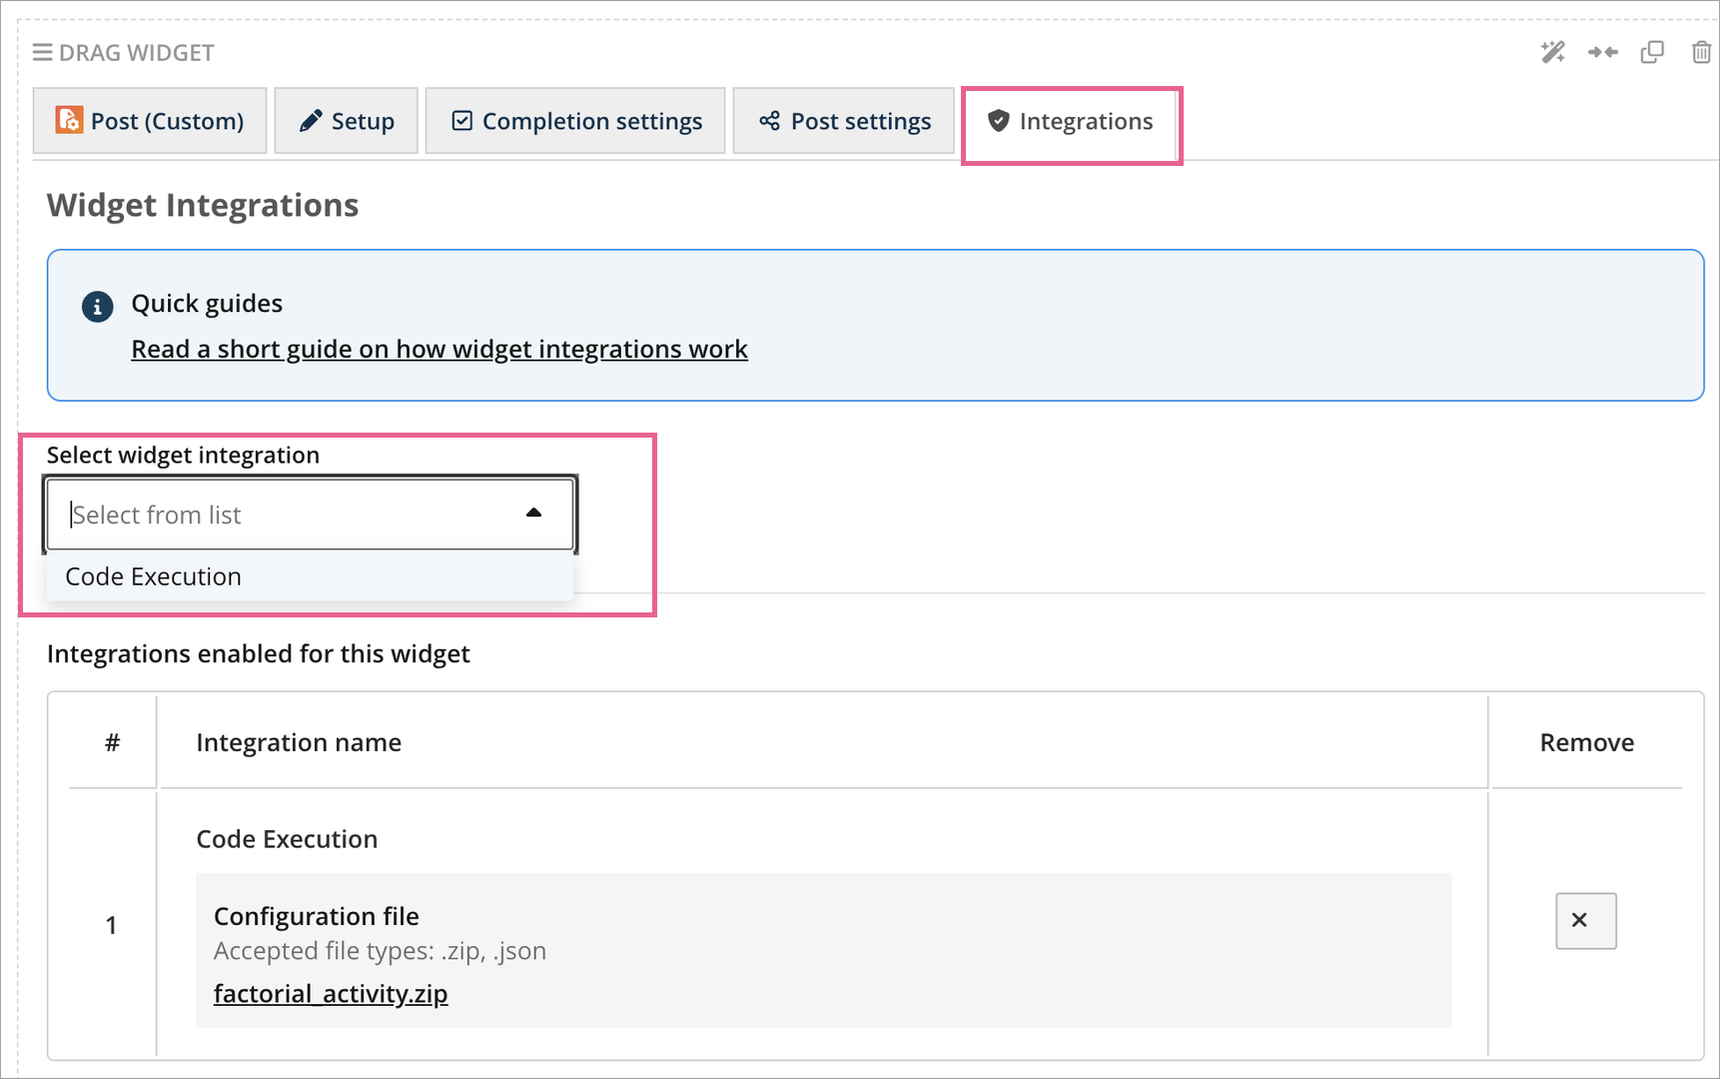
Part 2: Connect to the code execution service
Step 1
Switch to the Integrations tab within the widget settings.
Step 2
Under the Select widget integration section, choose Code Execution.
Step 3
Under the Configuration upload section, select your specific .zip or .json configuration file (see the appendix below).
Step 4
Click Upload.
Step 5
Click Add integration
Note: The current version does not support direct file overwrites. If you need to update the configuration file later, you must delete the integration from the list and re-add it with the new file.
Testing & verification
Submit a Test: Acting as a learner, upload a code file and submit the post.
Verify Execution: Reload the page (execution happens in the background and may take a few seconds).
Check Results: Ensure the post updates with the expected output, status, or scoring.
Supported languages
Our platform is powered by the Judge0 CE Extra API, which offers one of the most robust environments available. We currently support over 70+ languages and variations, including:
- Core & Systems: C/C++ (with Google Test), Java (with JUnit), C# (with NUnit), Rust, Go, and Swift.
- Data Science & AI: Python for ML (pre-loaded with NumPy, Pandas, and Scikit-learn).
- Parallel Computing: MPI support for C, C++, and Python.
- Web & Logic: Node.js, TypeScript, PHP, Ruby, and SQL (SQLite).
- Legacy & Specialized: Fortran, COBOL, Haskell, and Assembly.
Appendix: Activity configuration
To learn how to create the required .zip or .json configuration files for your specific coding activities, please refer to the documentation here: https://code-execution.openlearning.com/