LTI 1.3 - Single Sign on from Canvas
Canvas LTI 1.3 SSO launch to OpenLearning
LTI SSO (Learning Tools Interoperability Single Sign-On) is a secure way to log in to the OpenLearning platform. With LTI SSO, you only need to remember one set of login credentials, and you can use those same credentials to log in to multiple platforms.
Please note that LTI 1.3 SSO requires configuration on both sides (the OpenLearning platform and the external system that you are connecting it to). In this article, we will share the steps for setting up the connection between OpenLearning and Canvas Instructure.
Pre-requisite
- Admin access to your institution portal in OpenLearning.
- Admin access to Canvas Instructure
Initial steps to set up the LTI 1.3 SSO connection in OpenLearning
Step 1
Log in to OpenLearning and navigate to your Institution Settings > Integrations.

Step 2
Navigate to Manage Single Sign-on (SSO) connections.
Select LTI 1.3 from the drop down menu and click Add new SSO connection

Step 3
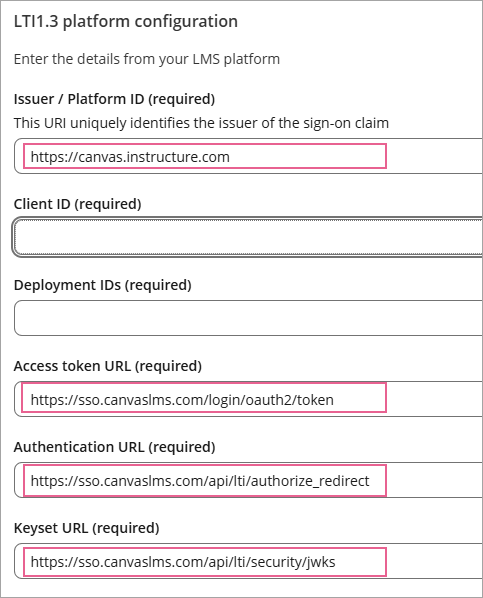
- Connection name: Choose a name for this SSO connection, e.g. "Canvas SSO"
- Issuer / Platform ID:
https://canvas.instructure.com - Client ID: To be filled later[1]
- Deployment IDs: To be filled later[2]
- Access token URL:
https://sso.canvaslms.com/login/oauth2/token - Authentication URL:
https://sso.canvaslms.com/api/lti/authorize_redirect - Keyset URL:
https://sso.canvaslms.com/api/lti/security/jwks
Note: Please ensure there is no trailing / on the platform ID. for example;
https://canvas.instructure.com not https://canvas.instructure.com/
This panel also displays Configuration information:
- Target Link URI
- Open ID Connect Initiation URL
- JWK URL
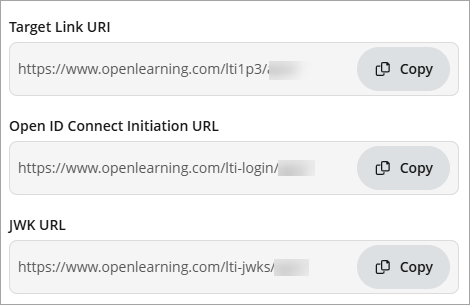
These will be copied into the Canvas LTI Developer Key setup in the next section of this article.
Setting up the LTI 1.3 SSO connection in Canvas
Step 1
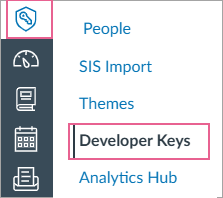
You'll need to add a Developer key for each of the LTI connection in Canvas. To do so, go to Admin > Your Organisation > Developer Keys
Step 2
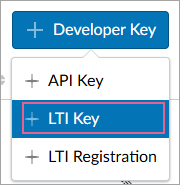
Click on the Developer Key and select LTI Key.
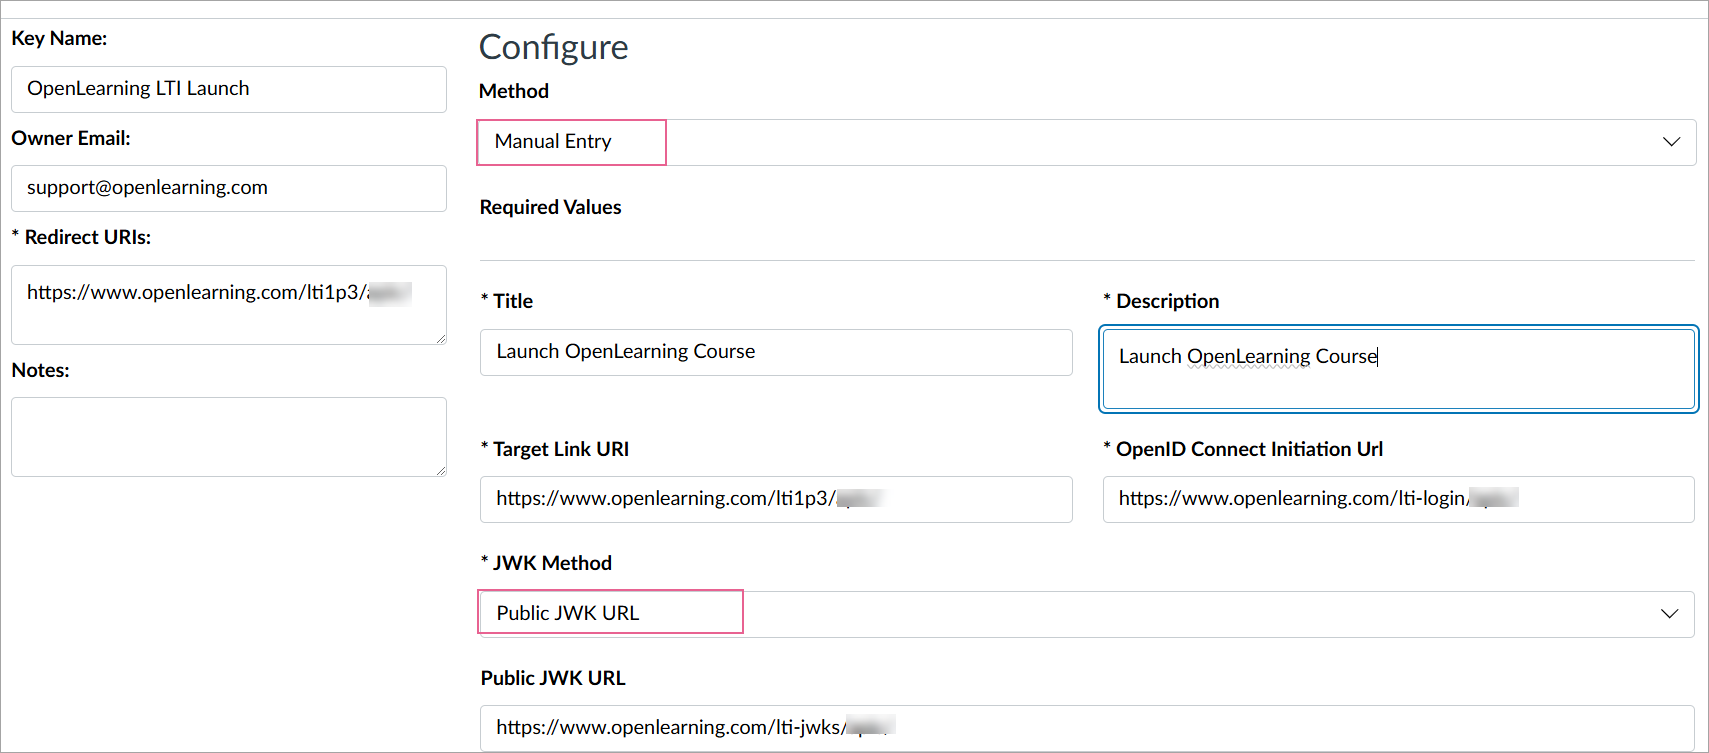
Using the OpenLearning Configuration information previously mentioned and, fill out the form as follows:
- Key Name: Enter any name that is relevant, i.e OpenLearning LTI Launch
- Redirect URIs: The "Target Link URI" from the Configuration information can be used.
- Method: Manual Entry
- Title: Launch OpenLearning Course
- This is the title that will appear throughout Canvas, and can be customised, the above value will be used in the rest of this document as an example.
- Description: Your own description, e.g. "Launch OpenLearning Course"
- Target Link URI: Copy this from the OpenLearning Configuration information
- OpenID Connect Initiation Url: Copy this from the OpenLearning Configuration information
- JWK Method: Public JWK URL
- Public JWK URL: Copy this from the JWK URL in the OpenLearning Configuration information
Step 3
Scroll down and fill in these details;
- Additional Settings > Domain:
openlearning.com 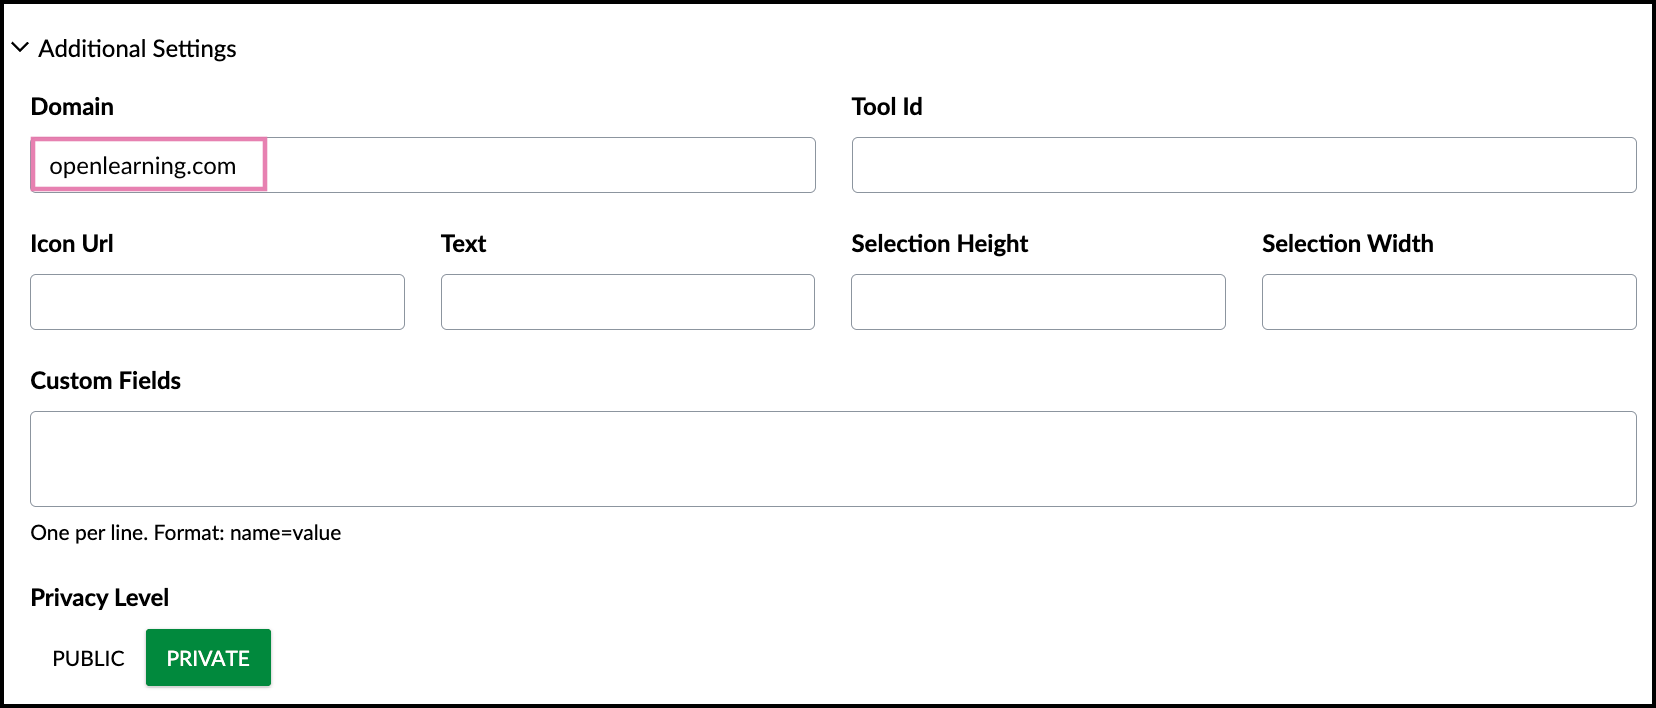
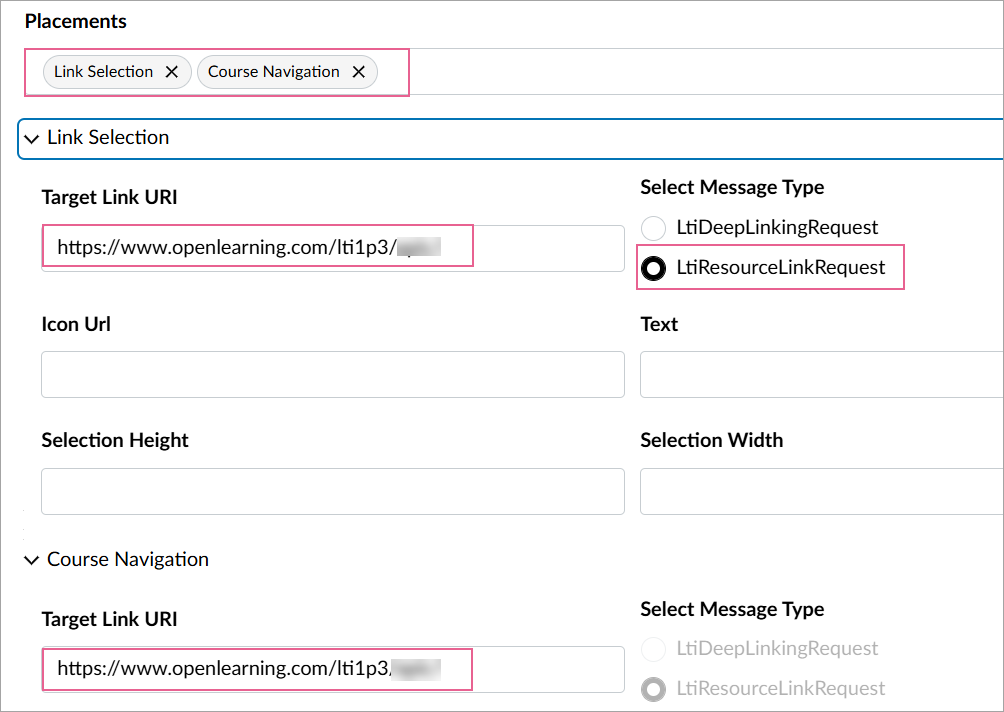
- Placements: You can add Link Selection or Course Navigation (or both). Link Selection will enable launching OpenLearning from within course module content. Course Navigation will enable placing a launch link in the course navigation menu.
- Link Selection:
- Target Link URI: Same as Target Link URI set above
- Select LtiResourceLinkRequest
- Course Navigation:
- Target Link URI: Same as Target Link URI set above
- Link Selection:
Scroll down and click Save.
Step 4
OpenLearning requires opening in a new window. To ensure Link and Course Navigation launch opens in a new window, you will need to add the field below. Click on the pencil icon to access the settings page again.
Next;
- Select: Method: Paste JSON
- Scroll down the LTI 1.3 Configuration to: "extensions", "settings", "placements" and find the "course_navigation" placement object.
- Add the field "windowTarget": "_blank",
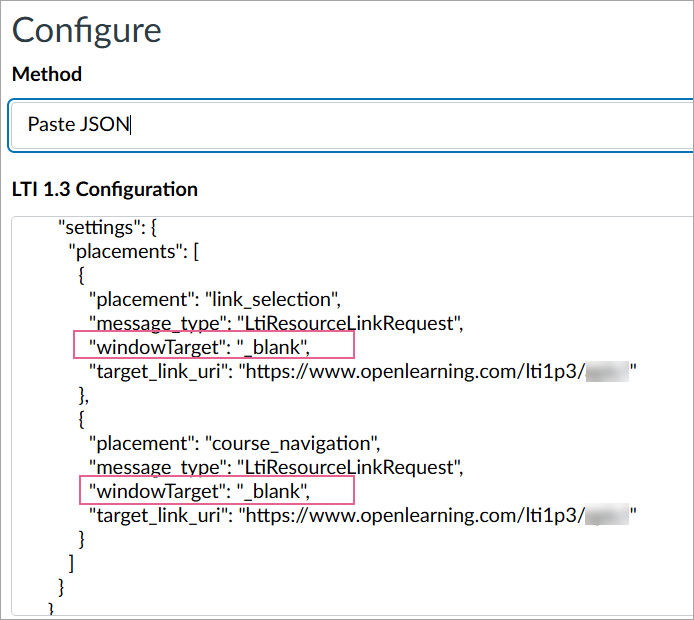
Example:
{
  ...
  "extensions": [
    {
      ...
      "settings": {
        ...
        "placements": [
          ...
          {
            "placement": "course_navigation",
            "message_type": "LtiResourceLinkRequest",
            "windowTarget": "_blank",
            "target_link_uri": "https://www.openlearning.com/lti1p3/myInstitution/"
          }
    ...
Step 5
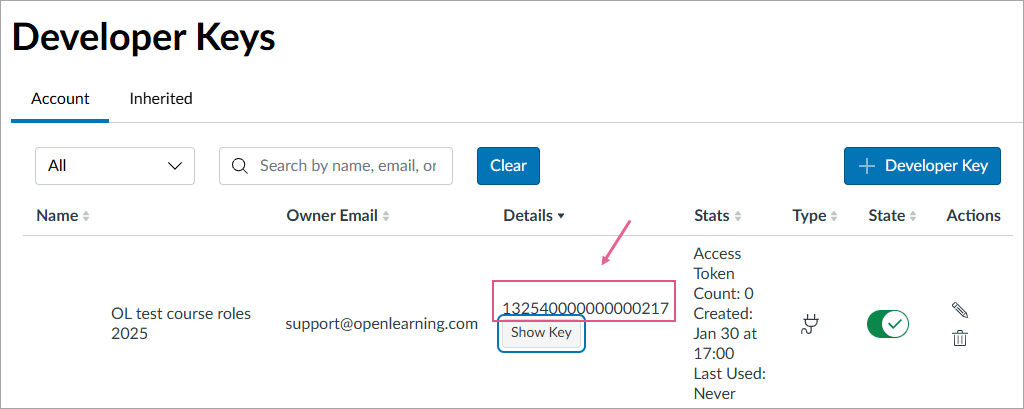
Click Save to save this configuration and make note of the Client ID under the "Details" column.
e.g. a number like: 123450000000000001
Step 6
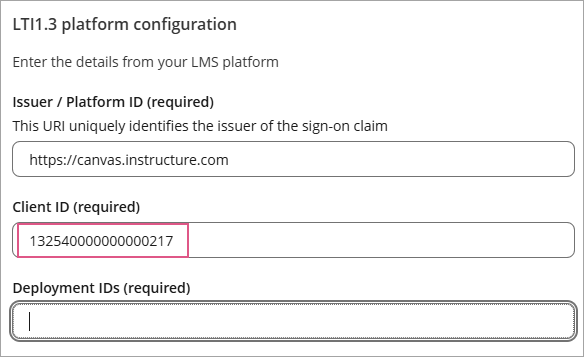
Next, put this in "Client ID" on the OpenLearning LTI 1.3 configuration as per the screenshot below.
Step 7
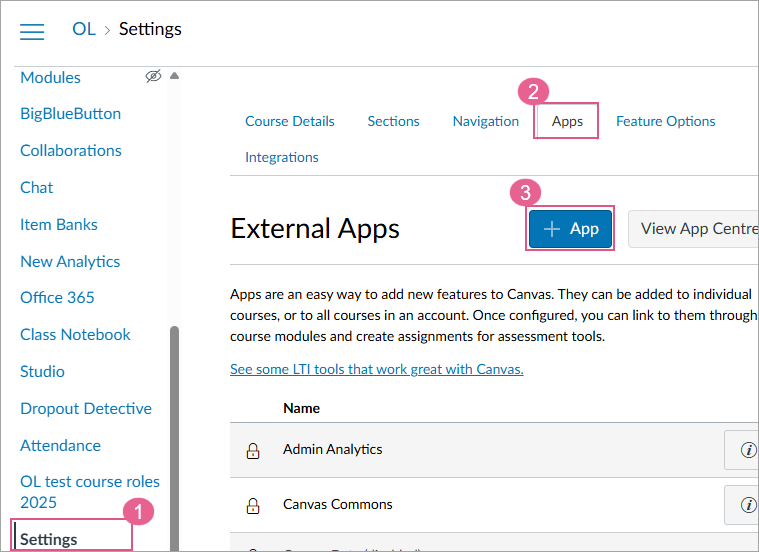
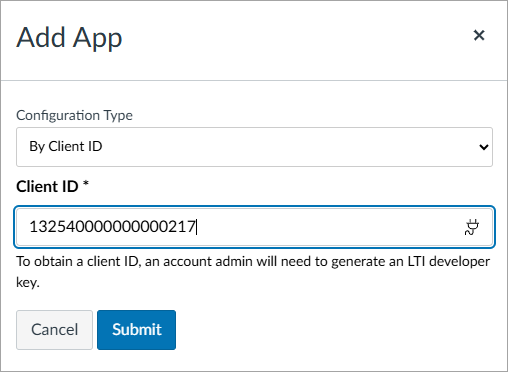
Head back to your Canvas course and go to Settings > Apps to add an App [+ App]
Step 8
Select Configuration Type - By Client ID and enter the client ID that you copied earlier and click Submit.
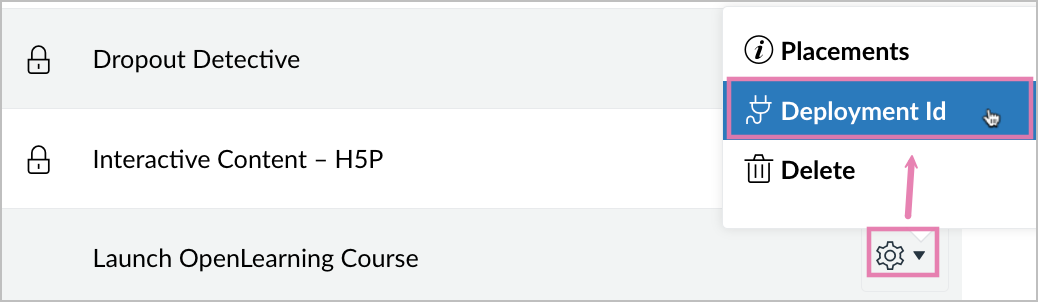
Step 9
Find the App that you have just created on the list, click on the cog and select Deployment ID
Step 10
Copy the Deployment ID and add it under "Deployment IDs" on OpenLearning. (Note: this is comma separated if you have multiple Deployment IDs/courses).
Example:
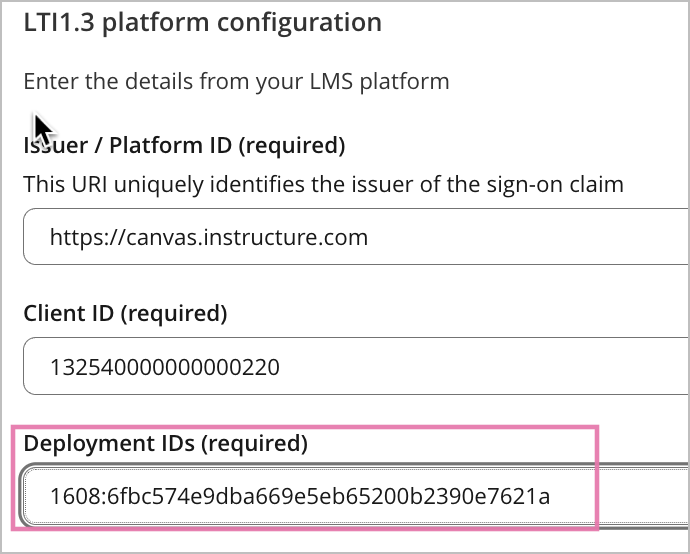
Click Save to complete the set up in OpenLearning and head back to Canvas.
Choose where to launch OpenLearning from within the Canvas course.
a) Settings > Navigation
This allows you to move "Launch OpenLearning Course" into the course navigation menu.
b) Modules > Add Item
This allows you to include the launch link directly to your course module.
- Select: "Add [External Tool] to Module"
- Next, select the : "Launch OpenLearning Course" and click Add Item.
- Ensure "Load in a new tab" is selected.
c) As an external link within pages
- Go to any page, click Edit.
- Select the text that you would like to link , and click on the link icon. Select External Link.
- Enter the SSO link that you copied from the navigation.
- Note: Remember to include display=borderless in the link to ensure this opens up in a new tab as the course cannot be embedded within another platform.
- Example: https://ol.instructure.com/courses/182342/external_tools/1563?display=borderless