Using Webhooks with Relay.app
This guide provides a step-by-step walkthrough for integrating OpenLearning events with Relay.app using webhooks.
1. Set up the Webhook Connector on the OpenLearning institution settings
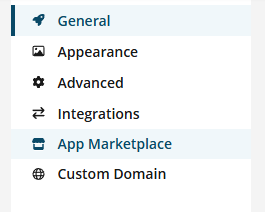
1.1 From the main navigation menu, select App Marketplace.
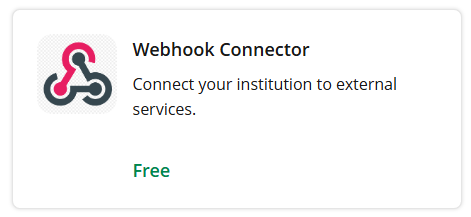
1.2 Locate the Webhook Connector and select Connect App. If you have not configured this previously, select Create Connector.
Then

Then

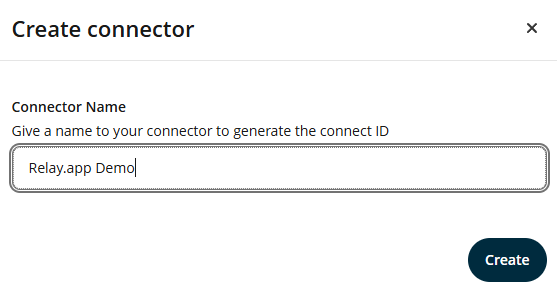
1.3 Provide a name for the connector for your own reference. In this demonstration, it is named "Relay.app Demo". This connector serves as the hub for your various platform event subscriptions.
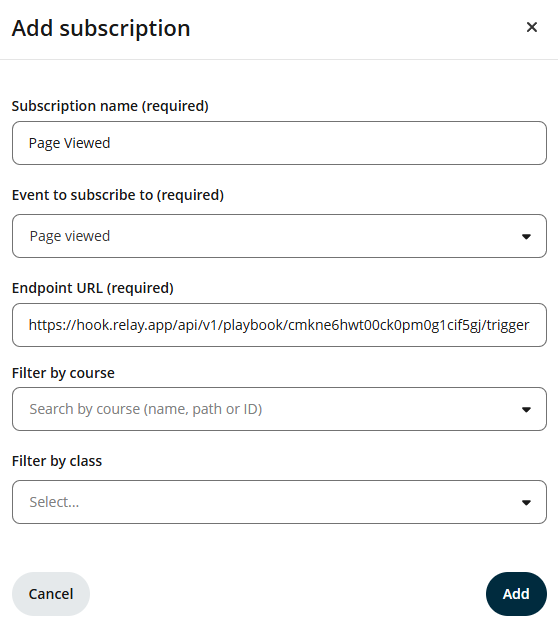
1.4 Click on + Add subscription to begin subscribing to a specific platform event.

1.5 In the dropdown menu, select the "Page viewed" event and name the subscription "Page Viewed". Note that while the Endpoint URL is required and already filled here, we will retrieve this from Relay.app in the next section. While filters for Course and Class are available to limit event triggers to specific contexts, they are left unselected in this demo so that all page view events across the institution are sent.
2. Setting up a Workflow in Relay.app
2.1 Within the Relay.app interface, select Workflow from the side navigation.
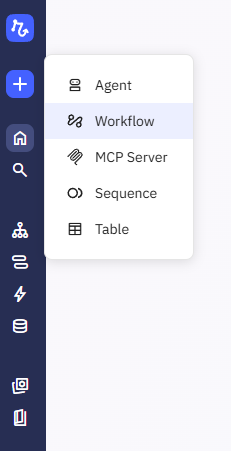
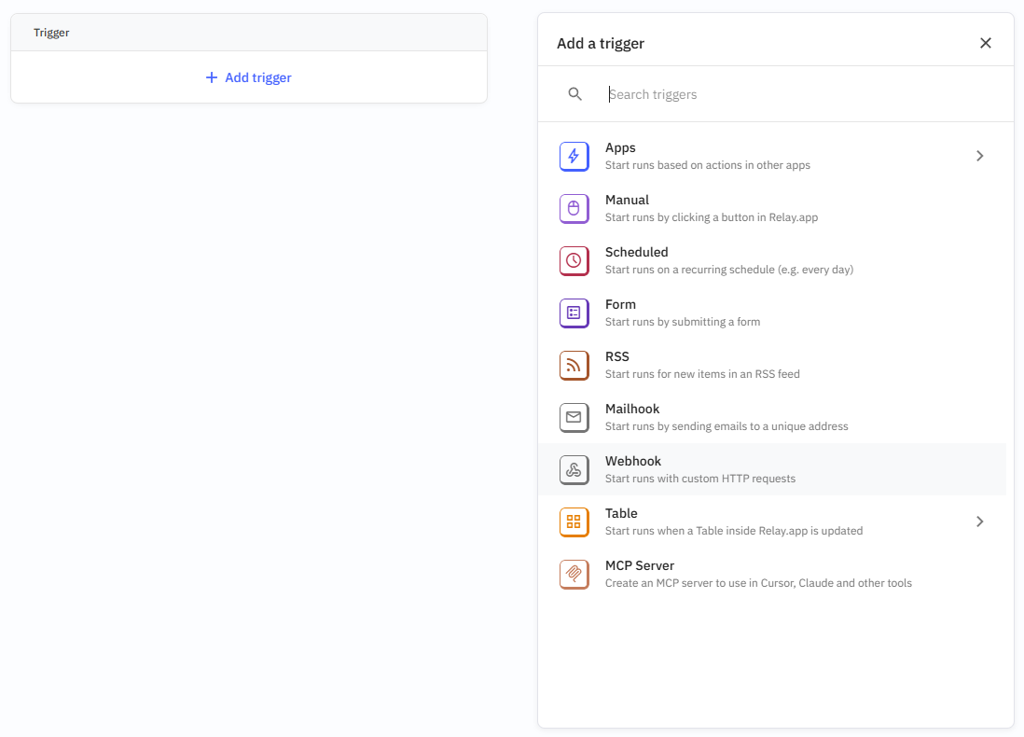
2.2 Select + Add trigger and choose the Webhook trigger option.
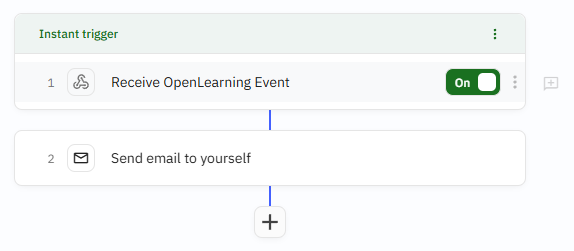
2.3 Assign the name "Receive OpenLearning Event" to the webhook trigger.
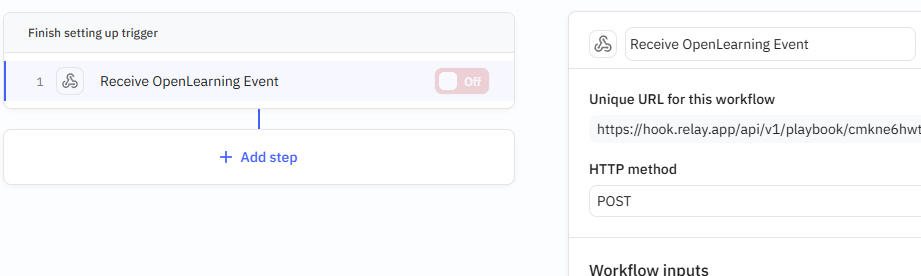
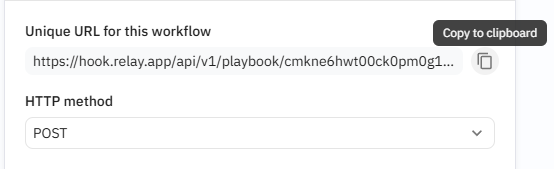
2.4 Locate the "Unique URL for this workflow" and copy it. Return to the OpenLearning settings and paste this into the Endpoint URL field mentioned in step 1.5.
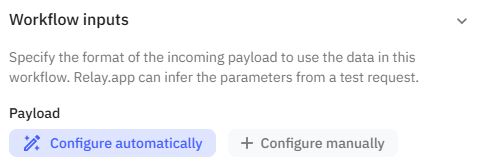
3. Configure Relay.app Workflow inputs
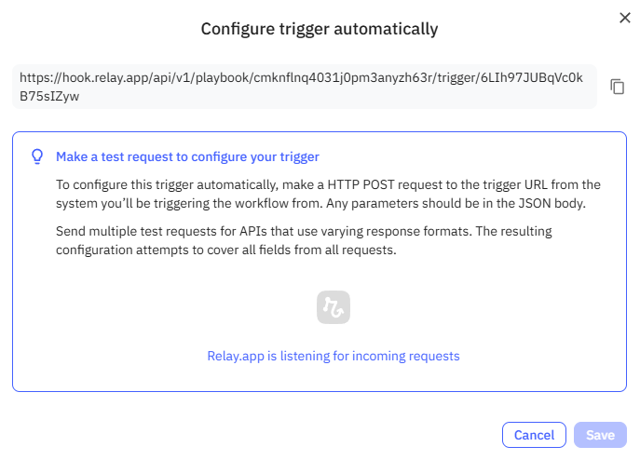
3.1 In Relay.app, select the webhook trigger and click Configure automatically.
3.2 The Relay.app workflow will now enter a listening state. To proceed, visit any course page within your OpenLearning institution. The workflow will automatically detect the incoming data and configure its parameters based on that payload.
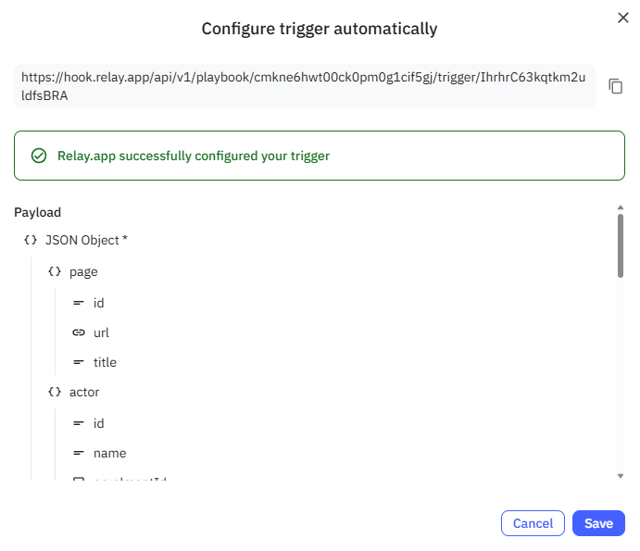
3.3 Once the data is detected, the interface will confirm that the request was received and successfully configured.
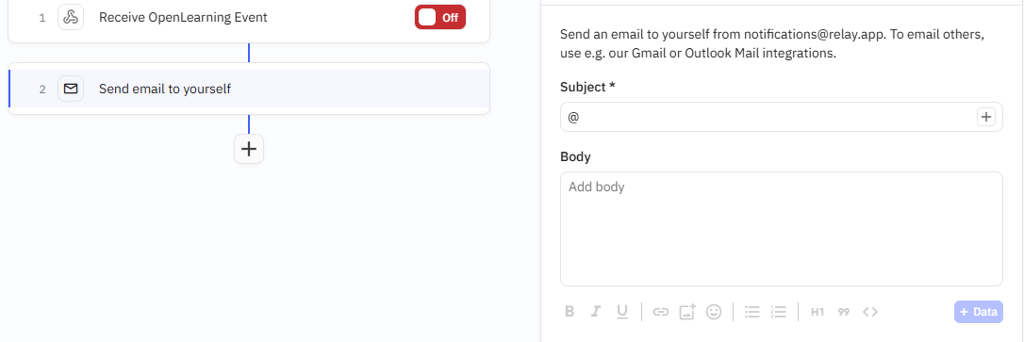
4. Test the Relay.app Workflow by sending an email
4.1 Click + Add step and select the action Send email to yourself.
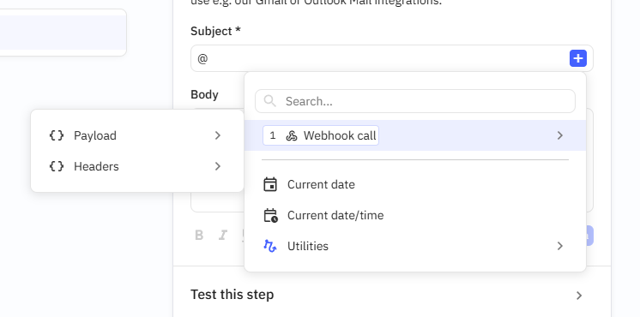
4.2 Begin configuring the subject line. You can dynamically insert data from the OpenLearning event by selecting "Payload" from the available "Webhook call" data.
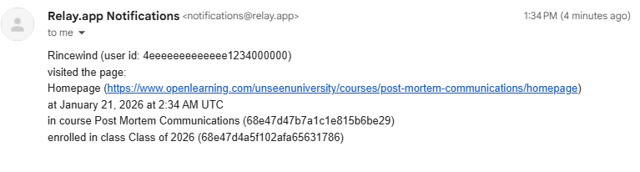
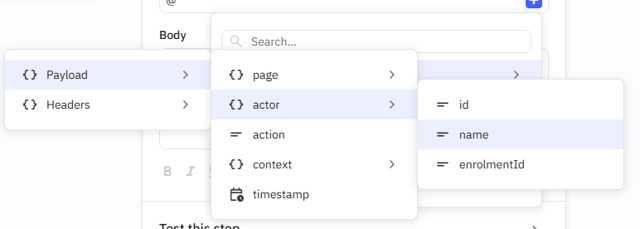
4.2 Specifically, navigate to "Payload" > "actor" > "name" to automatically include the learner’s name in the email subject line.
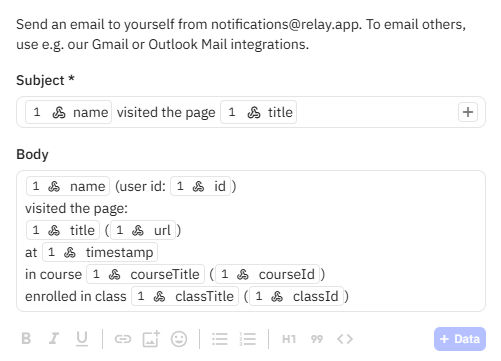
4.3 Finalize the email configuration. You can populate both the subject and the body with various parameters to provide context.
4.4 Once the configuration is complete, toggle the trigger to On.
4.5 Confirm the integration is working by verifying the receipt of the automated email in your inbox.