
How do I use the Media Recording response?
What is a media recording response
The written text response type allows Assessment Designer to design questions that require learners to record video or audio responses. This is particularly useful for assessments that test speaking skills.
Who can access the feature
Only accounts with the Assessment Designers role can access this feature. To learn more about course roles, please refer to the article What are the different roles within a course?
How to set the media recording response
Step 1
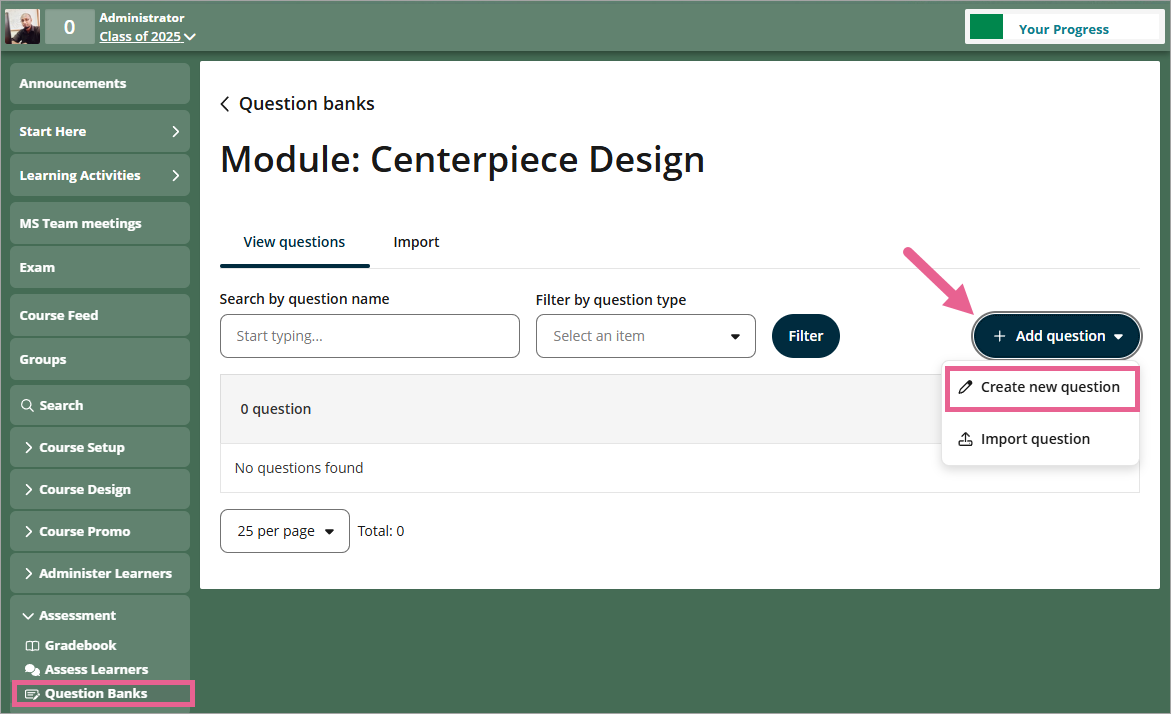
Go to Assessment > Question Banks

Step 2
To use the existing question bank, click on the question bank name. To create a new question bank, click on Create new bank. Enter a name for your question bank and then click Create.

Step 3
Click on Add question > Create new question
Step 4
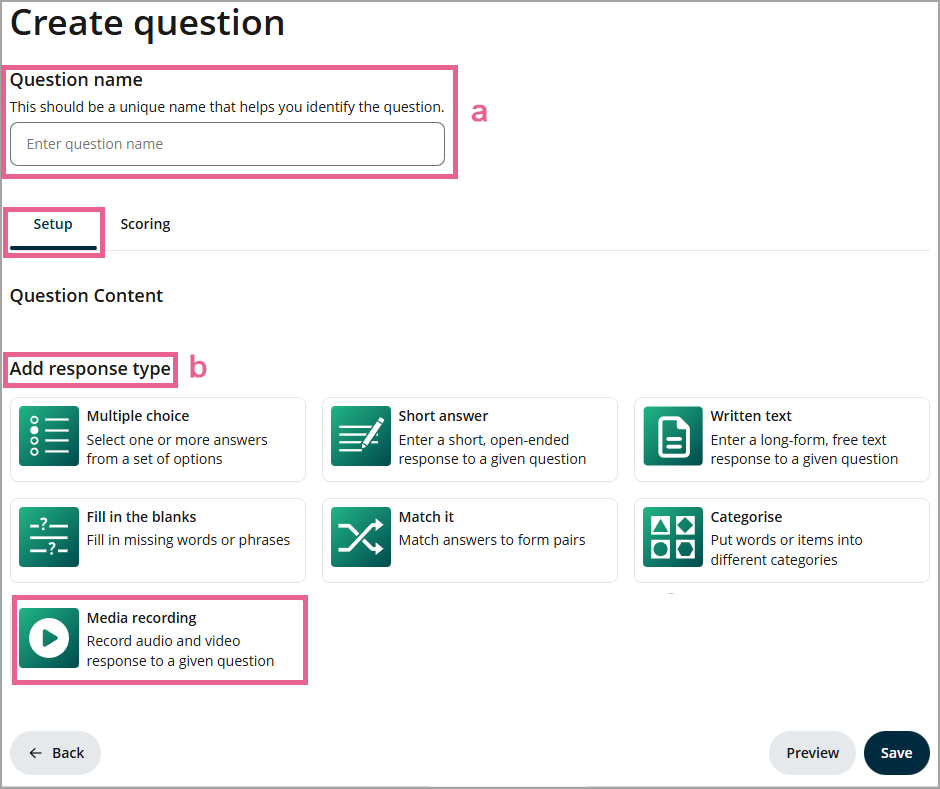
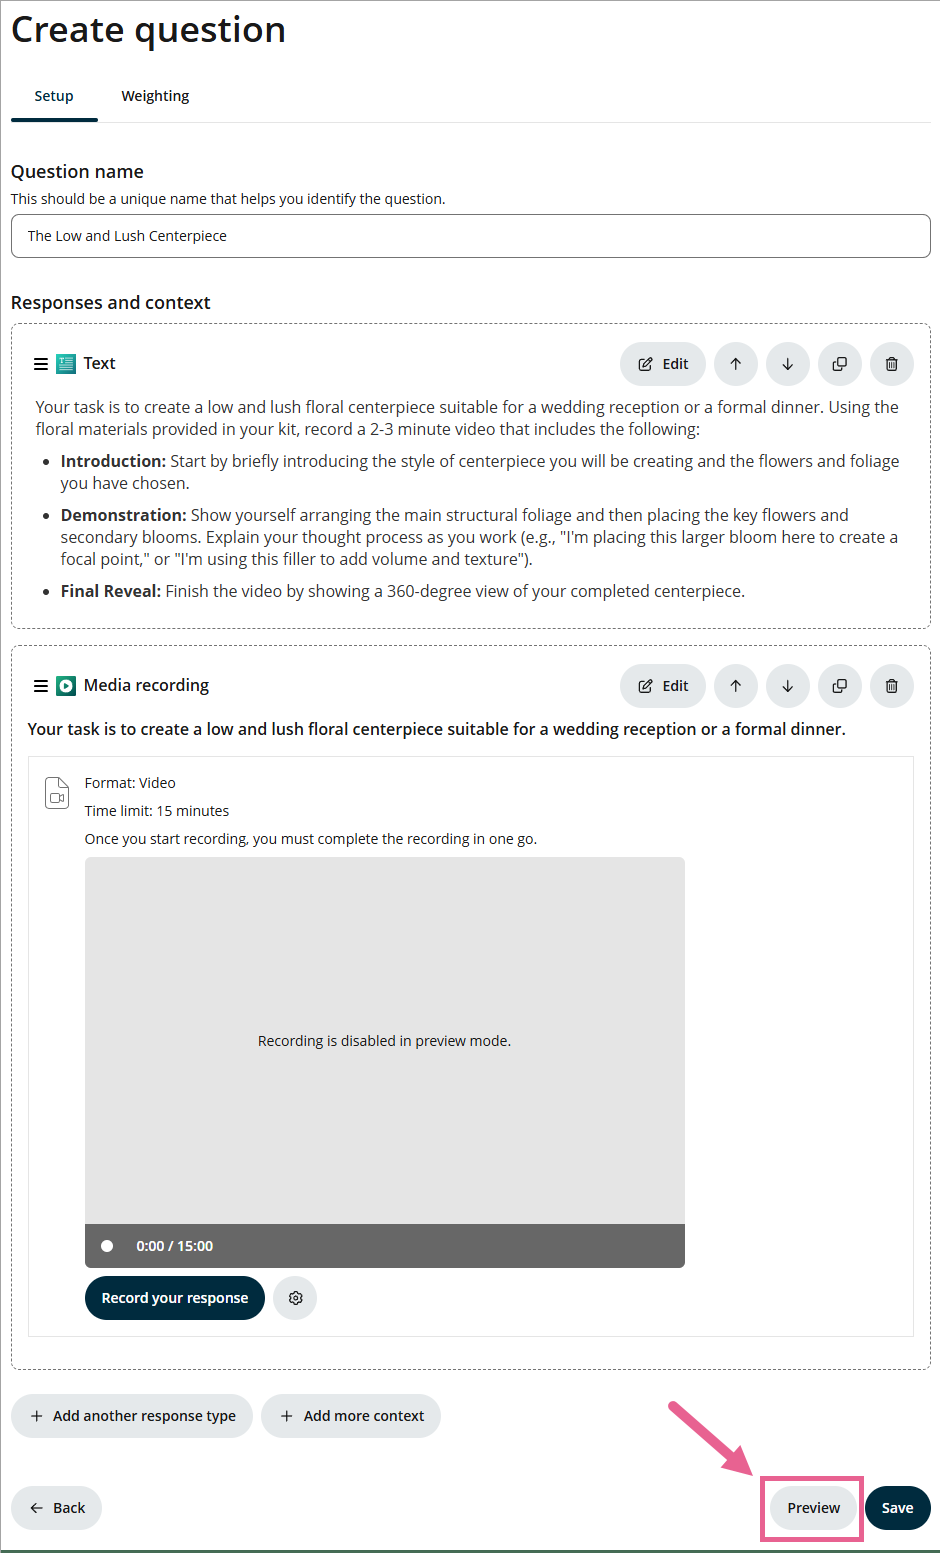
a) Enter a unique name for this question. This name is a unique identifier that helps you identify the question. It is not the question text.
b) Select the Media recording response type.
Step 4
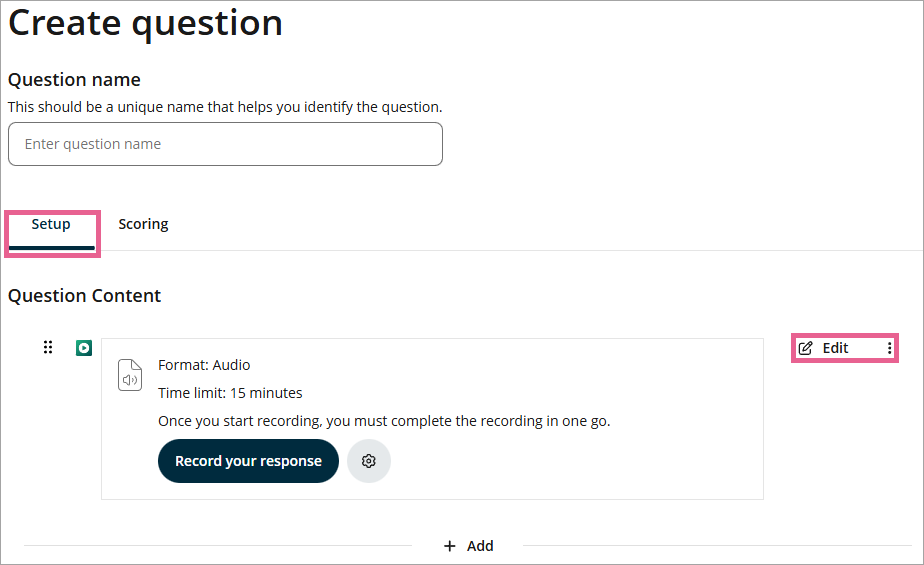
Once selected, click Edit. A drawer will open where you can configure your media recording question.
1) Response title: Display a simple text question for learners.
2) Recording format:
- Audio only
Video only
Audio with optional video
3) Audio quality:
- Note: Higher audio quality results in larger file sizes and longer upload times.
4) Video quality:
- Note: Higher video quality results in larger file sizes and longer upload times.
5) Recording time limit:
Note: Maximum duration is 15 minutes.
6) Re-recording options:
Learners must complete the recording in one attempt
Allow learners to stop and re-record at any time

Step 5
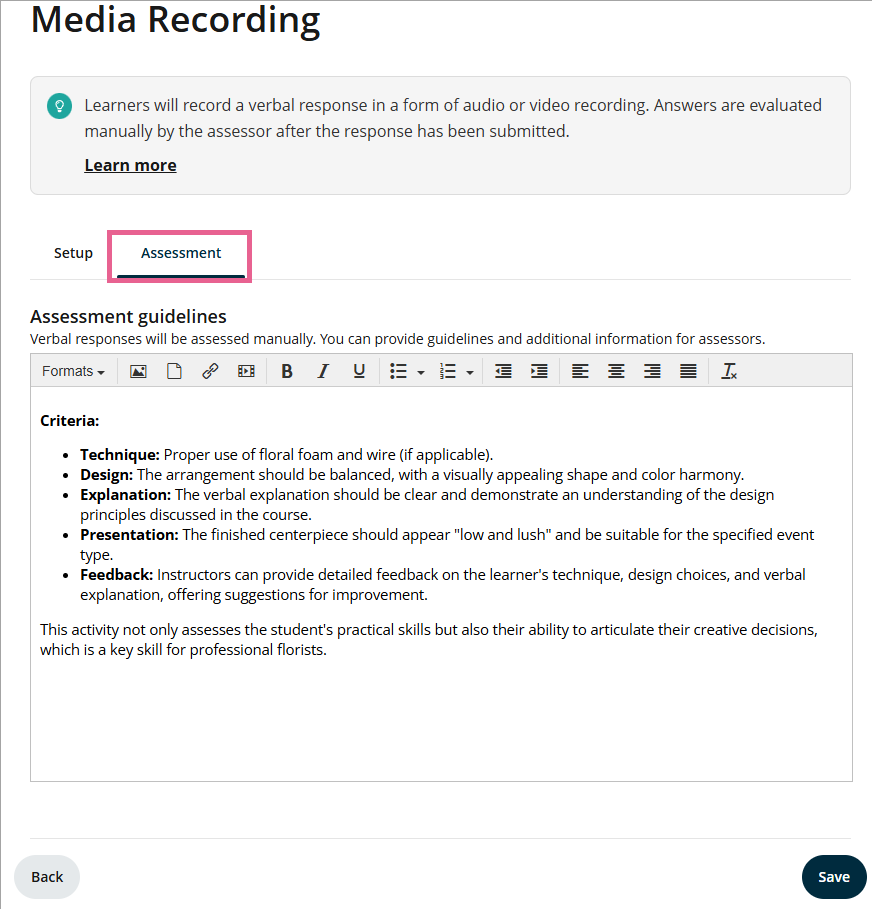
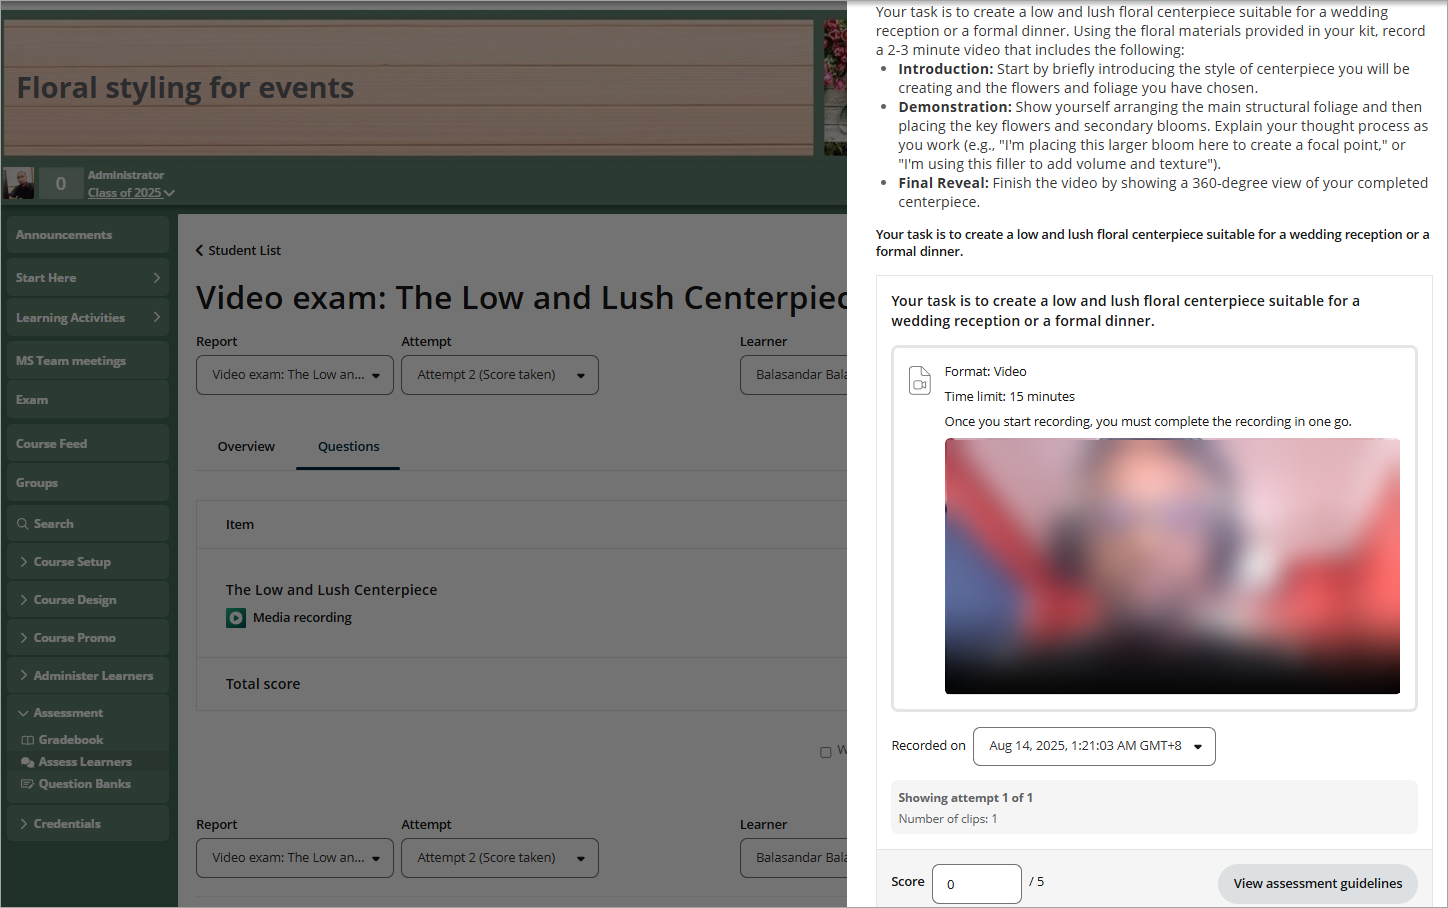
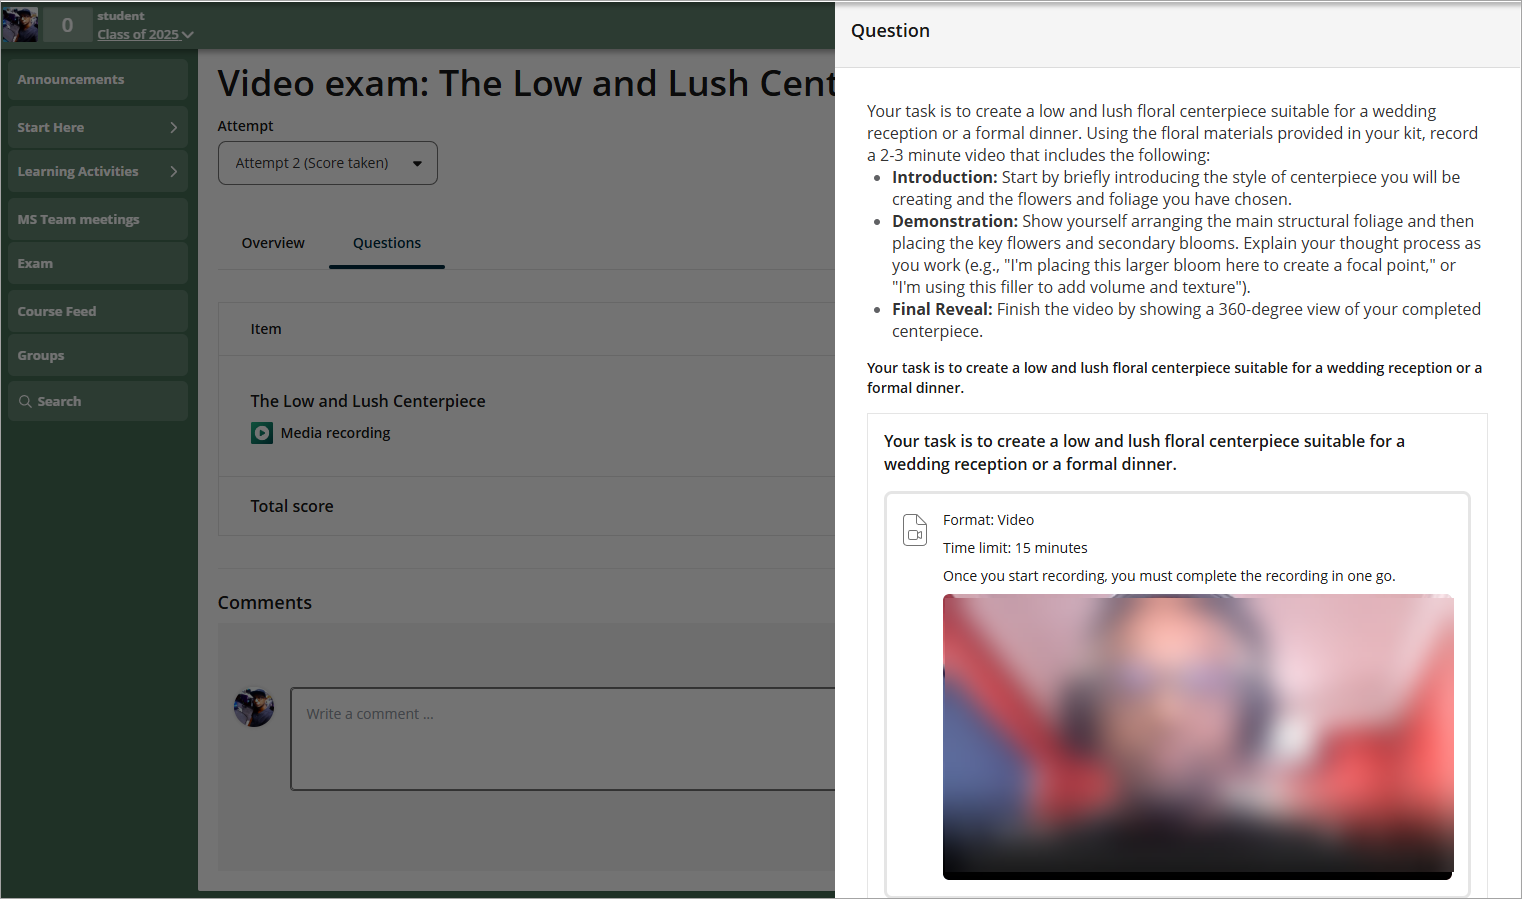
Click on the Assessment tab and you can also include assessment guidelines when setting up the question. These guidelines will be visible to Assessors during grading.
Click Save to apply the changes to the settings.
Step 6
Click Save to save the questions, and click Preview to see a preview.
In preview question mode, the recording functionality for audio and video is disabled. However, you can still click the buttons to simulate the real user interface experience, though the cameras and microphones will not activate.
To experience or test the question functionality, you must first add the question to an exam, then use the 'Preview exam' feature.
Assign course learning outcomes to the media recording response
You can add outcome tags for each question in the Alignment tab.
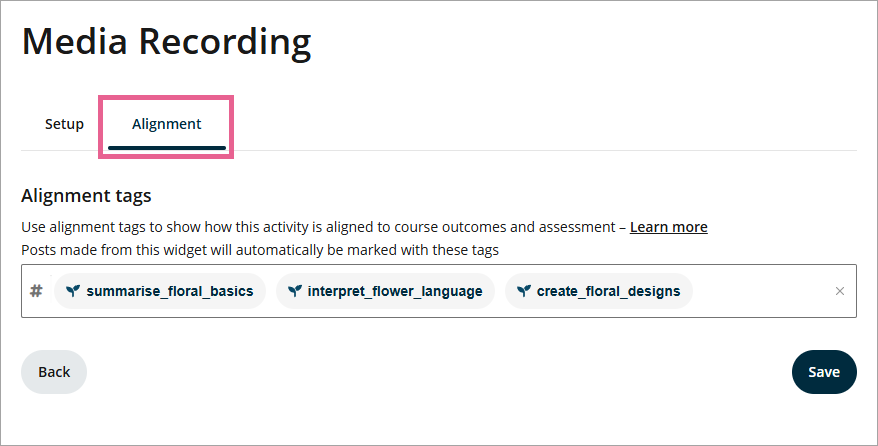
You can now see the outcomes attached to your question in an exam setup.
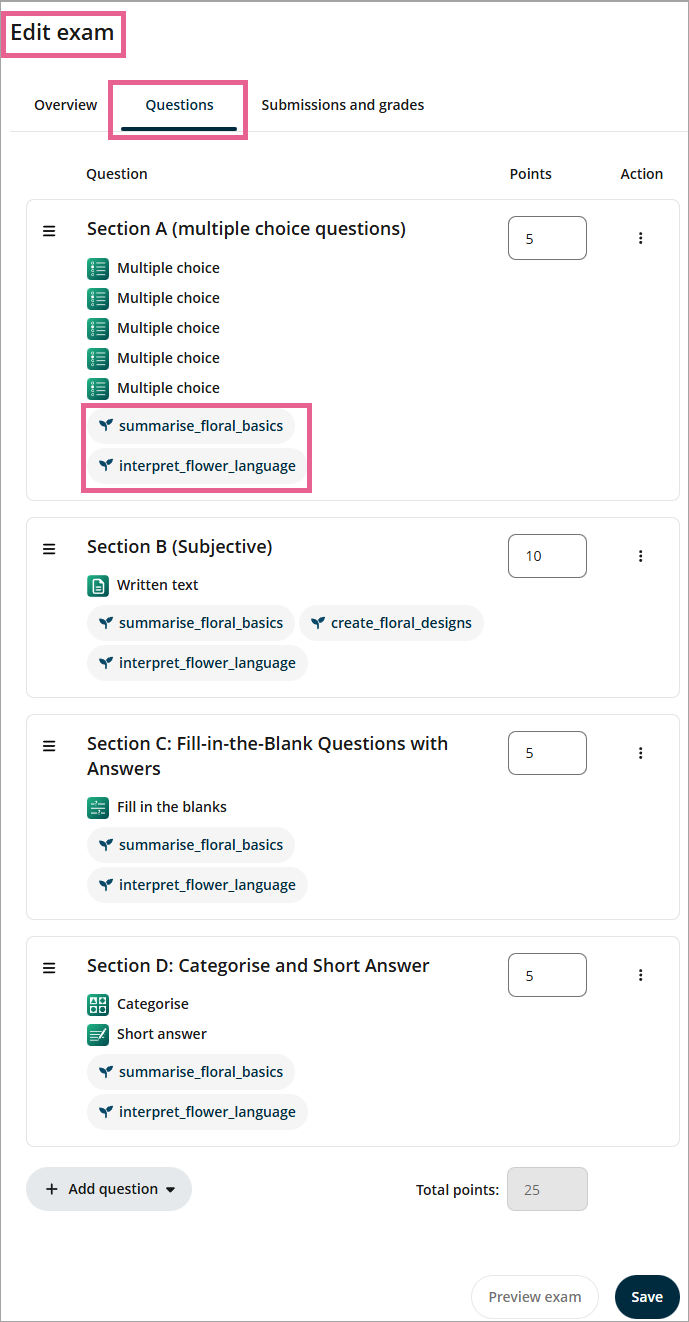
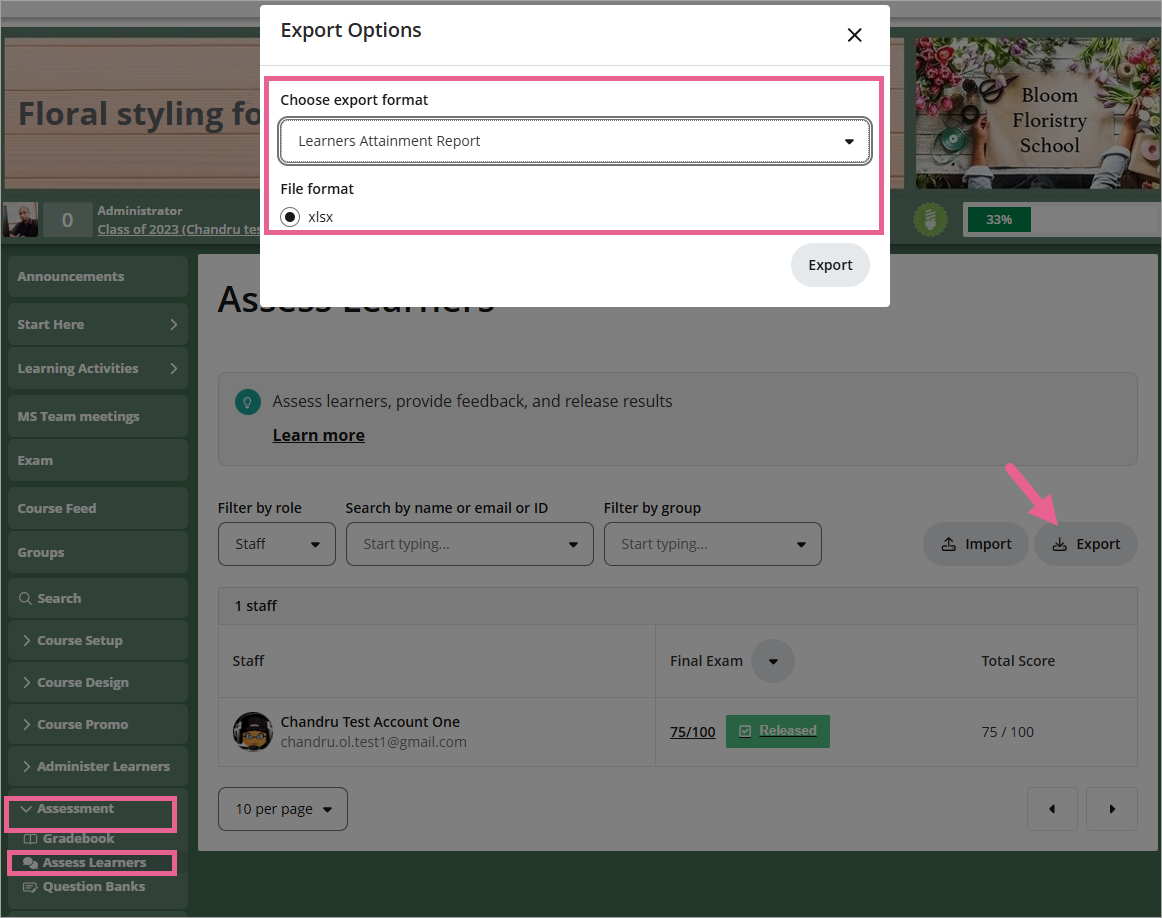
Tagging course learning outcomes (CLOs) here is an essential step in supporting the Learner Attainment Report — an exportable report available from the Assess Learners page. This report combines learner grades and CLO alignments to give educators a clearer view of learner progress.
Assessor view
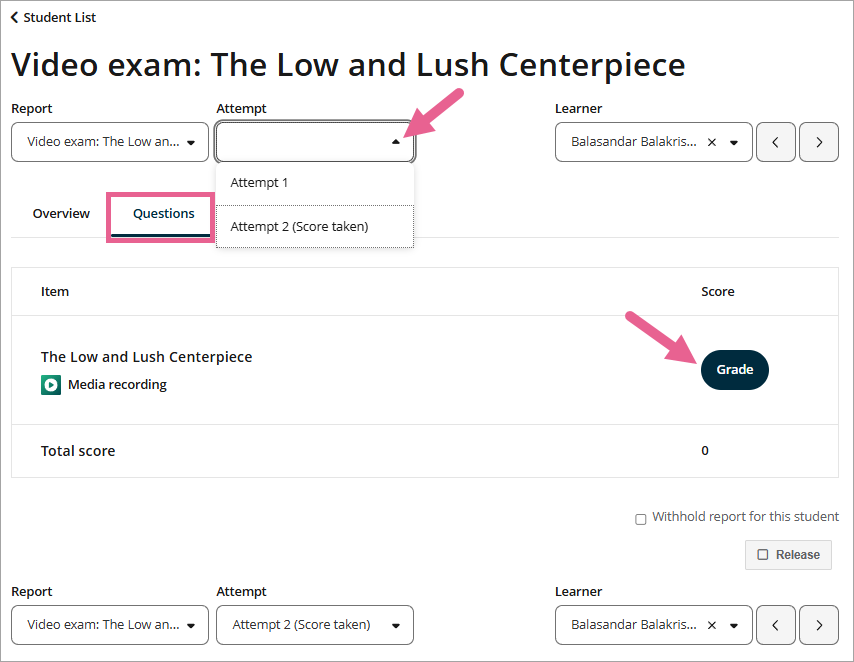
Grading a media recording response type is similar to grading a written text response type.
When you grade a media recording response type item, you will be able to see the video or audio file, the date and time it was recorded, and the media player controls (you can play, rewind, move the time indicator to view different parts of the recording, adjust the volume, and view it in full screen).
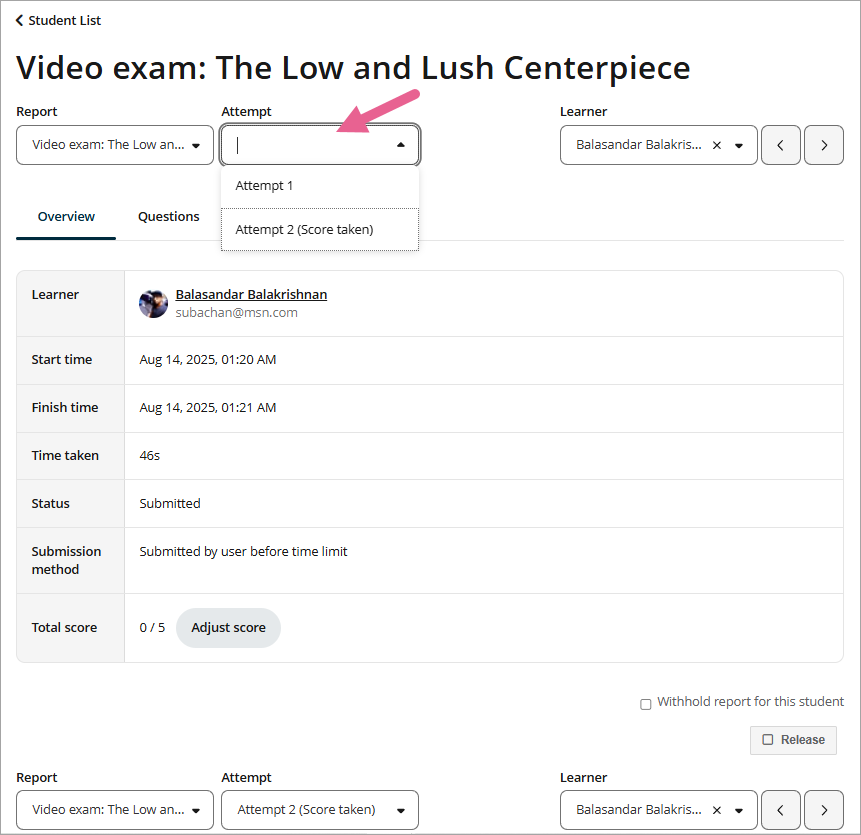
If the media recording response type allows for multiple recordings, then the assessor will be able to view all recordings. However, the most recent recording will appear first. Simply use the dropdown to view the other recordings.
Once you have released the grades to learners, they will be able to see the recordings they submitted along with the score and comments (if the assessor has added any).
Learner view: Taking an exam with a media recording response type
For exams that contain a media recording response type, learners will be required to allow permissions for their camera and microphone. If they don't allow these permissions, they will be unable to start the exam.
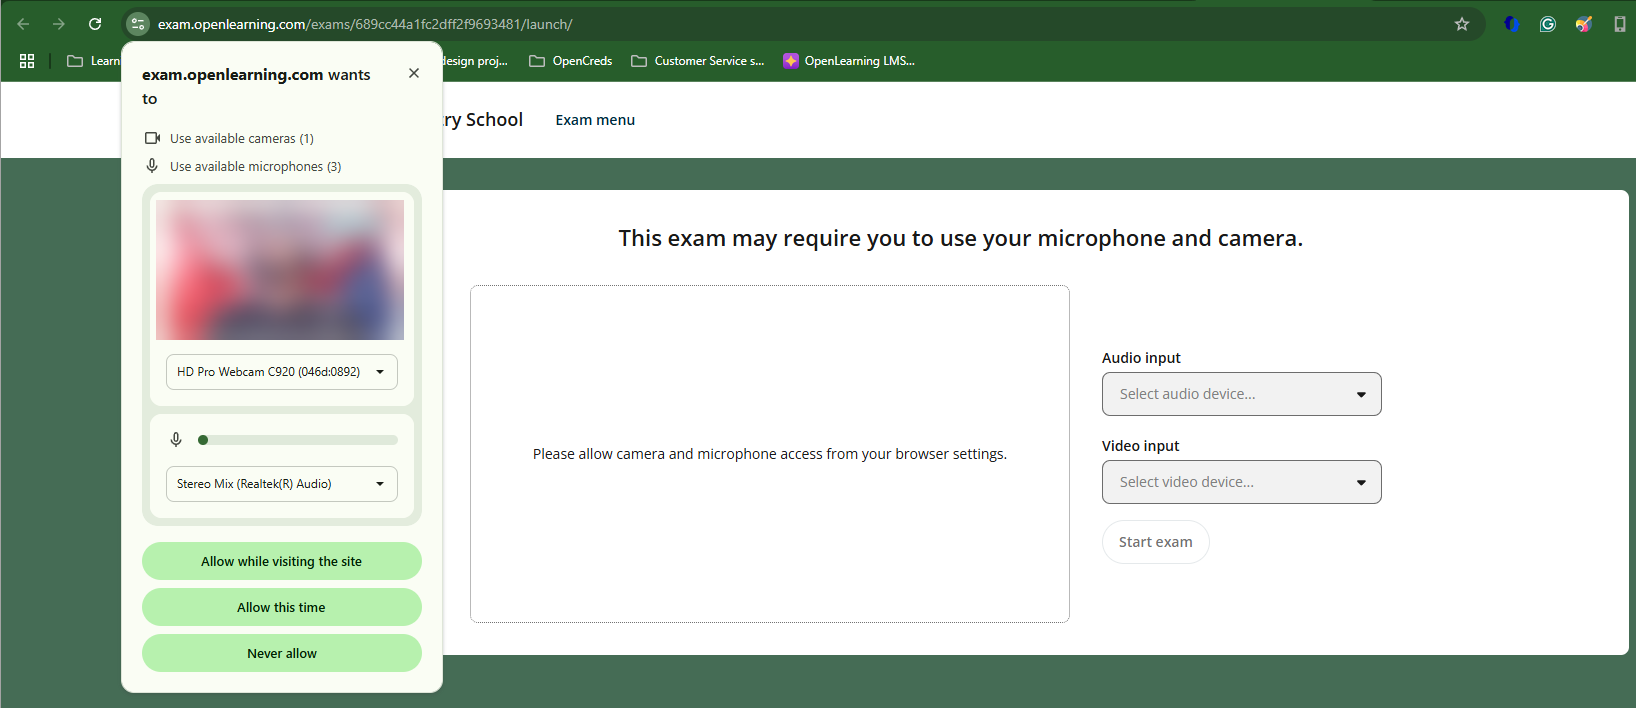
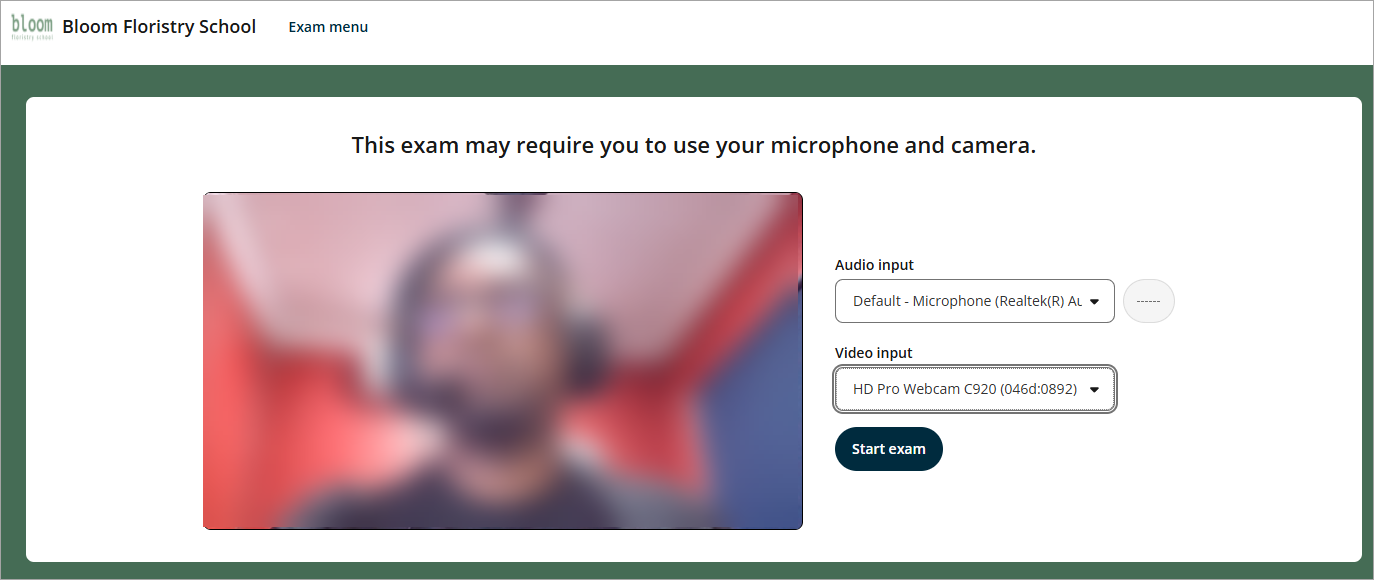
Once they have allowed permissions, they also have the option to switch their audio and video input devices.
Once learners are ready and have selected their desired audio and video interface, they should be able to see their face on the screen and a small audio indicator that shows their microphone is connected.
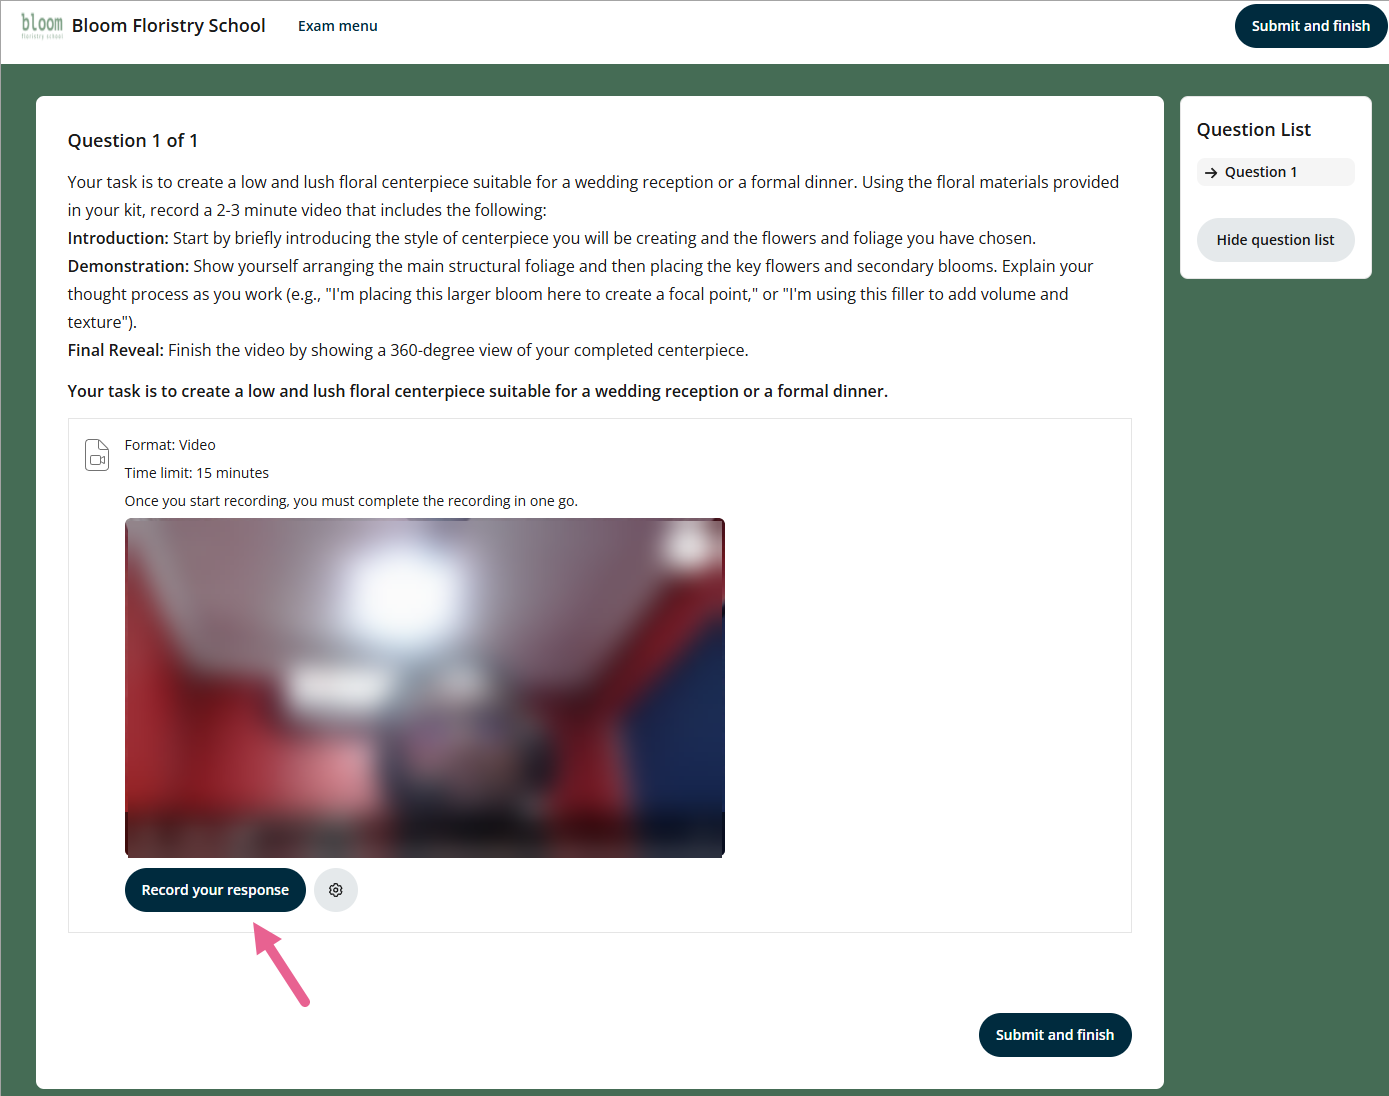
Must complete the recording in one attempt
Learners should be able to see the question, the expected format, the video time limit, and the rules (must complete the recording in one go).
To start recording, users simply click the "Record your response" button. There will be a 3... 2... 1... countdown before the recording starts.
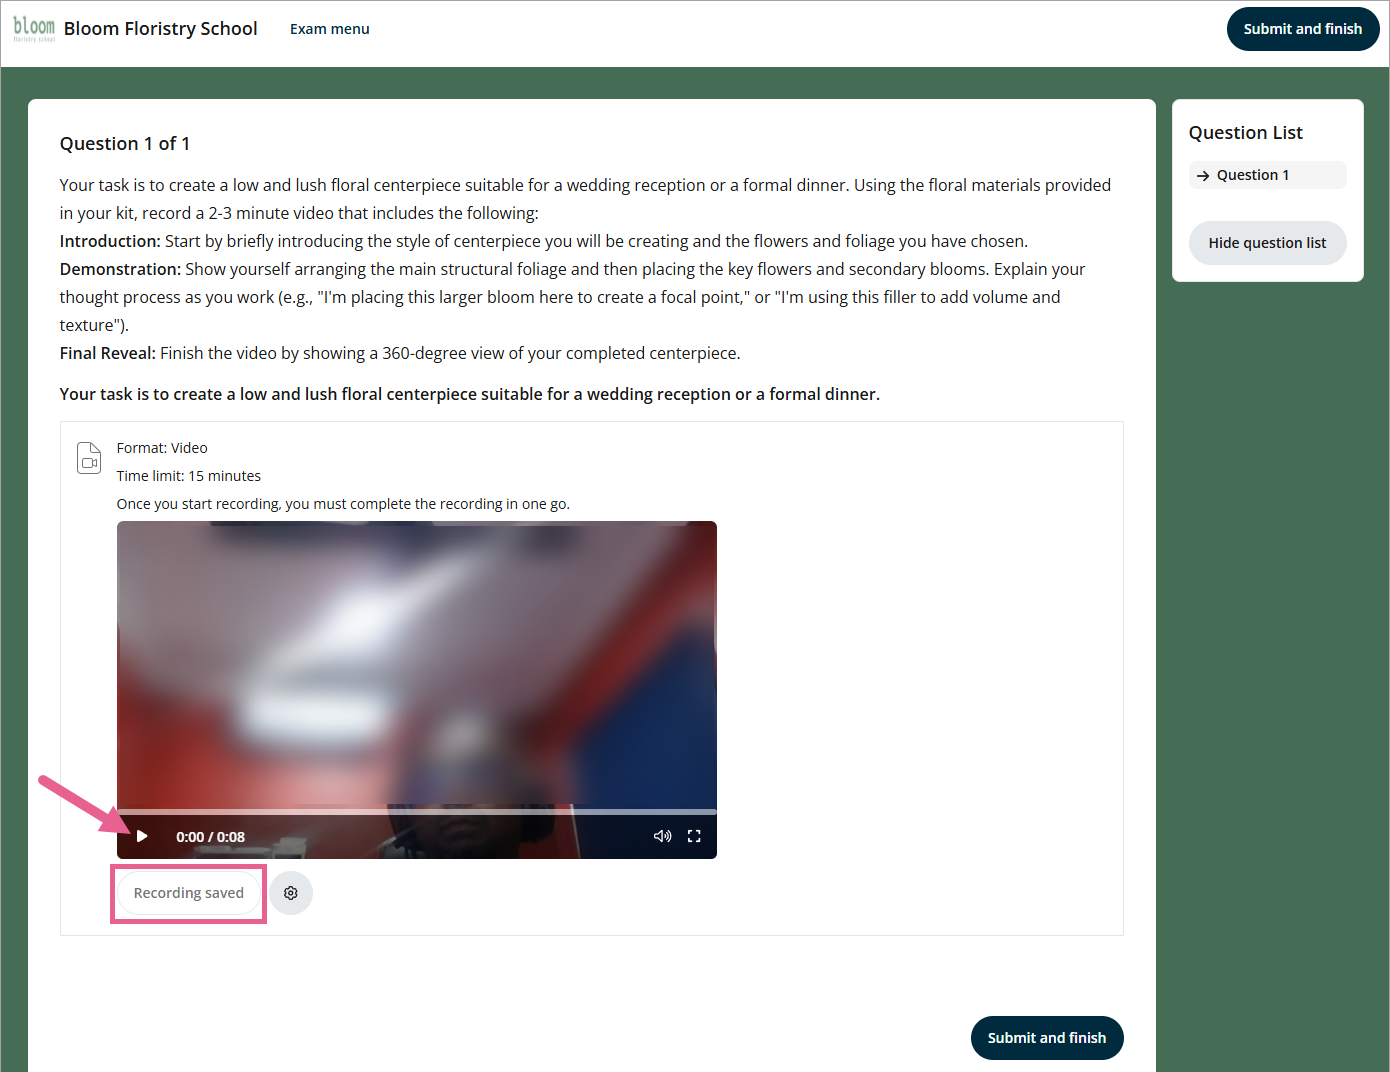
Once completed, the video will be uploaded and the button will change to ‘Recording saved’. Learners will be able to playback what they have recorded.
Allows re-recording
If the response type has the setting that allows for re-recording, then the button will display "Record your response" again. Clicking this button will replace the previous recording. Learners can only play back the most recent recording, not any previous versions.
Audio recording
The audio recording will be similar, however, there won’t be a screen to show the camera recording of the learner.
Audio with optional video recording
For audio with optional video, there will be a toggle to turn the camera on/off.
Uploading audio and video files in the background
When it comes to uploading video and audio files, this process happens in the background. If the exam is timed and the video and audio files are still uploading when time runs out, the system will ensure that everything is uploaded with the submission.
If learners submit the exam while files are still uploading in the background, the submit modal will show that files are still uploading, and the system will ask them not to close the page until the upload is complete.
What happens if the learner changes video/audio source in the middle of a recording
If learners change their audio or video source in the middle of a recording, the recording will be divided into different clips. There will be an option in the interface that allows learners to view all the clips in that recording.