
How to set up a Custom External Payment Gateway
OpenLearning supports a mechanism for hosting your own payment gateway or enrolment process. Instead of using OpenLearning's built-in payment flow, you can route learners to your own web application to handle payment, then enrol them automatically once payment is complete.
External Gateways are now set up at the Institution level. Once you've created a gateway, you can reuse it as a payment method across multiple programs, courses, and classes. You no longer need to configure a separate gateway for each one.
What you'll need
Your own web application that can receive POST requests from the learner's browser
A portal administrator account to set up the integration on the portal level
A course administrator account that can bwith a valid API Key.
If you enable Signed Data Transfer (recommended): a method for retrieving public keys from a JWKS endpoint and validating JWTs (JSON Web Tokens) signed with RS256
How it works
Set up an External Gateway in your Institution Settings, and (optionally) enable Signed Data Transfer.
Select that gateway as the payment method on your Program or Class pricing page, and set the price and currency.
Host a web application that will:
Receive a POST request from each learner requesting to join a program or class
If Signed Data Transfer is enabled, verify the authenticity of the JWT using the public keys retrieved from the Public Verification URL (JWKS)
Direct the learner to your payment gateway
Upon completion of payment, make an API request to OpenLearning to enrol the learner
Redirect the learner back to the OpenLearning course
Add an External Gateway in your Institution Settings
Step 1
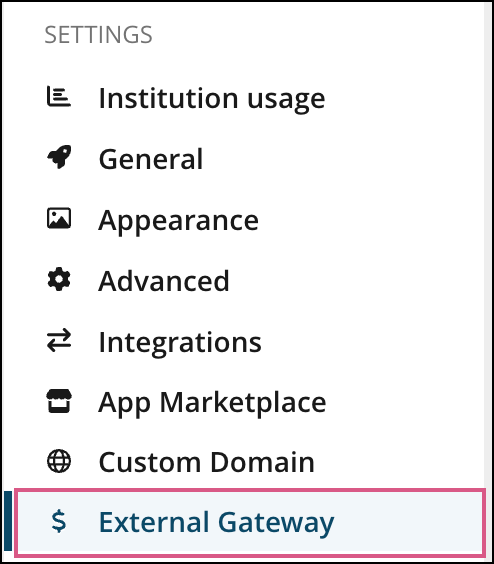
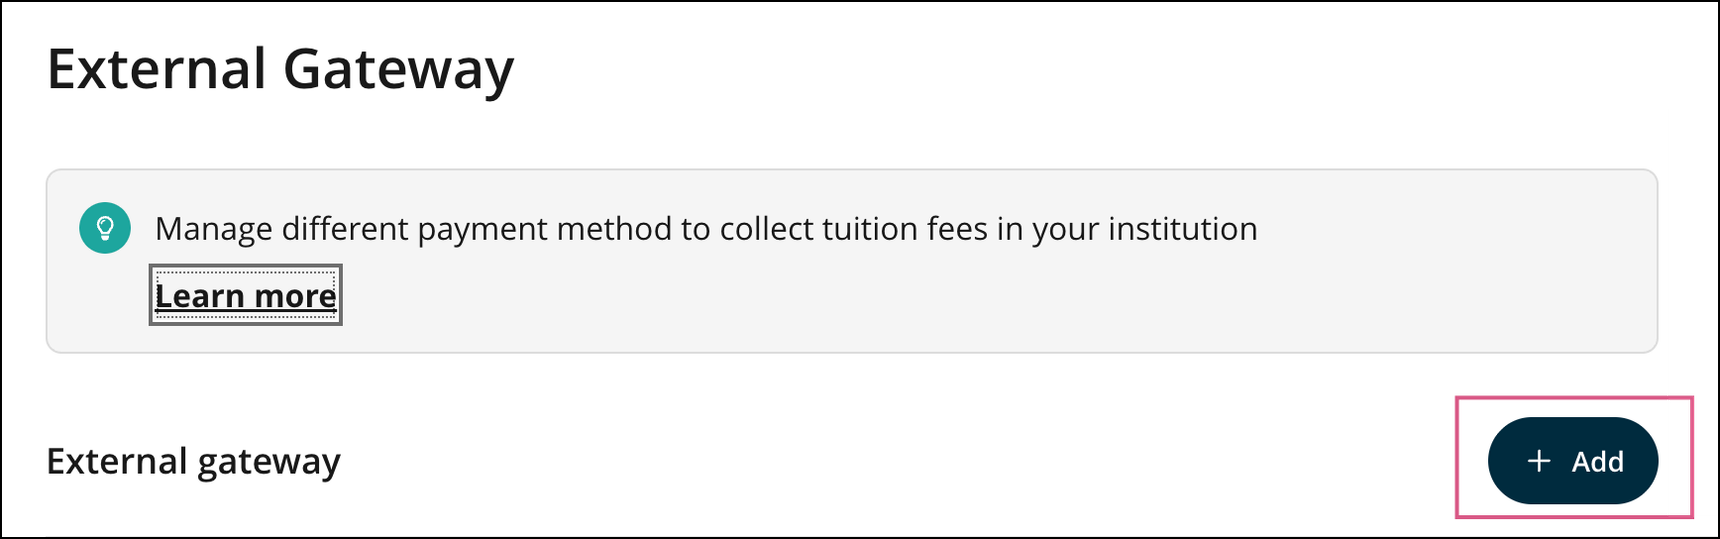
Go to your Institution Settings > External Gateway page.
Step 2
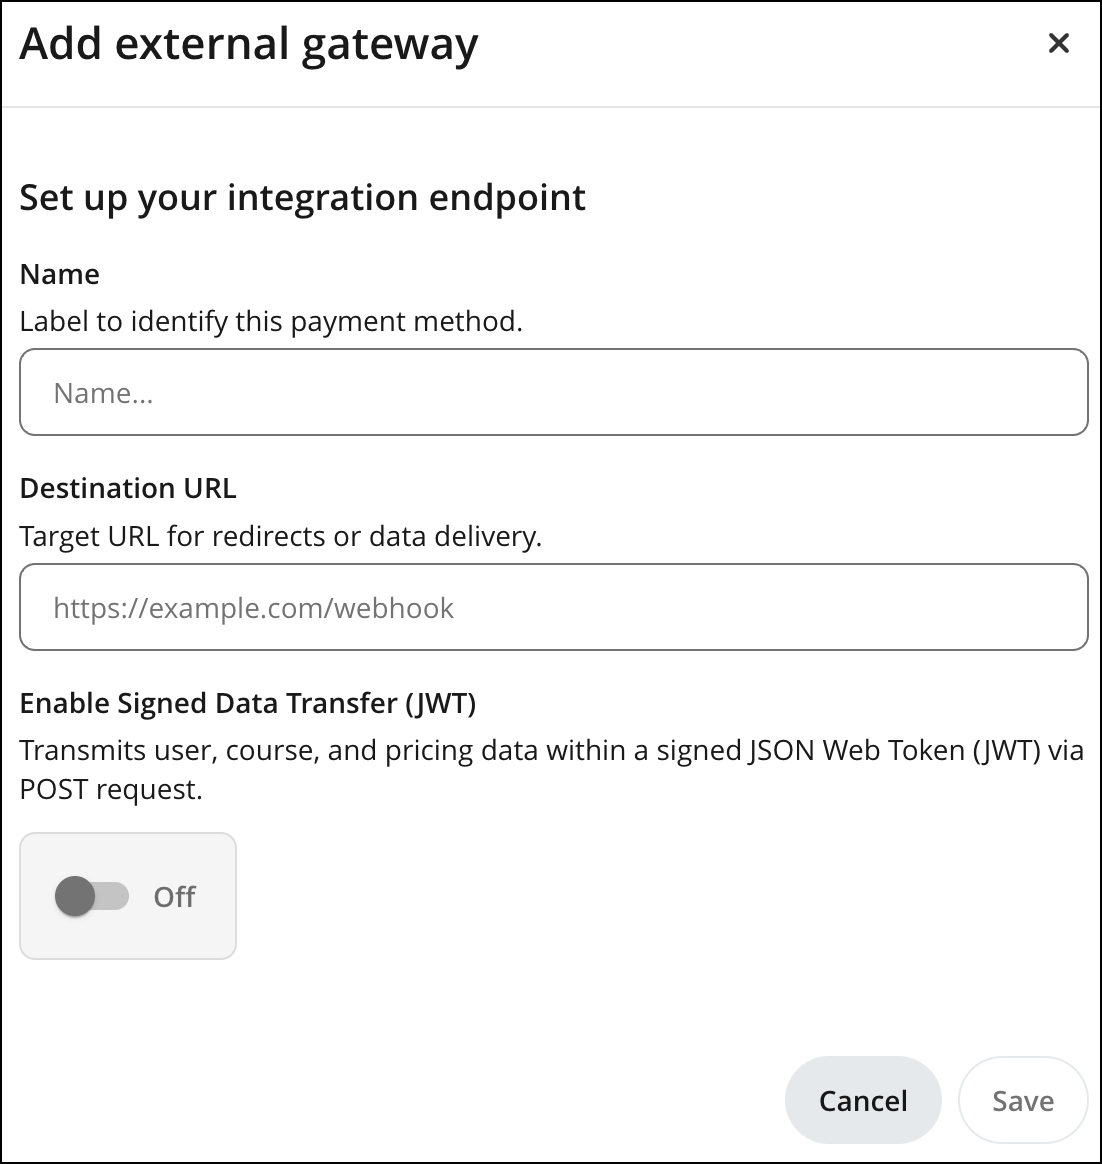
Click Add external gateway. A dialog titled Set up your integration endpoint will appear.
Step 3
Fill in the following fields:
Name: a label to identify this payment method. This is how the gateway will appear when you select it on a pricing page, so use something recognisable.
Destination URL: the target URL of your web application, where redirects or data will be delivered (for example, https://example.com/webhook).
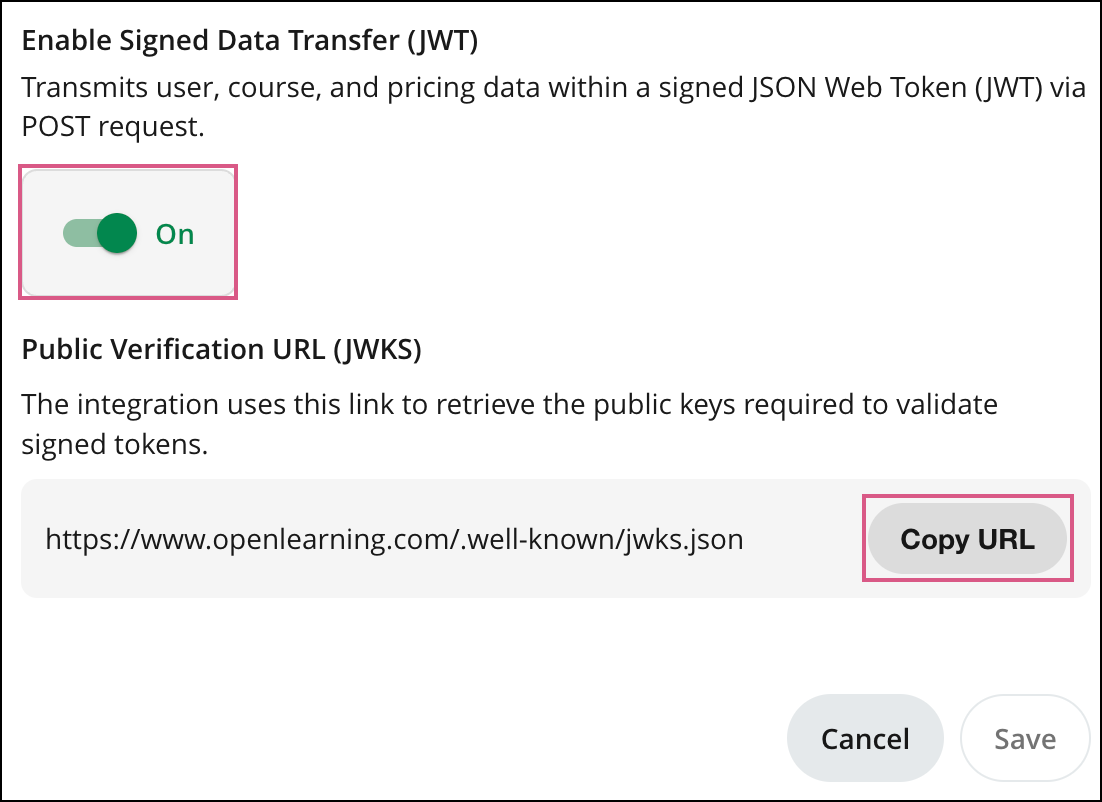
Enable Signed Data Transfer (JWT): optional. When turned On, OpenLearning transmits user, course, and pricing data inside a signed JSON Web Token (JWT) sent via POST request. This lets your application verify that the request genuinely came from OpenLearning and has not been tampered with. We recommend enabling this for any gateway that handles payment.
Step 4
If you turn Enable Signed Data Transfer (JWT) on, a Public Verification URL (JWKS) will appear. Your integration uses this link to retrieve the public keys needed to validate the signed tokens. Use the Copy URL button to copy it into your web application's configuration.
Unlike the previous setup, which used a single static public key, the JWKS endpoint allows OpenLearning to rotate its signing keys without breaking your integration. Your application should fetch the keys from this URL (and may cache them), then match the kid in the token header to select the correct key for validation.
Step 5
Click Save.
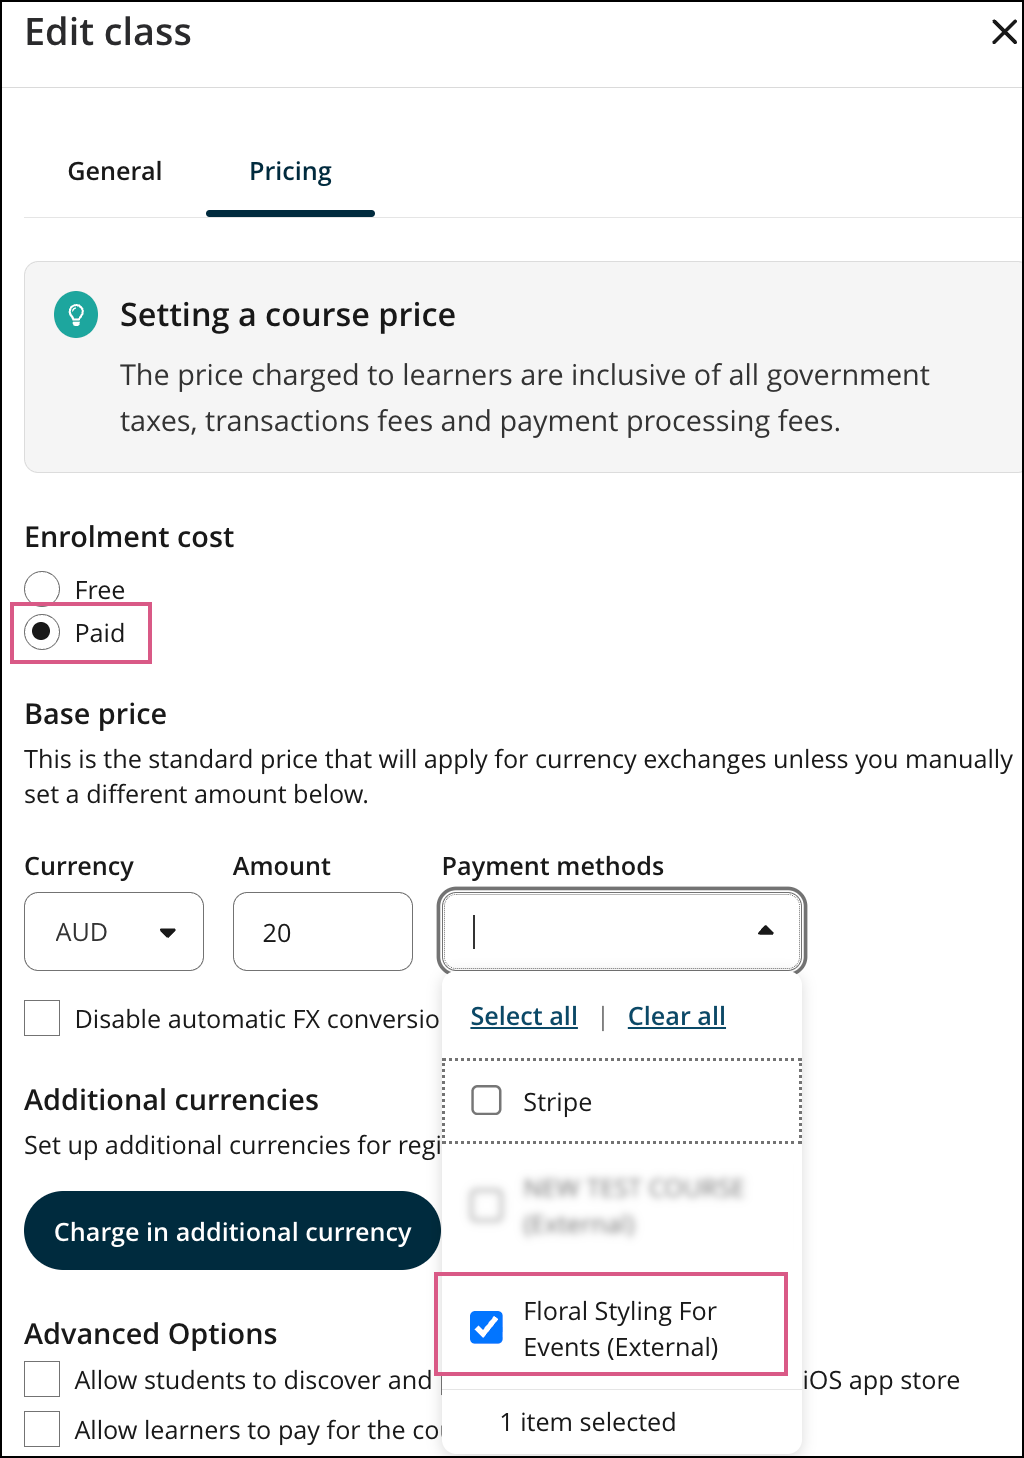
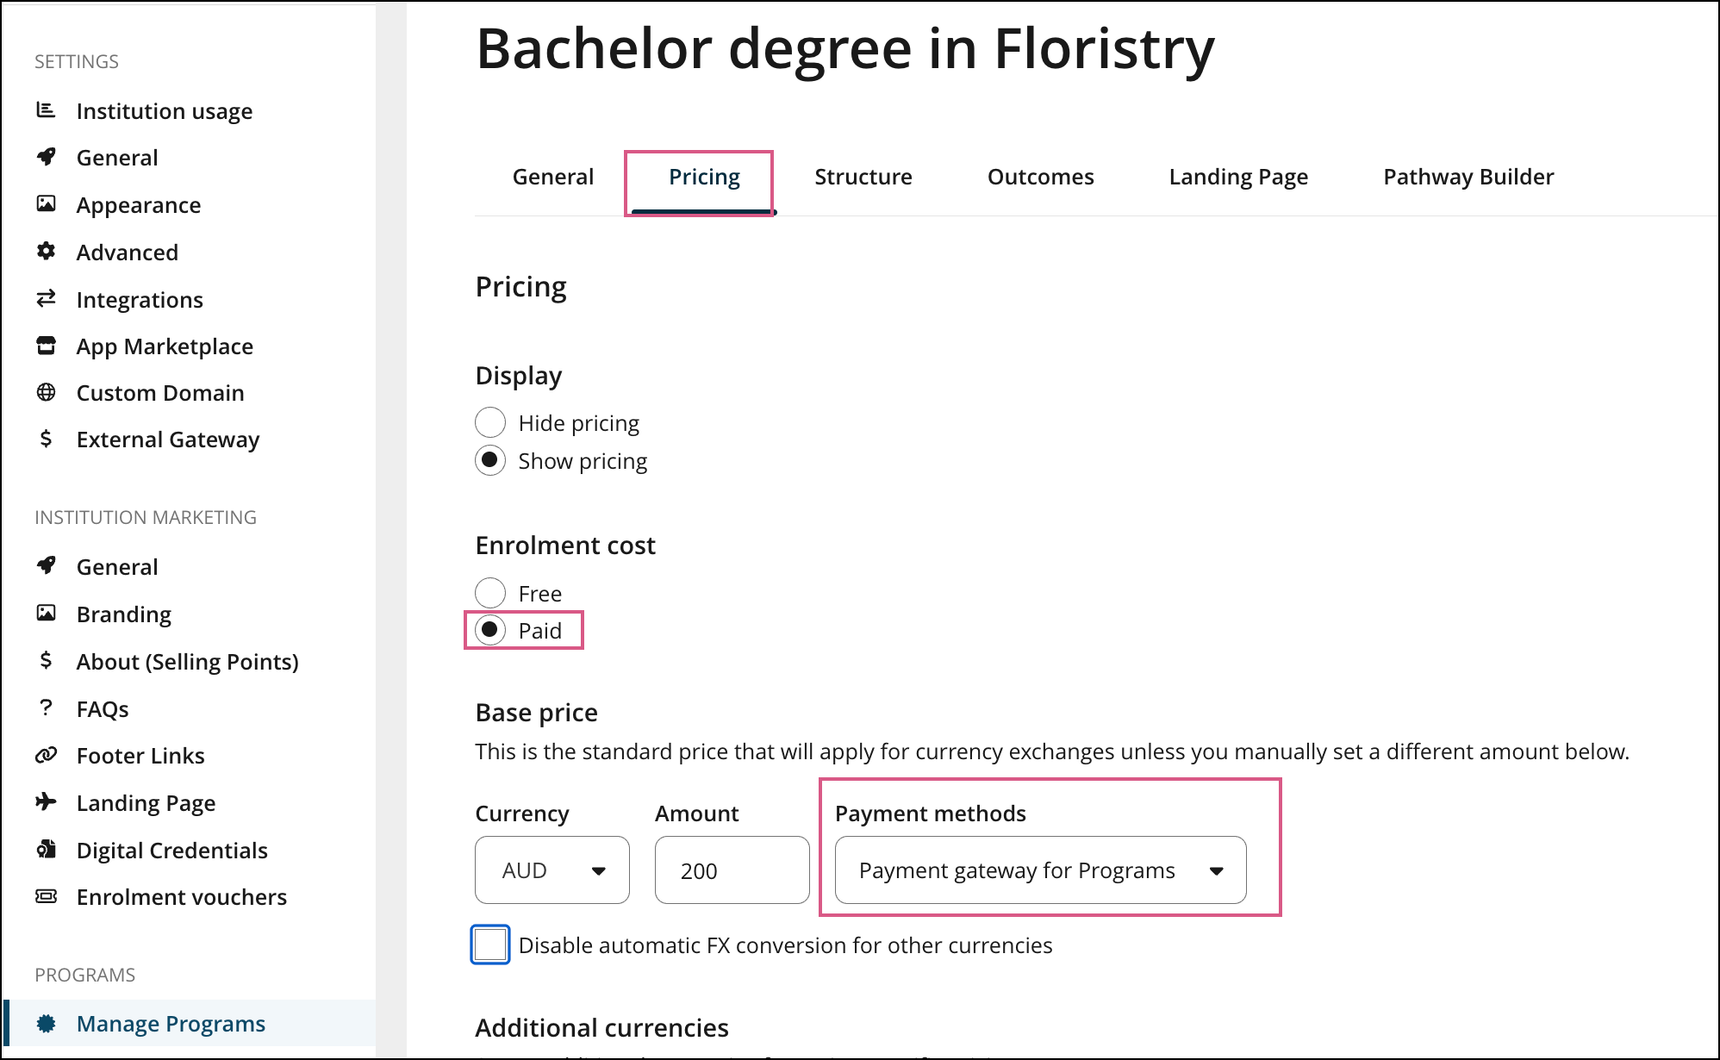
Select the gateway on your Class or Programs pricing page
Once your External Gateway is saved, you can apply it to as many programs and classes as you like:
Step 1
Go to the pricing setup page for your Program or Class.
Step 2
Set the Base Price, Currency and Amount.
Step 3
Select the External Gateway you created as the payment method.
Example: Class level (Course Setup > Classes >> Class Pricing page);
Example: Program Level (Manage Programs > select Program > Pricing tab)
Step 4
Save your changes.
What your web application needs to do
When a learner requests to join a program or class that uses your External Gateway, OpenLearning sends a POST request to your Destination URL.
If Signed Data Transfer (JWT) is enabled:
Step 1
The POST request contains a JWT carrying the user, course, program and pricing data.
EXAMPLE:
For Course:
{
  "kid": "ed25519-main", // KID used to lookup public key in JWK
  "jti": "258f42cf-faac-4a18-ad90-6c5e90202488", // UUID for the JWT
  "exp": 1781044090, // Jwt expiry time in unix timestamp
  "sub": "6a1cb38b4174cc70dad899d8", // User Id
  "aud": "darren-uni", // Institution name
  "title": "cool course name", // Course name
  "course": "64a2575256d0f56f96871d4d", // Course id
  "class": "64a25754b65333ee1a4e01b7", // Class id
  "currency": "AUD", // Empty if free course
  "price": "33", // Empty if free course
  "access_code": "", // Access code if any
  "redirect_url": "https://www.openlearning.com/..." // Url to redirect back
}
For Qualification:
{
    "kid": "ed25519-main", // KID used to lookup public key in JWK
    "jti": "258f42cf-faac-4a18-ad90-6c5e90202488", // UUID for the JWT
    "exp": 1781044090, // Jwt expiry time in unix timestamp
    "sub": "6a1cb38b4174cc70dad899d8", // User Id
    "aud": "darren-uni", // Institution name
    "title": "cool qualification name", // Qualification name
    "program": "64a25754b65333ee1a4e01b7", // Qualification id
    "currency": "AUD", // Empty if free
    "price": "33", // Empty if free
    "redirect_url": "https://www.openlearning.com/..." // Url to redirect back
}
Step 2
Retrieve the public keys from the Public Verification URL (JWKS) and validate the JWT's signature (Ed25519).
Step 3
Direct the learner to your payment gateway
Step 4
Upon successful payment, call the OpenLearning API to enrol the learner.
Step 5
Redirect the learner back to the OpenLearning course.
If Signed Data Transfer (JWT) is not enabled:
The following template variables can be used to customise the course enrolment URL:
$user_name - the user’s full name
$user_id - the user’s OL user ID
$course - the course title
$course_id - the course’s OL ID
$class_id - the OL ID of the class they might be enrolling into
$context - the name of the institution, if there is one
$price - price
$currency - currency
$access_code - access code
The following template variables can be used to customise the program enrolment URL:
portal_pathuser_idqualification_idinstitution_idexternal_user_idpricecurrency
If the URL entered has any of these template variables within the URL, Openlearning will replace each with the respective value automatically.
e.g.
https://www.example.com/$context?user=$user will link to:
https://www.example.com/hogwarts?user=Harry%20Potter
A note for existing courses
All external gateways that were previously set up inside individual courses have been migrated to the new External Gateway page in your Institution Settings. Each migrated gateway is named after the class and course it originally belonged to, so you can identify it easily.
All existing courses that already use an external gateway as a payment method remain fully usable and have not been affected by this change. You don't need to do anything to keep them working.
Building the Integration Layer
A learner visiting the course landing page and clicking any of the "Join now" buttons will perform a POST request to your web application.
This POST request will send a form parameter named "jwt" containing the JSON Web Token.
i.e. the user pressing this button is the equivalent of submitting the form:
<form method="POST" action="{your External Enrolment URL}">
  <input type="hidden" name="jwt" value="{the value of the JWT}"/>
</form>
Upon your web application receiving the JWT it will need to verify the authenticity of the JWT using the public key provided in step 1. using the algorithm from the JWT (RS256 for the migrated ones or EdDSA for others).
e.g
# Python
import jwt
token_data = jwt.decode(token, public_key, algorithm="EdDSA")
# NodeJS
var jwt = require('jsonwebtoken');
var tokenData = jwt.verify(token, publicKey, algorithms=["EdDSA"])
The JWT will provide the following claims:
For course:
{
  "kid": "ed25519-main", // KID used to lookup public key in JWK
  "jti": "258f42cf-faac-4a18-ad90-6c5e90202488", // UUID for the JWT
  "exp": 1781044090, // Jwt expiry time in unix timestamp
  "sub": "", // User Id
  "aud": "", // Institution name
  "title": "", // Course name
  "course": "", // Course id
  "class": "", // Class id
  "currency": "AUD", // Empty if free course
  "price": "33", // Empty if free course
  "access_code": "", // Access code if any
  "redirect_url": "https://www.openlearning.com/..." // Url to redirect back
For qualification:
{
    "kid": "ed25519-main", // KID used to lookup public key in JWK
    "jti": "258f42cf-faac-4a18-ad90-6c5e90202488", // UUID for the JWT
    "exp": 1781044090, // Jwt expiry time in unix timestamp
    "sub": "", // User Id
    "aud": "", // Institution name
    "title": "", // Qualification name
    "program": "", // Qualification id
    "currency": "AUD", // Empty if free
    "price": "33", // Empty if free
    "redirect_url": "https://www.openlearning.com/..." // Url to redirect back
Please use the link below to find the web application example in NodeJS:
Your web application can now process the payment using your own payment gateway, and once the payment has been processed the learner can be enrolled into the relevant class using a server-side request to the OpenLearning Enrolment API:
For course: OpenLearning API - Swagger UI
For qualification: OpenLearning API - Swagger UI
e.g
POST "https://api.openlearning.com/v2.2/enrolments/"
Headers:
  Accept: application/json
  Content-Type: application/x-www-form-urlencoded
  X-API-Key: {api_key}
Body:
class={class_id}&user={user_id}
Where:
{api_key} is replaced with the API Key from your course administrator's OpenLearning account
{class_id} is replaced with the value of the "class" JWT claim, and
{user_id} is replaced with the value of the "sub" JWT claim
Upon successfully enrolling the learner into the required class, redirect the user to the URL provided in the "redirect_url" JWT claim. The learner will now have access to the course content.
 Sounds too complicated? No worries, you can use OpenLearning payment gateway to process course payments. To learn how, please refer to our article below: