TurnItIn Feedback Studio LTI 1.3 in OpenLearning
OpenLearning supports multiple technologies to provide interoperability with other systems, tools, and apps. In this article, we will be covering the Learning Tools Interoperability version 1.3 (LTI 1.3) integration with TurnItIn Feedback Studio, a plagiarism detector that identifies the similarity between students' assignments and other writings or published work.
This article is provided within OpenLearning to assist with configuring Turnitin integration. However, it is based on Turnitin’s official documentation and should be read alongside their resources.
The original Turnitin guide can be found here:
For the most up-to-date instructions and other Turnitin-related resources, please consult the official Turnitin articles here:
Pre-requisite
- An OpenLearning portal subscription with access as an institution administrator in order to set up this integration for your courses.
- TurnItIn license with access as an administrator.
Configure LTI settings in TurnItin
Step 1
If you are part of a global institution, log in to your Turnitin account as an administrator.
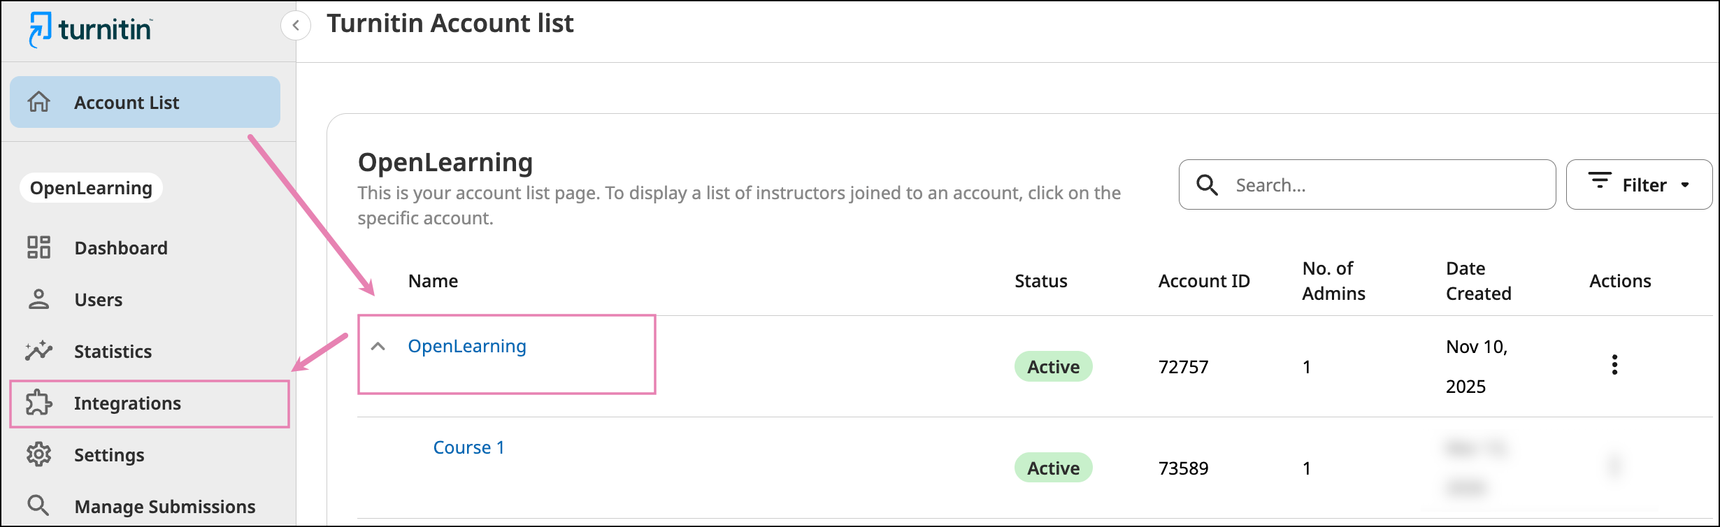
Step 2
Select the name of the account and then Integrations from the side navigation.
Example:
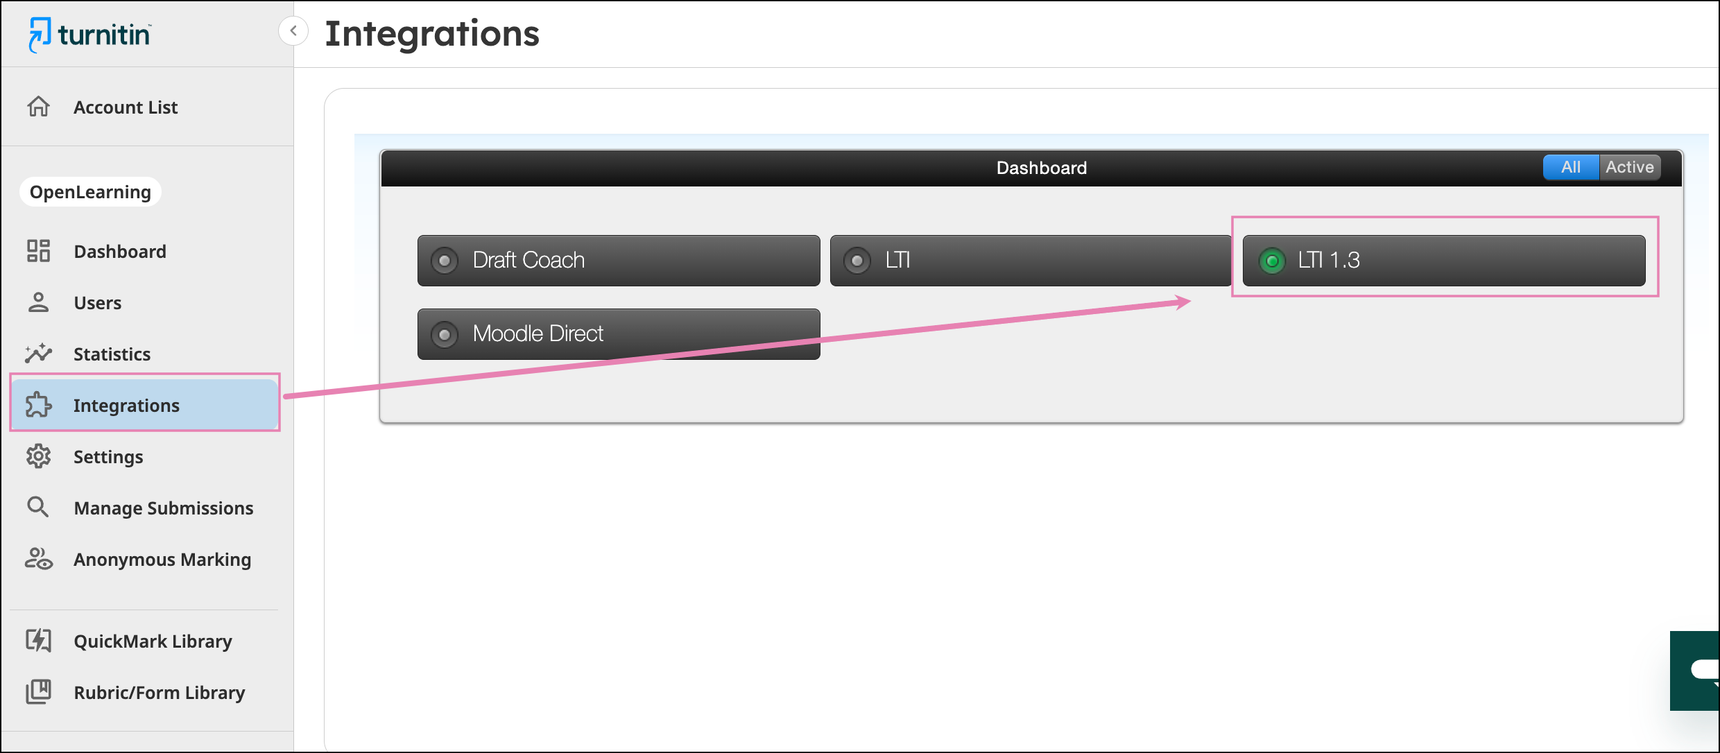
Step 3
Select the LTI 1.3 button to open the configuration page.
Step 4
Select the Get Started button to open the configuration page. Note that this will only be shown if you had'nt set up any LTI 1.3 integration prior to this.
Step 5
If you already have a pre-existing registration, select the Create new registration button from the registration dashboard.

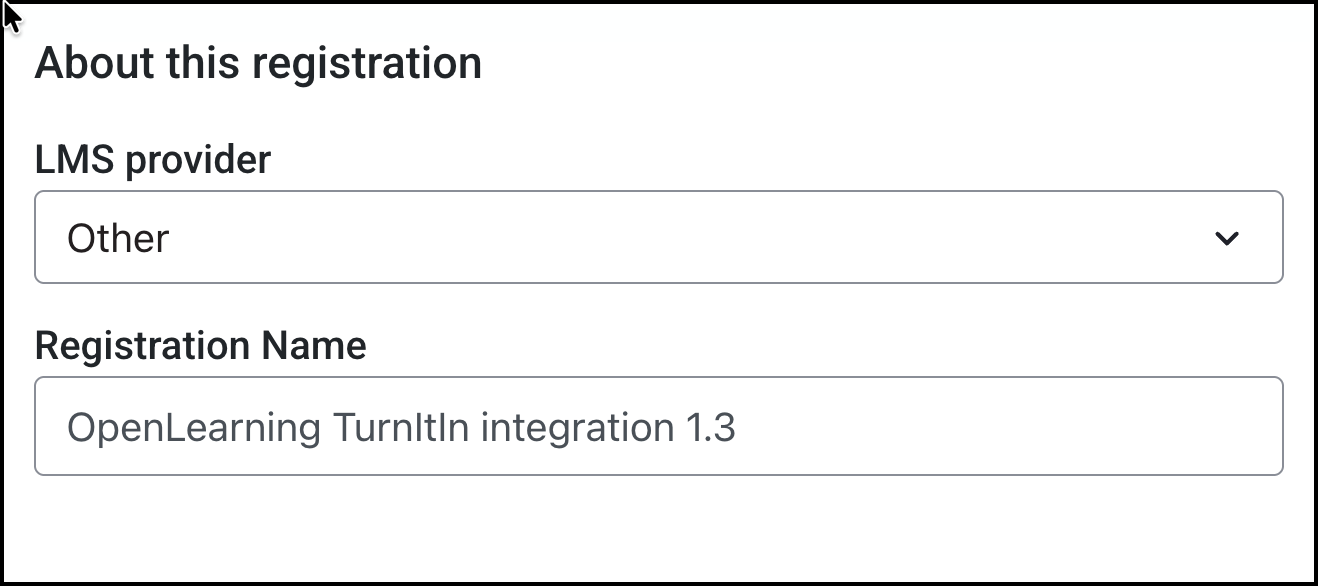
Step 6
From the LMS Provider drop-down menu, select Other and enter your registration name. This can be any name, but we recommend choosing one that clearly indicates the integration with OpenLearning. Doing so helps avoid confusion when reviewing settings, especially if multiple integrations are in place.
Step 7
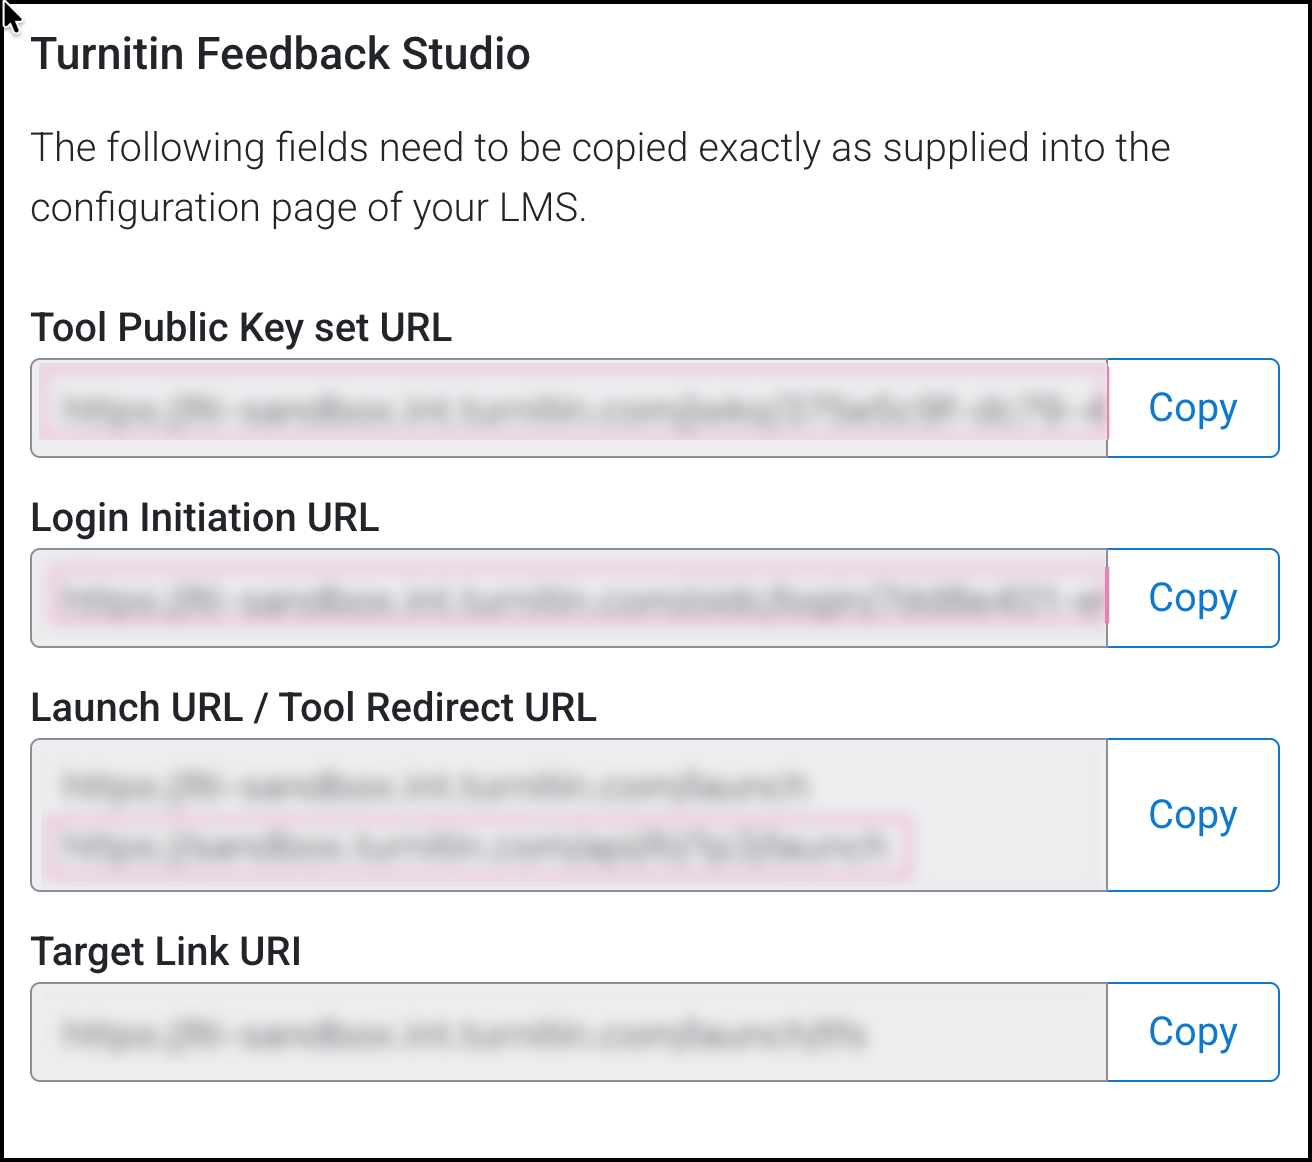
Take note of these settings as this needs to be copied over. Do not close or save the changes yet.
Configure TurnItIn Feedback Studio 1.3 in OpenLearning
Step 1
Log in to OpenLearning and navigate to your Institution Settings > Integrations.

Step 2
Scroll down to the LTI Tool Providers section and click on + Add LTI tool provider.

Step 3
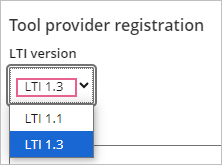
Enter the tool provider name, and on the Tool provider registration section, select LTI 1.3 for the LTI version.
Step 4
Enter the details that you copied over from TurnItIn earlier;
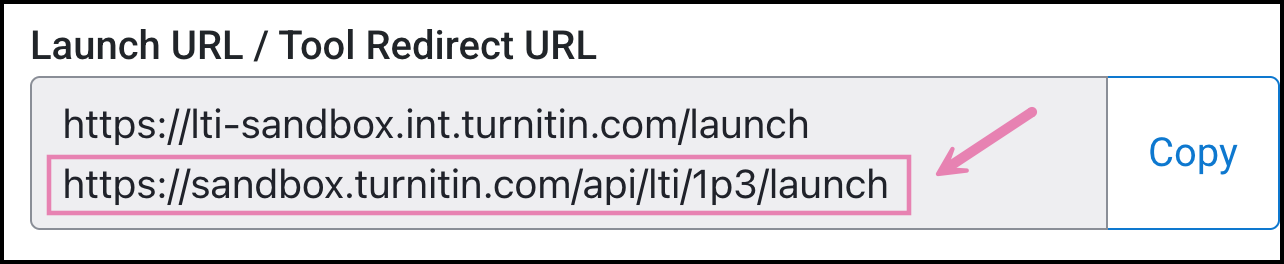
- Launch URL: Launch URL in TurnItIn
Note: Use the second URL, [TurnItIn_Instance]api/lti/1p3/launch for this connection to work: - OIDC Launch URL: Login Initiation URL in TurnItin
- Key Set URL: Tool Public Key set URL in TurnItIn
Step 5
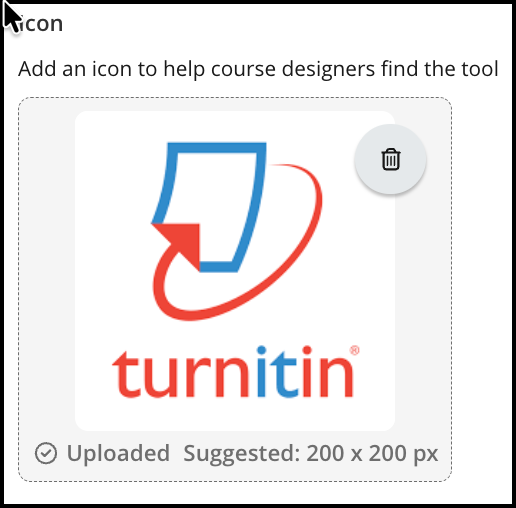
Upload the icon/thumbnail for the widget if it's not detected automatically when the Launch URL is added.
Step 6
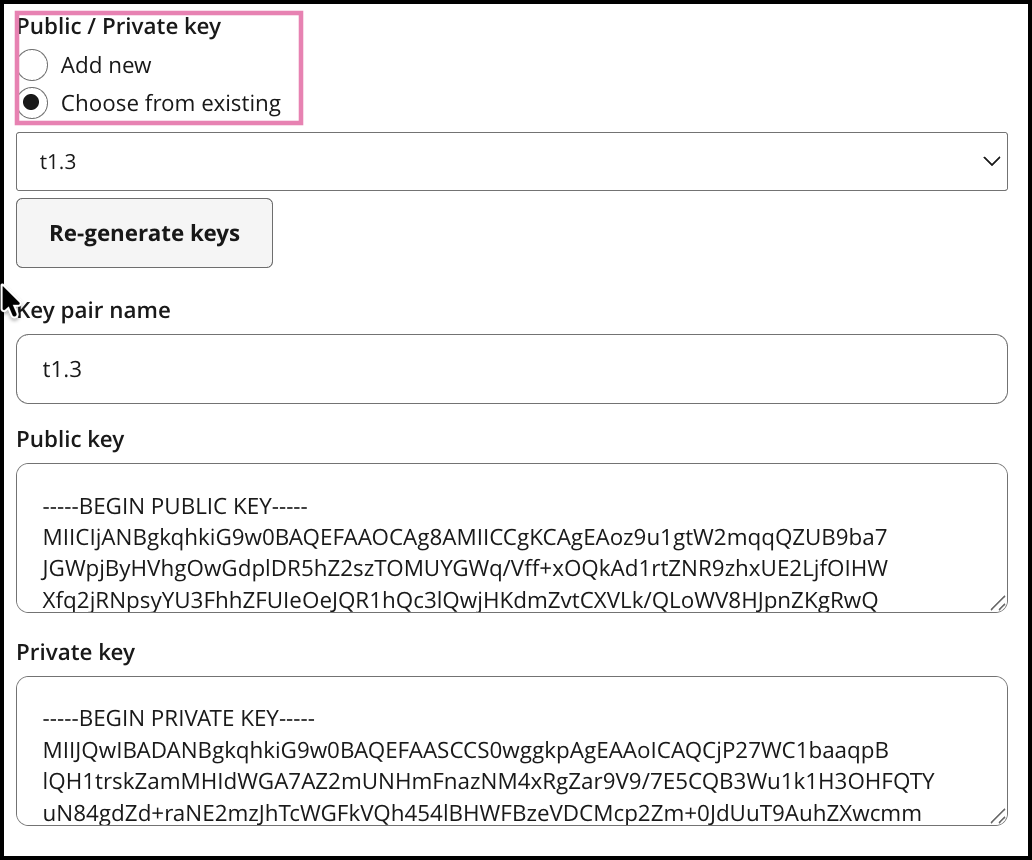
Scroll down and enter a Key pair name and click on Generate keys to get a public/ private key pair.
Step 7
Scroll down again to Advanced Settings and in the Email address identification: select Personal Email Address
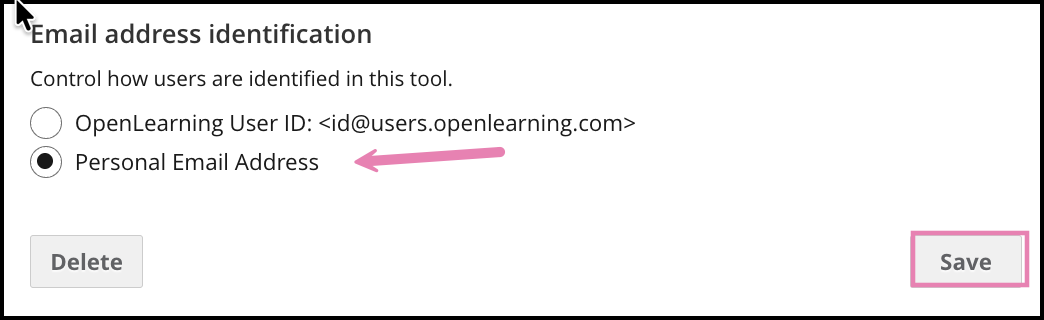
Click Save.
Step 8
Open the TurnItIn LTI connection on OpenLearning again and scroll down to the Registration details.
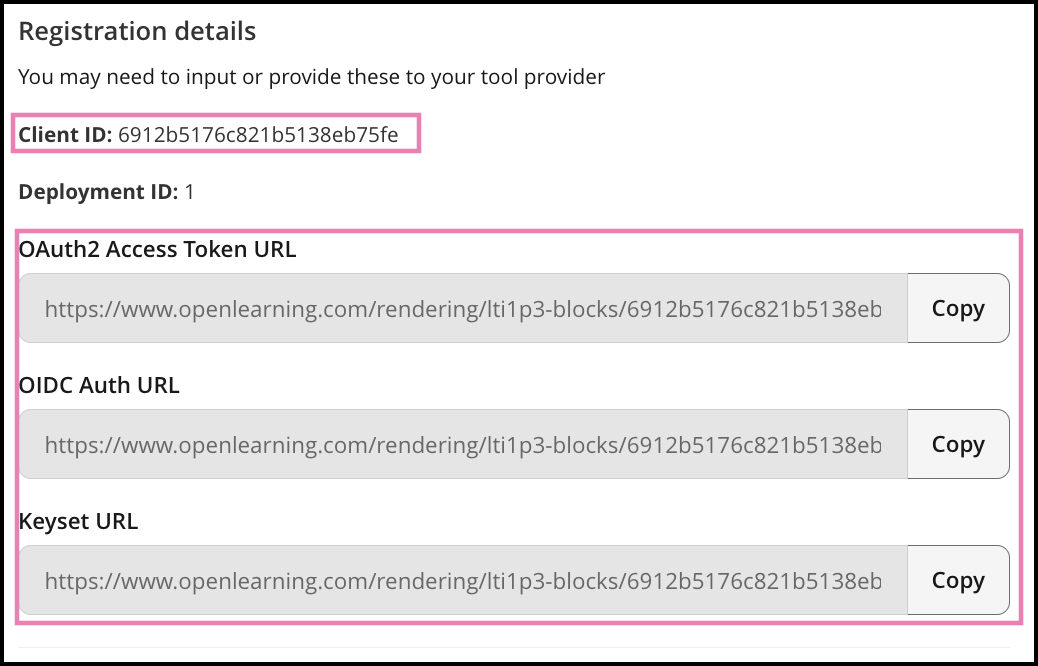
Note: Keep this tab open or copy the details here as you will need to add these into your TurnItIn dashboard.
Finalise OpenLearning integration in TurnItIn Dashboard
Step 1
Head into TurnItIn again and complete the LTI setup with the Tool Registration Details values obtained in the previous step from OpenLearning.
Platform public key set URL: Keyset URL in OpenLearning
Issuer: https://www.openlearning.com
Client ID: Client ID in OpenLearning
Access token URL: OAuth2 Access Token URL in OpenLearning
OpenID connect login endpoint: OIDC Auth URL in OpenLearning
Example:
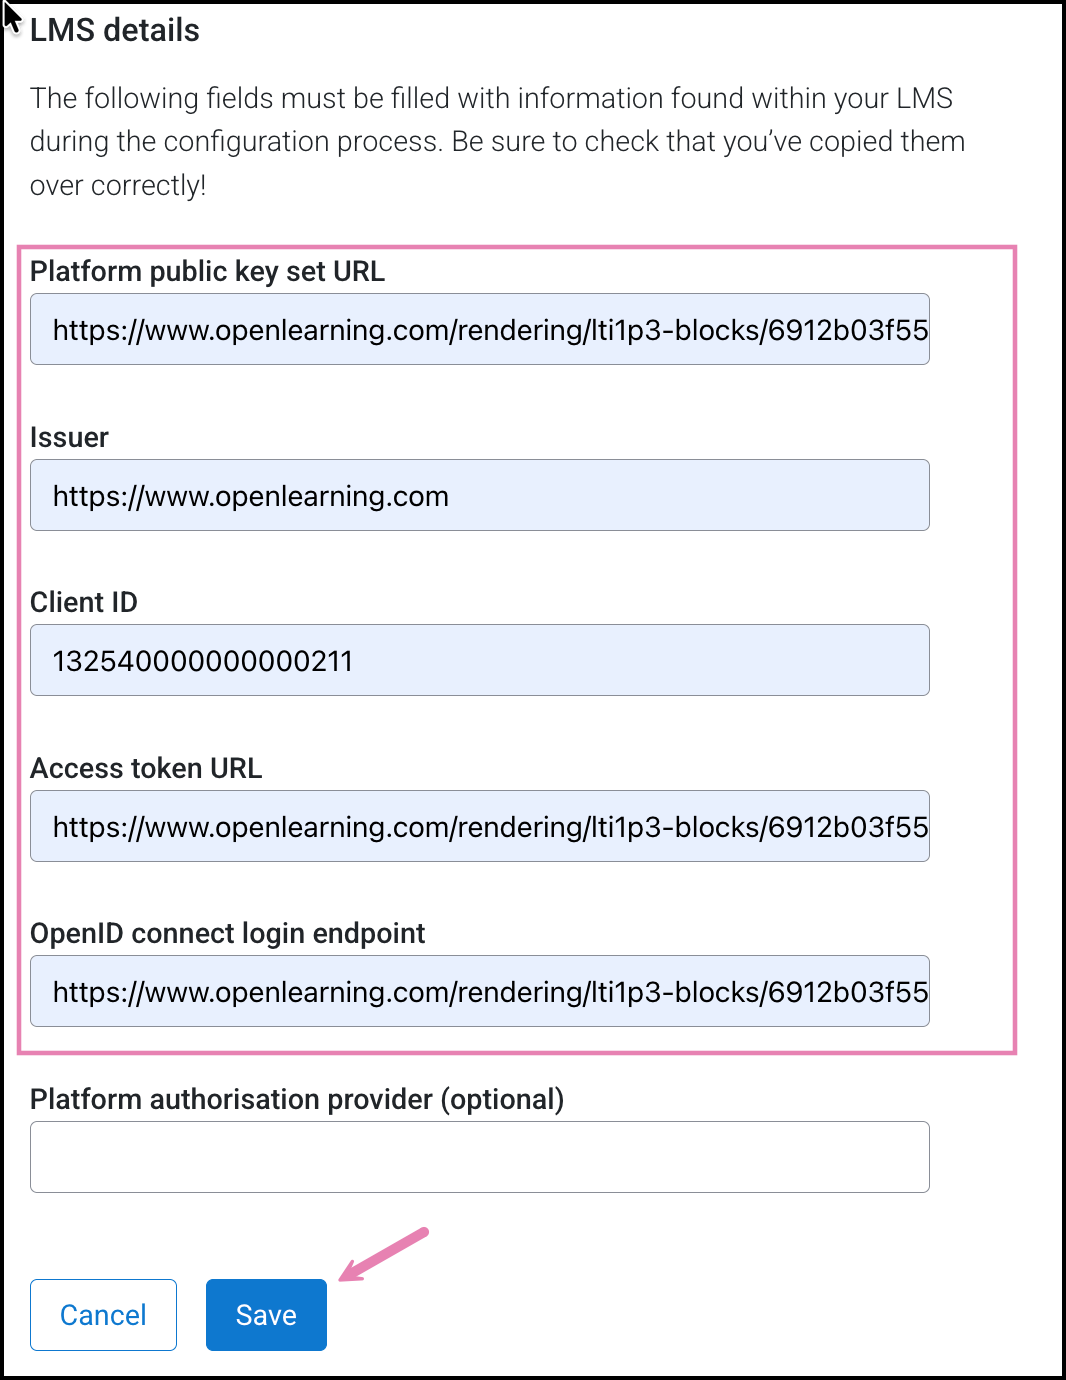
Click Save to complete the setup.
Add TurnItIn Feedback Studio LTI tool to the course in OpenLearning
Step 1
On your preferred course page, click on the Edit button to go into Edit mode.
Step 2
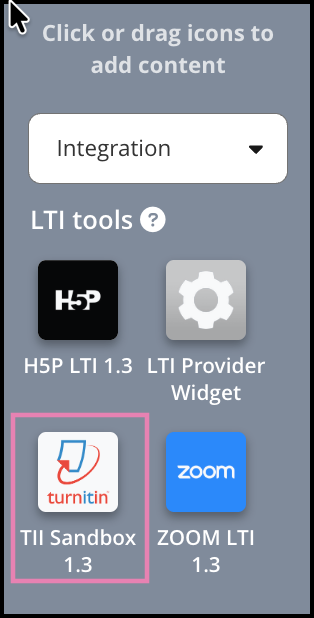
Go to the Widget menu and select Integration from the category dropdown. Click or drag the TurnItIn widget icon onto your page as with any other widget.
Step 3
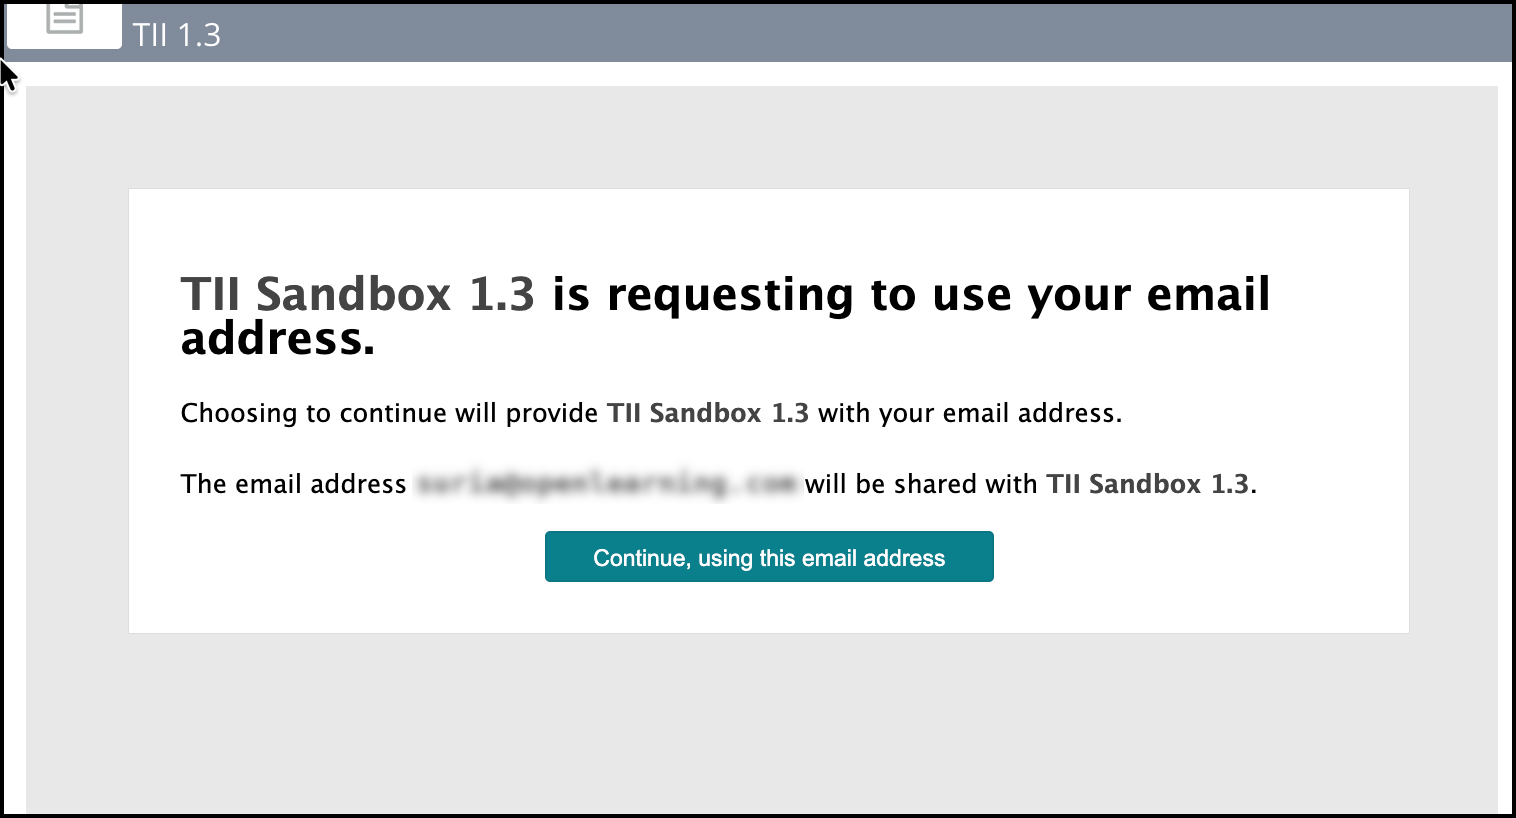
On the first launch, it will request to use your email address as per the screenshot below. Click Continue using this email address to proceed.
Step 4
When configuring a new Turnitin integration within your LMS, you must run our deployment workflow before your institution can start using the integration.
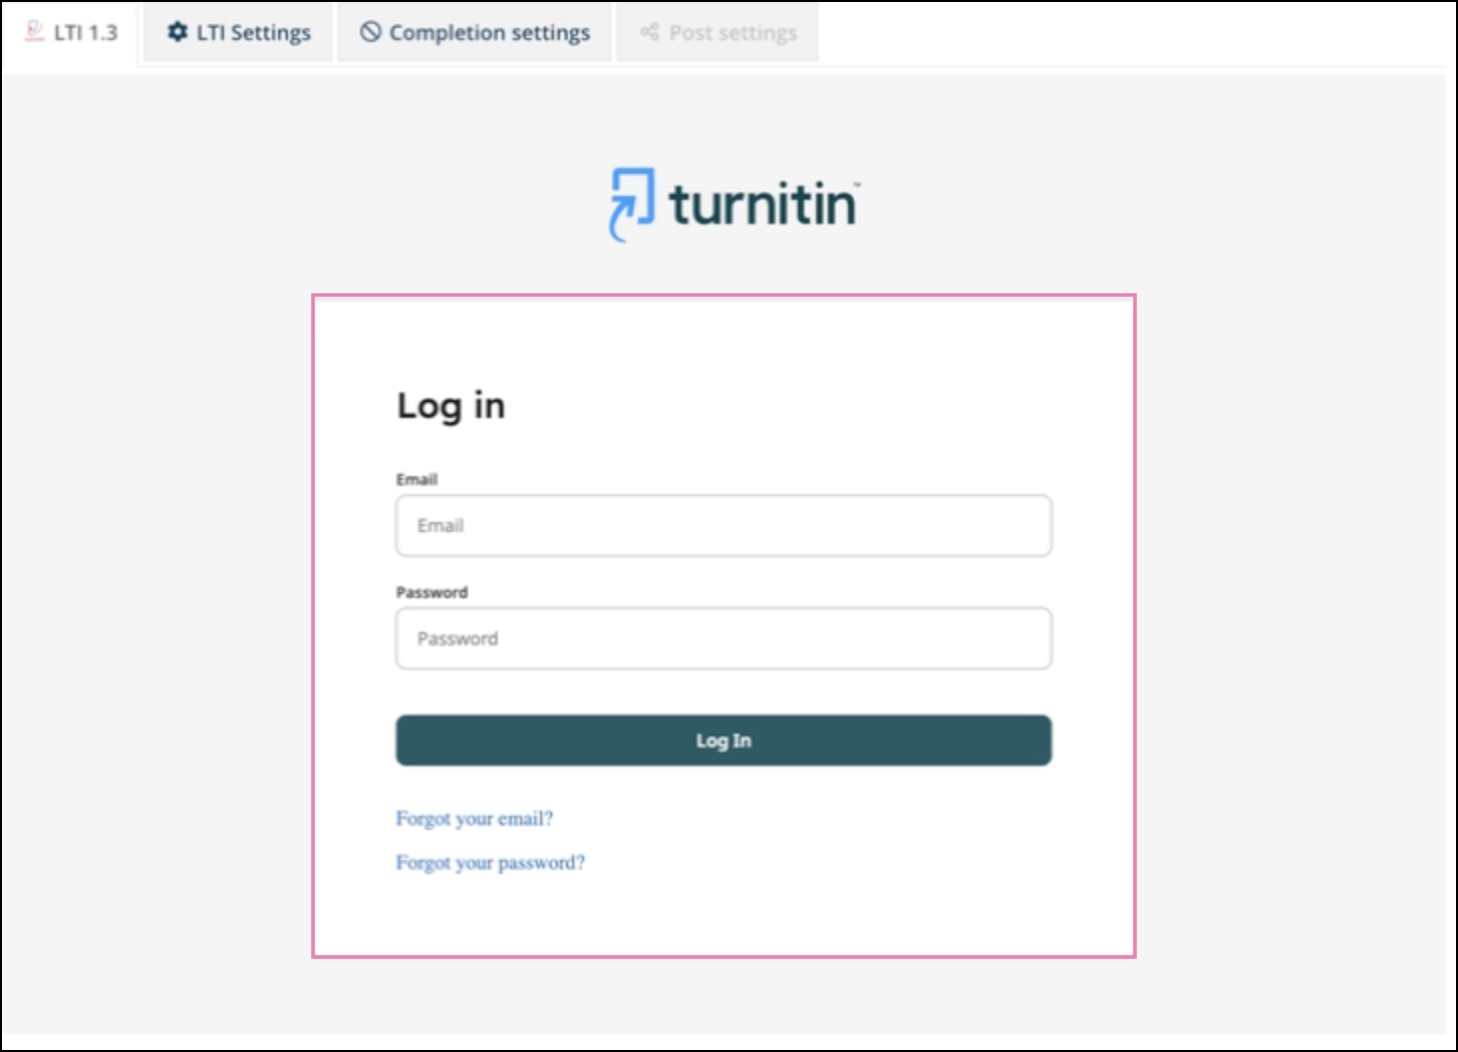
On first launch, please login to TurnItIn using your admin credentials.
Step 5
When configuring a new Turnitin integration within an LMS, you must complete Turnitin’s deployment workflow before the integration can be used.
- This workflow requires your institution’s Turnitin account administrator to link the integration to a specific Turnitin sub-account.
- The workflow will launch automatically the first time you attempt to use the integration. For this reason, we recommend creating a “dummy” assignment to complete the configuration process.
Step 6
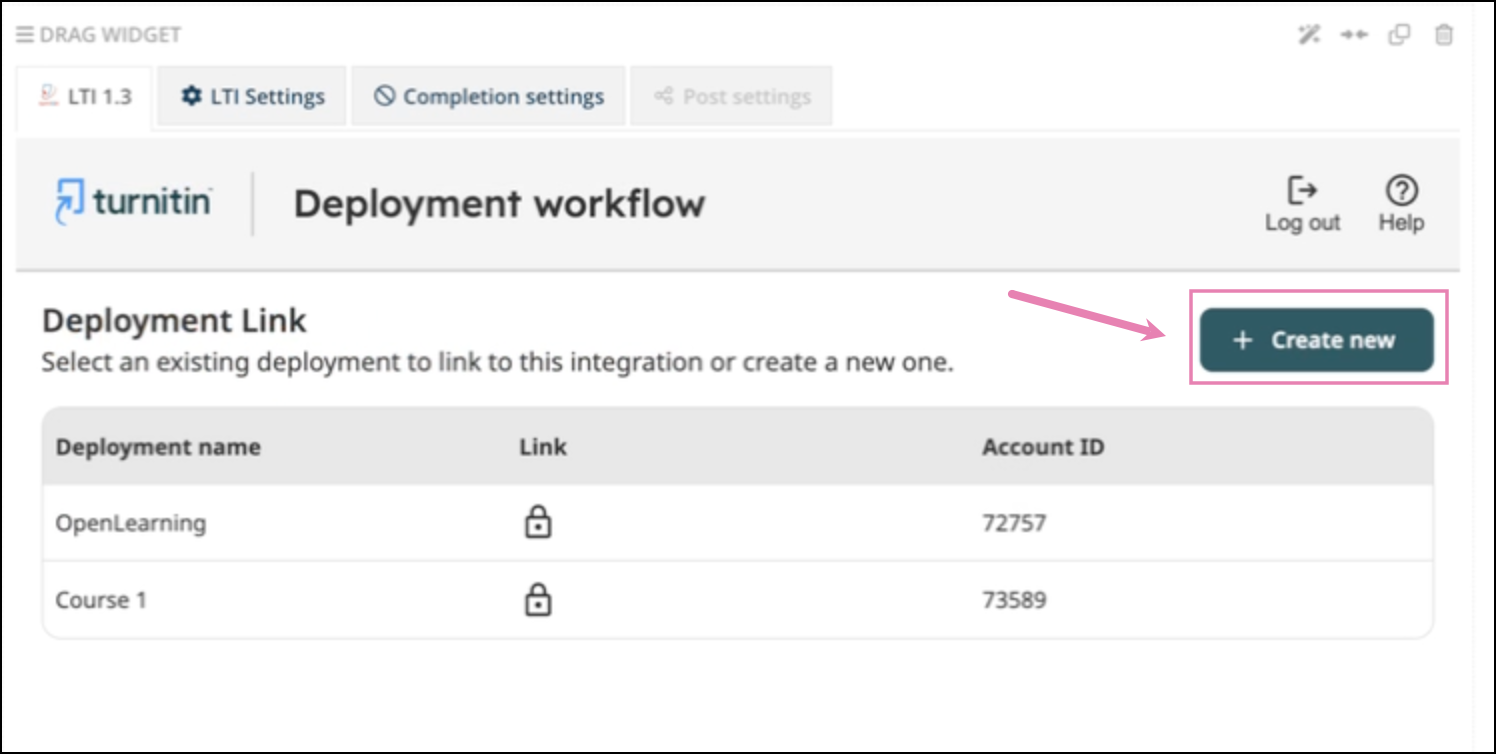
Once you have logged in to Turnitin’s deployment workflow within the widget, you will either be provided with a list of existing configurations, or the option to create a new one. If there is a lock icon in place of the link button, that configuration cannot be used for this deployment.
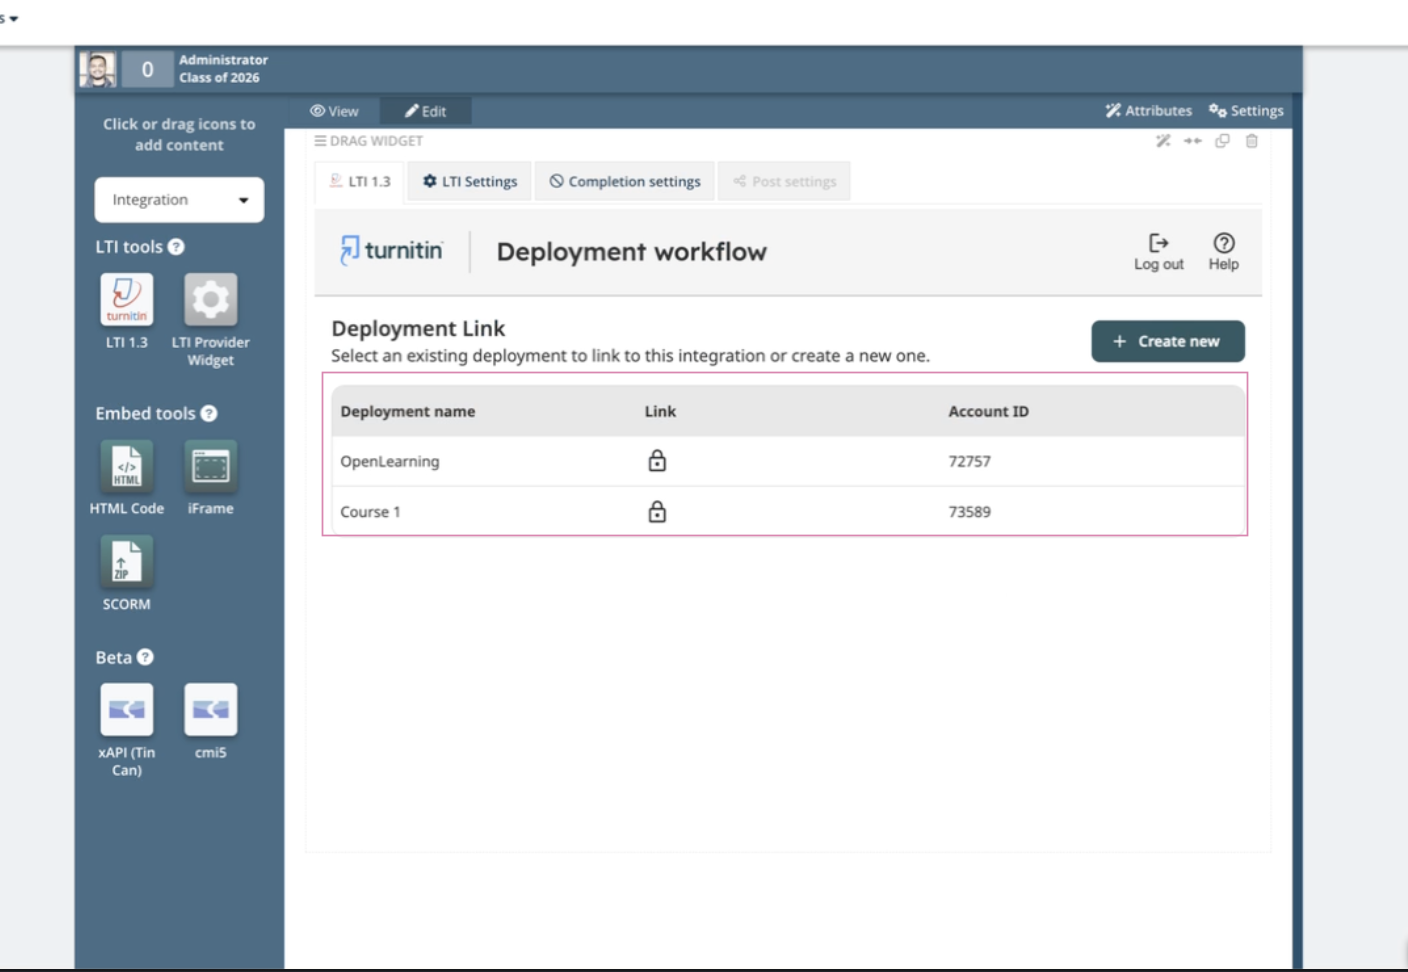
Step 6a
To create a new deployment - Select the Create New or Create Deployment button, depending on which you have available.
Step 6b
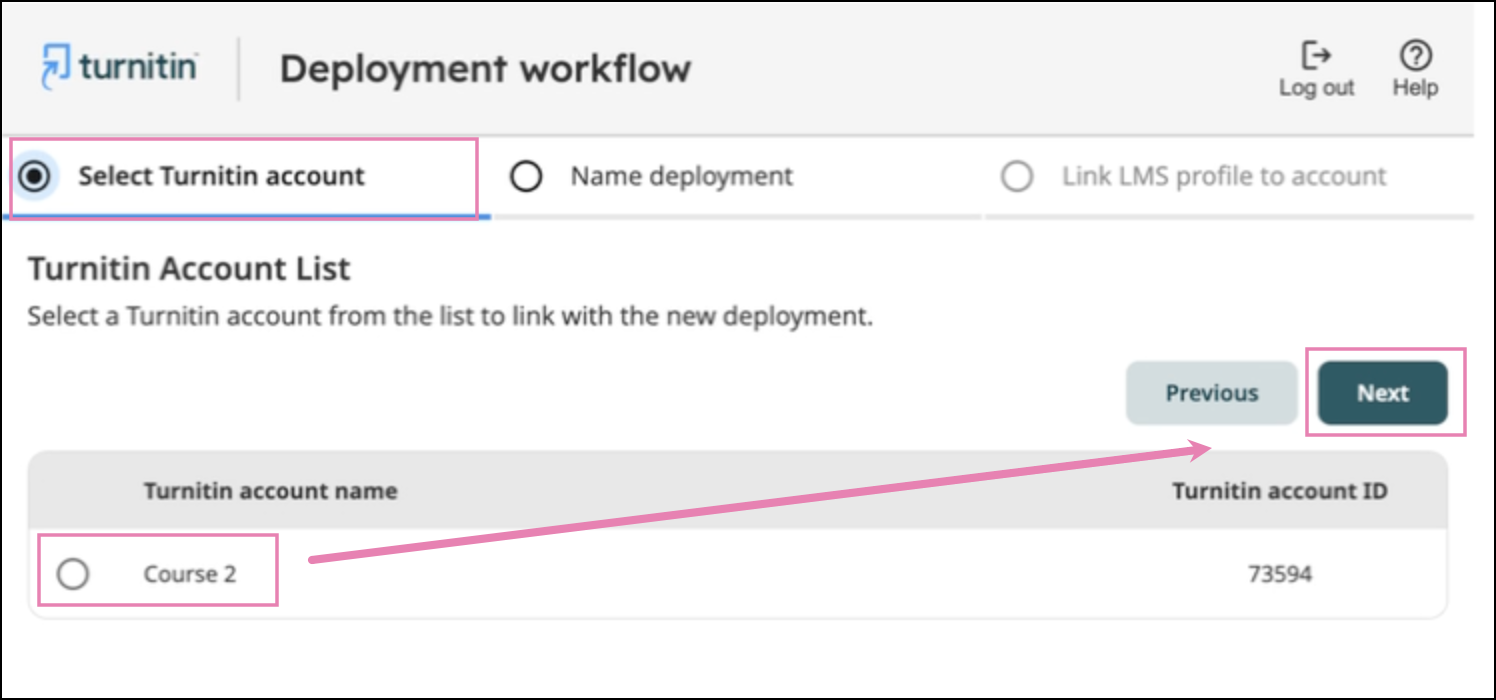
Select the Turnitin account the configuration should be registered to and select Next.
Step 7
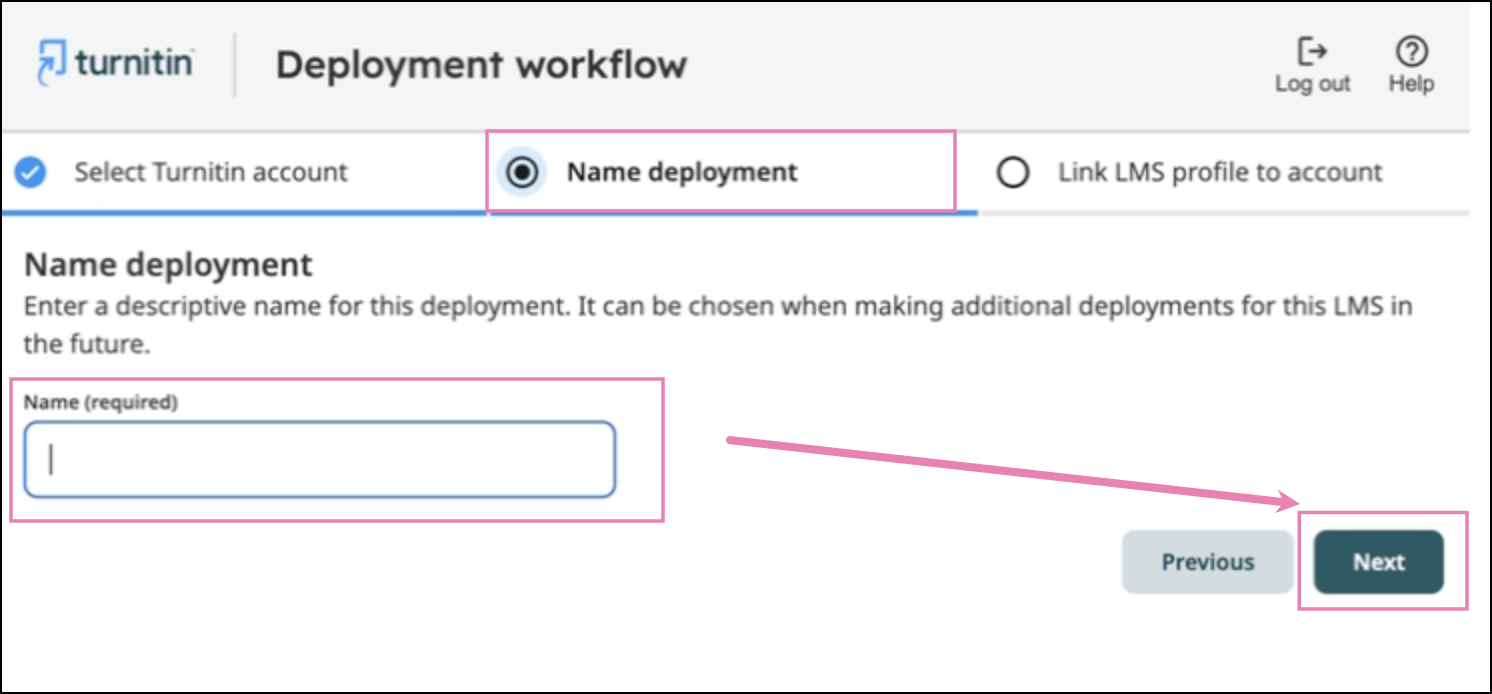
Enter a descriptive name for the deployment, as it may be listed for future configurations in OpenLearning. Select Next.
Step 8
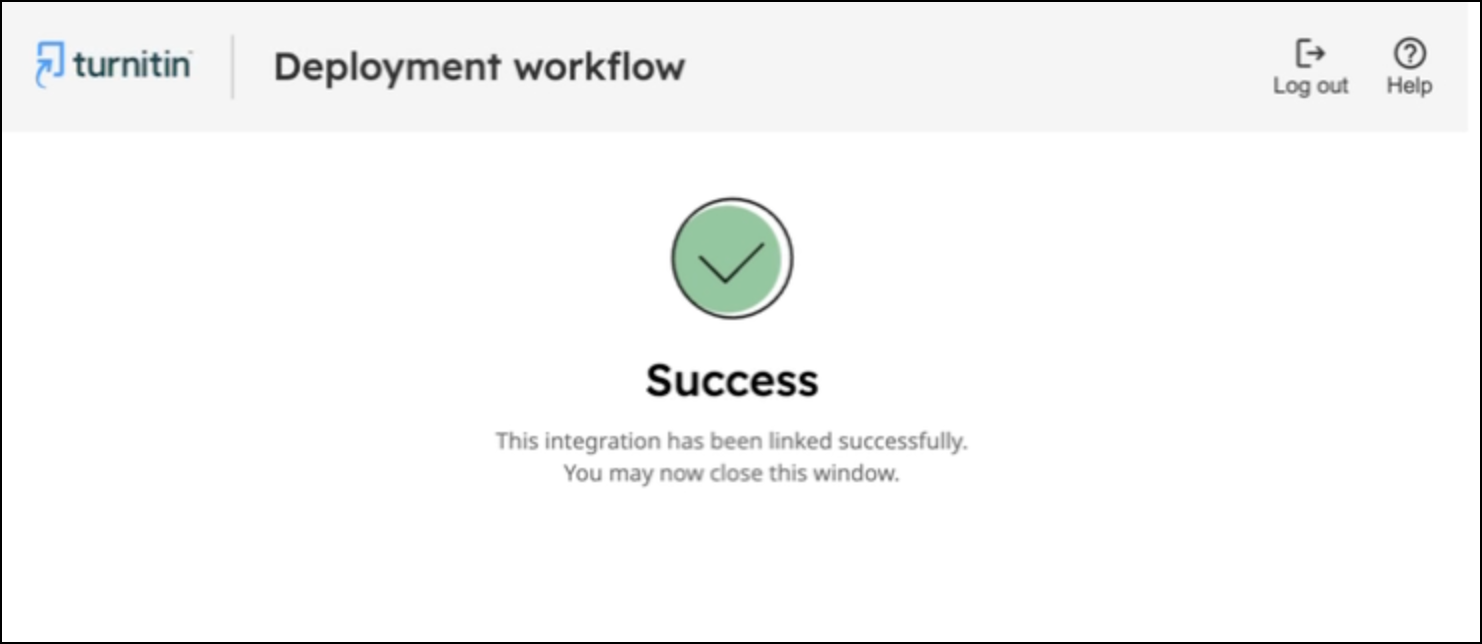
Click Confirm to complete the deployment to complete your configuration.
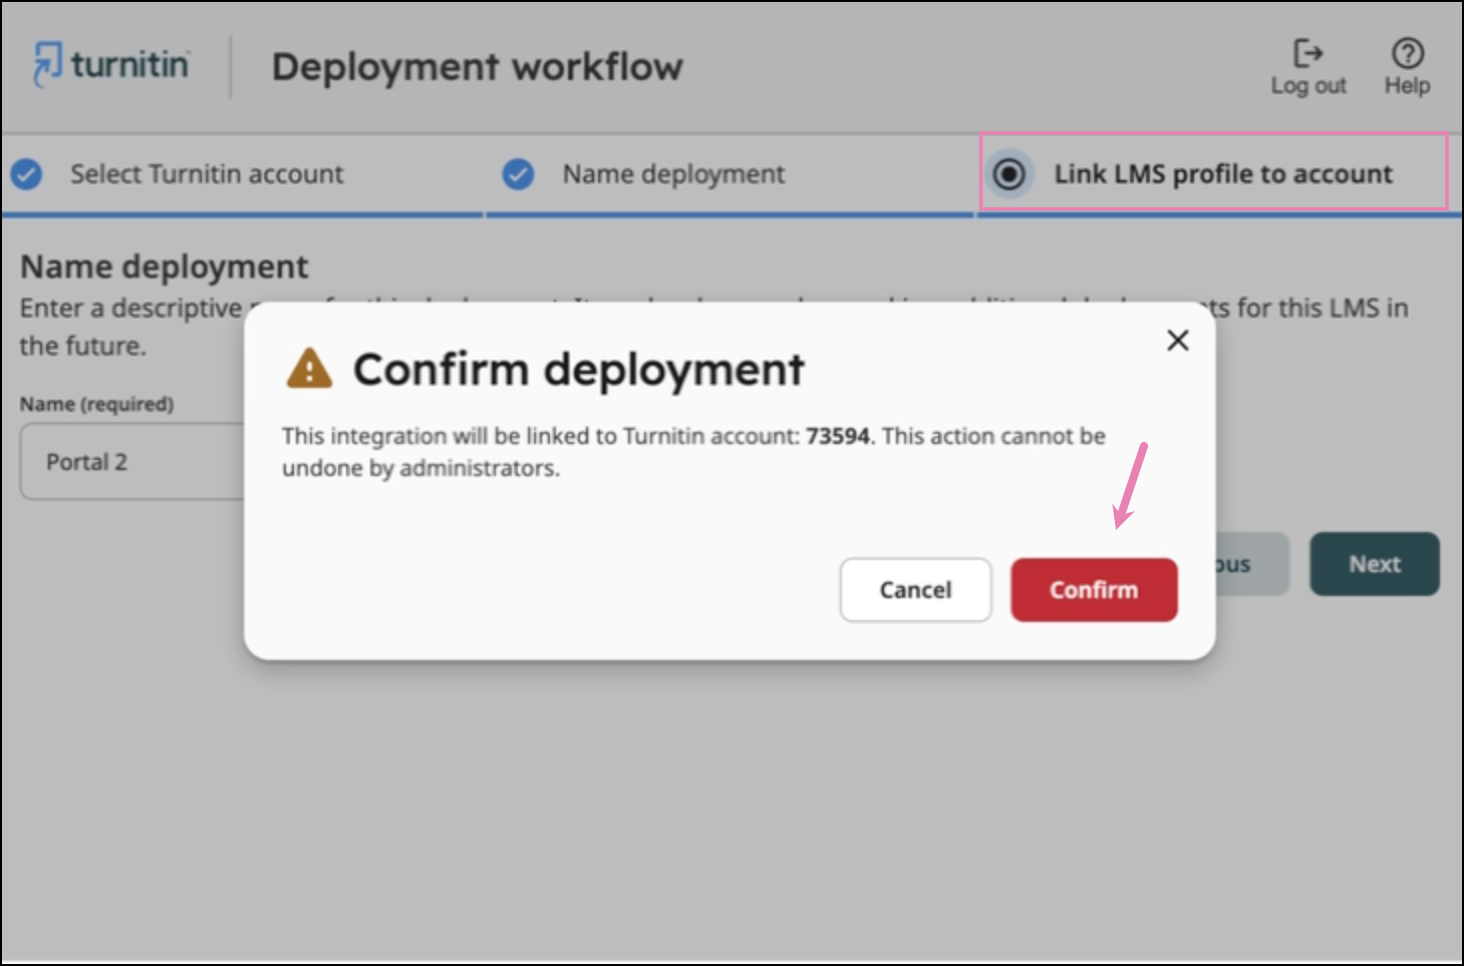
If successful, you will be prompted to log out of the deployment workflow. Reload the page now to configure the submission widget.
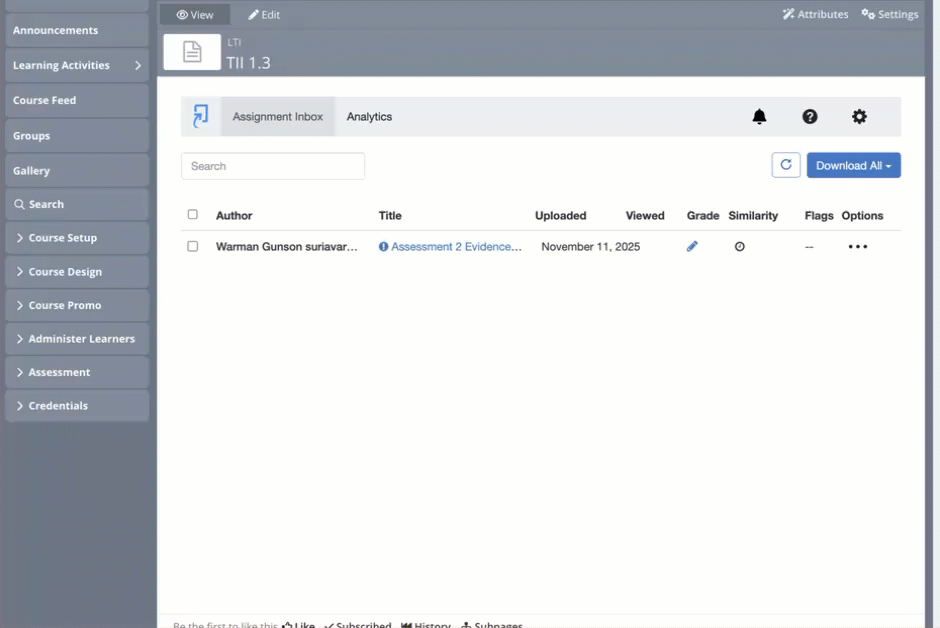
Admin view in OpenLearning
As an administrator of the course that has been included in the plan, it will give allow you to set up and make changes to the TurnItIn Submission settings.
For more detials on the available configuration, please refer to the TurnItIn guide from their site here:
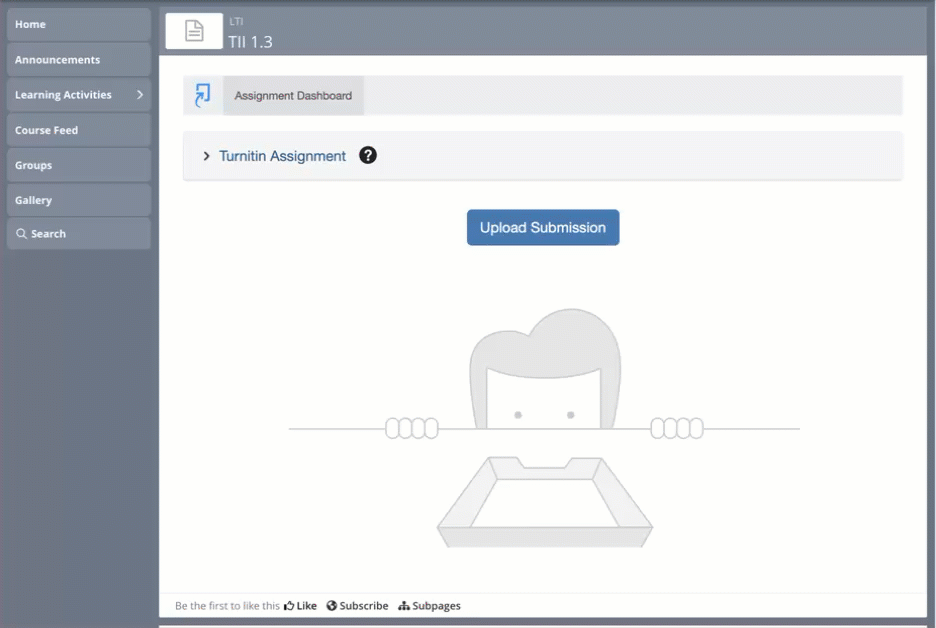
Learner view in OpenLearning
The learner will be able to upload their submission and see the specified / requirement of the TurnItIn assignment via their Assignment Dashboard.