
3. Crafting your course landing page

The course landing page is key to gaining enrolments! It's the very first connection you have with learners and is the place to market your course to potential learners.
To set up your course landing page:
Step 1
Go to Course Promo > Landing Page.
Step 2
Visual Focal Point - upload a course promotional image (recommended image size 1200 x 800 pixels) or copy/paste a Youtube / Vimeo video link.

Step 3
Add a Course Blurb. This is a short introductory sentence that should quickly catch the eye of potential learners.

Step 4
Add a Course Description. Be sure to address the following topics in your course description to better help potential learners decide if your course is right for them:
- What is the main purpose of this course?
- Who is this course for?
- Is any prerequisite knowledge required before taking this course?
- How will taking this course help the learner in their everyday life?
It should be written in a way that is engaging, enticing, and provides learners with the key details they need to know to enroll. Include a course summary, your learning outcomes, and an overview of your modules.
The more interesting and enticing that this is written, the bigger chance you have of boosting learner enrolments.

Step 5
Add any additional information regarding your certification in the text box below.

Step 6
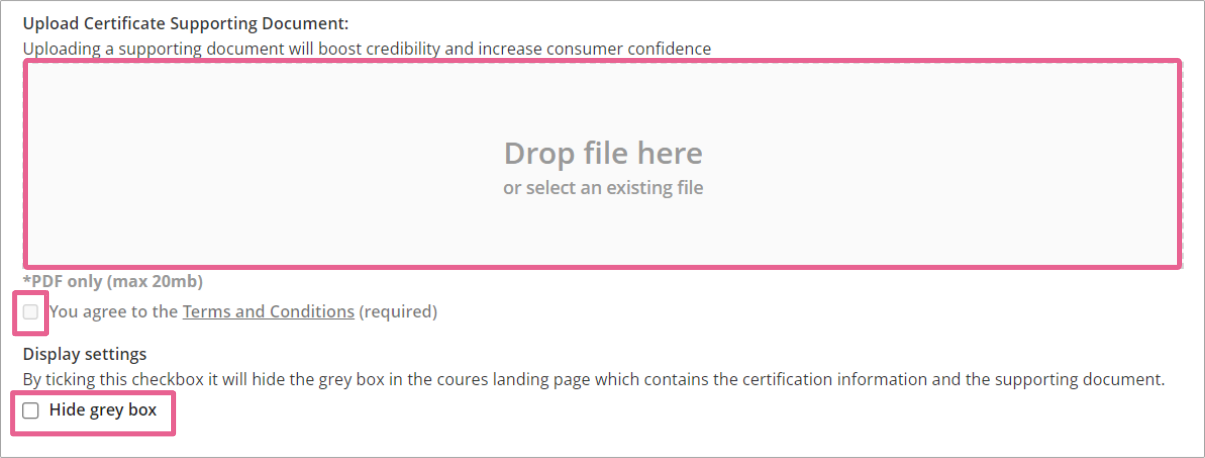
If your course offer a certificate, you can upload a supporting document (.pdf) that will increase the credibility of your course' credential. Please make sure to tick the terms and conditions button to continue and click on the Save button at the bottom of the page when you are done.
If you don't want to display this section on your course landing page, tick the Hide grey box checkbox.
If you decide to display this section, this is how the end result would look like.

Step 7
Choose the default Featured Class that you wish for learners to be enrolled in when they choose to join your course.
Note: By default, each course comes with a Featured Public Class. However, you can create a new class and set it as your default Featured Class.

Step 8
Make sure your Course Outcomes are properly set up in Course Setup > Outcomes as these will appear on your Landing Page as well.

If you choose to fill out the Outcomes Summary section as well, please do not repeat the same information as is already included in your Outcomes page. Otherwise, all the information will appear twice on your Landing Page.
Step 9
If necessary, add info to the Further Information section. This would be a great spot to outline your course or add any contact info you may have in case learners need assistance completing the course.

Step 10
Choose to hide or display the price of your course on your landing page by selecting one of the options here;
- Default (Show Cost)
- Hide cost
- Custom format (This will allow you to set up a custom text for the cost. To set this up, please refer to our article linked here.)

Step 11
Add course staff by typing their display names or profile names into the bar and clicking on them when they pop up.

You can show or hide staff information by selecting the appropriate radio button.
Make sure to click Save once you're finished!
![]()
Note: The platform will show course staff information by default if the course is created via the standard UI, such as the "Create a Course" section or via the Institution portal.
However, if the course is created via the API, the default setting will be Hide. If the setting is Show, the behaviour of requiring at least one person on the list remains the same.
Step 12
Click View Landing Page in order to see what your landing page will look like to potential learners. Use this opportunity to see if things are looking good and to go back and make any changes as needed.

1 reply
-
done