
How do I set up automatic grading assessment? (quiz activity)
Things to check before setting up
- Before configuring Gradebook, you must first have set up the correct permissions in roles Learn more about roles
- You must also have specified your course outcomes. Learn more about course outcomes
- Please make sure that you are able to see the Assessment tab in your course’s sidebar. The Assessment tab will appear to a Course Admin, Assessor and Assessment Designer.

How do I create a quiz activity?
Step 1
Go to Assessment > Gradebook

Step 2
Click Add grade item>Quiz activity

Step 3
Select the page containing your quiz activity. Enter the name and description for the quiz activity, then click Add to gradebook.

Step 4
This will take you to the main Gradebook section. In this section, you need to set up the following:
1) Weight: Assign the weight or score for your grade items.
2) Visibility: Select the appropriate visibility setting for your learners' view. The default visibility of the item is Full report. The other options available are Full report on release, Score only and Hidden.

3) Action: Click the three dots, select Edit to continue modifying your grade item report, or choose Delete to remove the grade item.

How do I edit the quiz activity grade item?
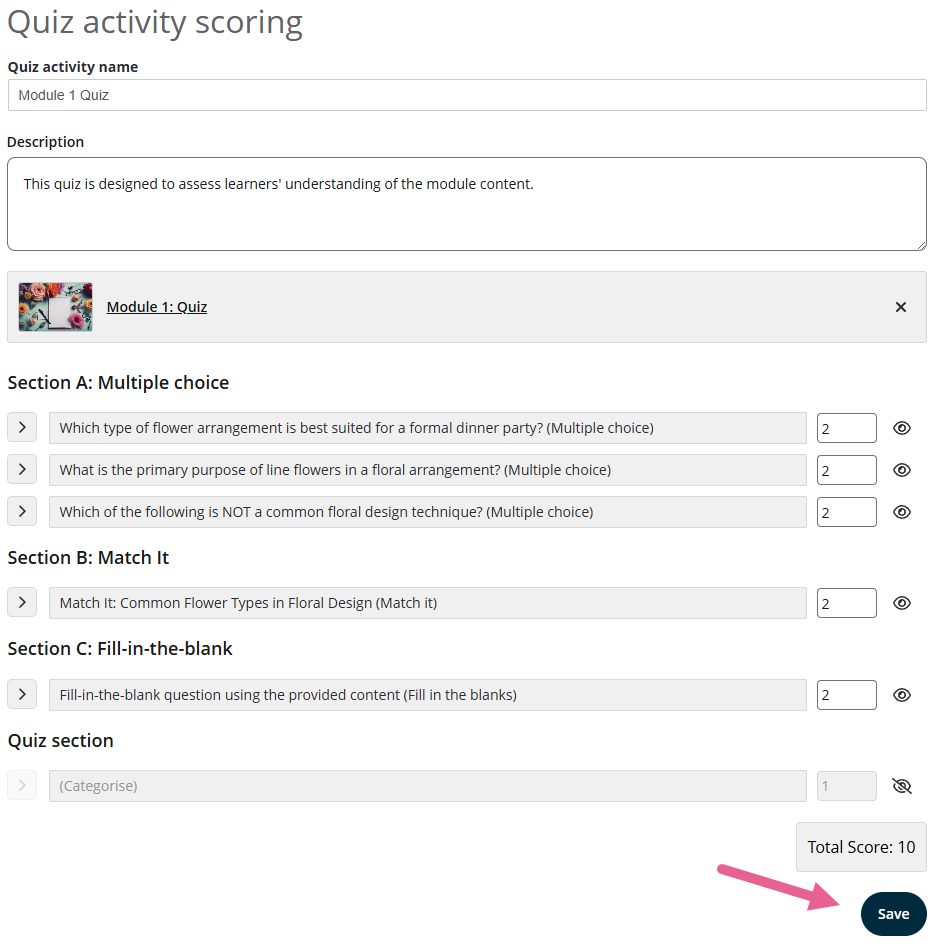
Clicking Edit will open the Quiz activity scoring page. Here you will see:
- Quiz activity name: The name of your grade item report will appear here. You can edit it if you wish.
- Description: The description of your grade item report will appear here. You can modify the description here if you want.
- Add a quiz page: You can view the page where the quiz is located. You also have the option to change the quiz page by clicking 'X' and adding a new one.
- Quiz section: This is the quiz section, a container that hosts multiple quizzes based on how you set them up on your quiz page. To learn more about the quiz section, click here.
- Quiz score: You can set up your quiz score here.
- Optional evaluation: You can write an evaluation here on how you want to assess this quiz. This section is optional.
- Total score: View the total quiz activity score here.
- Save button: Don't forget to click Save after editing the report.

How do I copy existing grade items when creating a new class
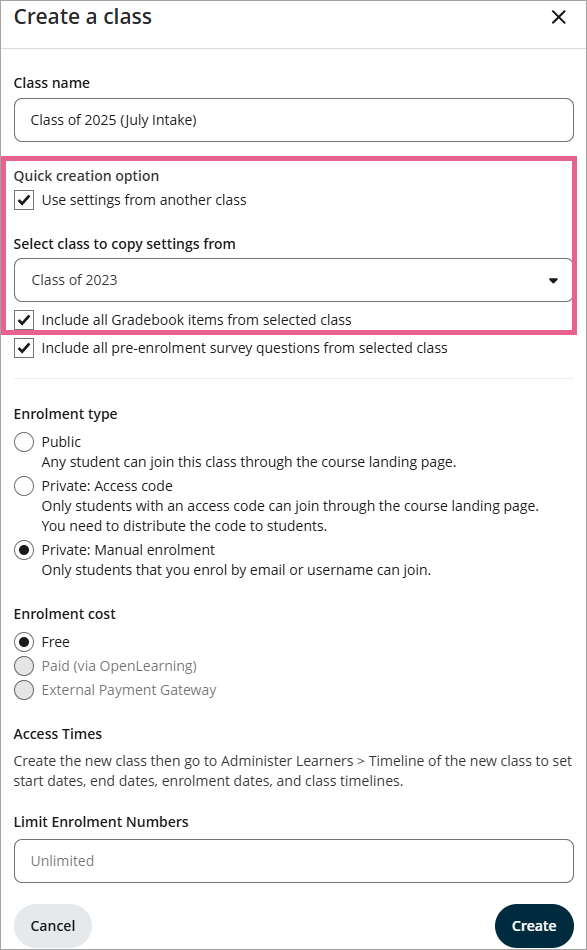
You can also choose to copy over the existing grade item when creating a new class from the Course Setup > Classes > Create a new class section by selecting the options highlighted in the screenshot below:
- Quick creation option: Tick Use settings from another class
- Select class to copy settings from
- Tick Include all Gradebook items from selected class
How are Quizzes marked?
Quizzes will be automatically marked upon submission, and results will show on the Assess Learner page immediately.
![]() Note: If you make changes to a quiz and the grades don’t update:
Note: If you make changes to a quiz and the grades don’t update:
Go to the Gradebook.
Open the Quiz activity grade item.
Click Save again.
This will re-trigger the grading process and update learners’ results
Viewing learner answers
You can click on a learner's results to see a more detailed breakdown of their score.
Click on the quiz page from within this view to see their answers in context.

It is possible to make adjustments to the total score. You may wish to use this for special consideration cases or late adjustments.
10 replies
-
How can I randomise presentation of the Multiple Choice widget answers? The first answer must be the correct one when setting up the widget, but I'd like random presentation of the possible answers to my students.
-
Hello! I've noticed that if I use the submit button at the bottom of the page, I have more settings options. Also, all checkboxes are replaced by the 'submit' button which makes it easier to complete the exam. It might be great to add this to the article as it is a useful tool, I think :)
-
Hello again! I've noticed the 'visible' button on one of the screenshots - what is this button for?
-
Tq
-
How do you work for grades in an assignment that uploads files?
-
how can I assess a group task?

