
How do I set up a Program?
What is a Program?
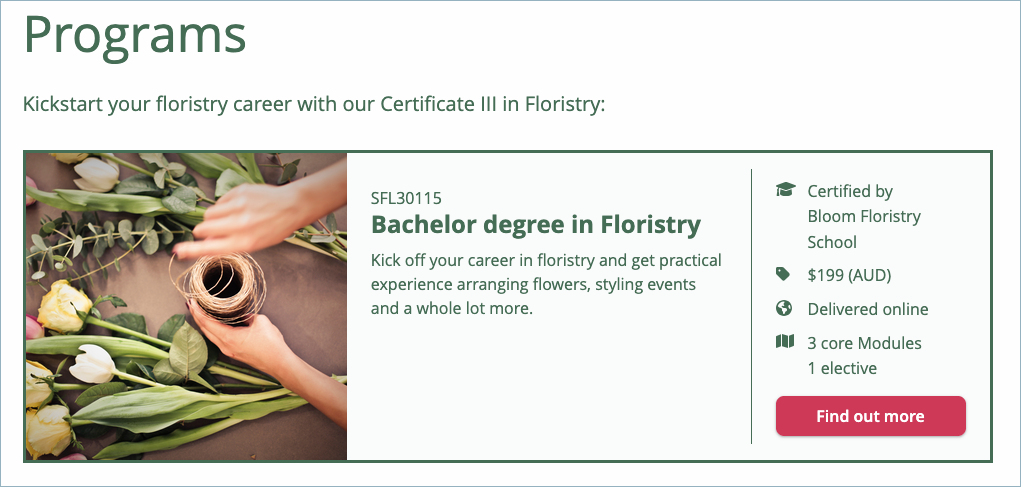
The ‘Program’ is a feature in OpenLearning that allows you to combine multiple courses into a single package where you can have both the Core (required) courses and Elective (optional) courses. Please note that the title is customisable, eg qualification, program, degree, certificate, etc.
Program Type
There are currently 7 types of programs you can set up:
- Certificates
- Diploma
- Undergraduate Degrees
- Postgraduate Degrees
- Doctorate
- Program
- Bundle
What can I set in a program?
For each program, you can set up the following:
- General
- Pricing
- Structure
- Outcomes
- Landing Page (can be selected only when a program has been created)
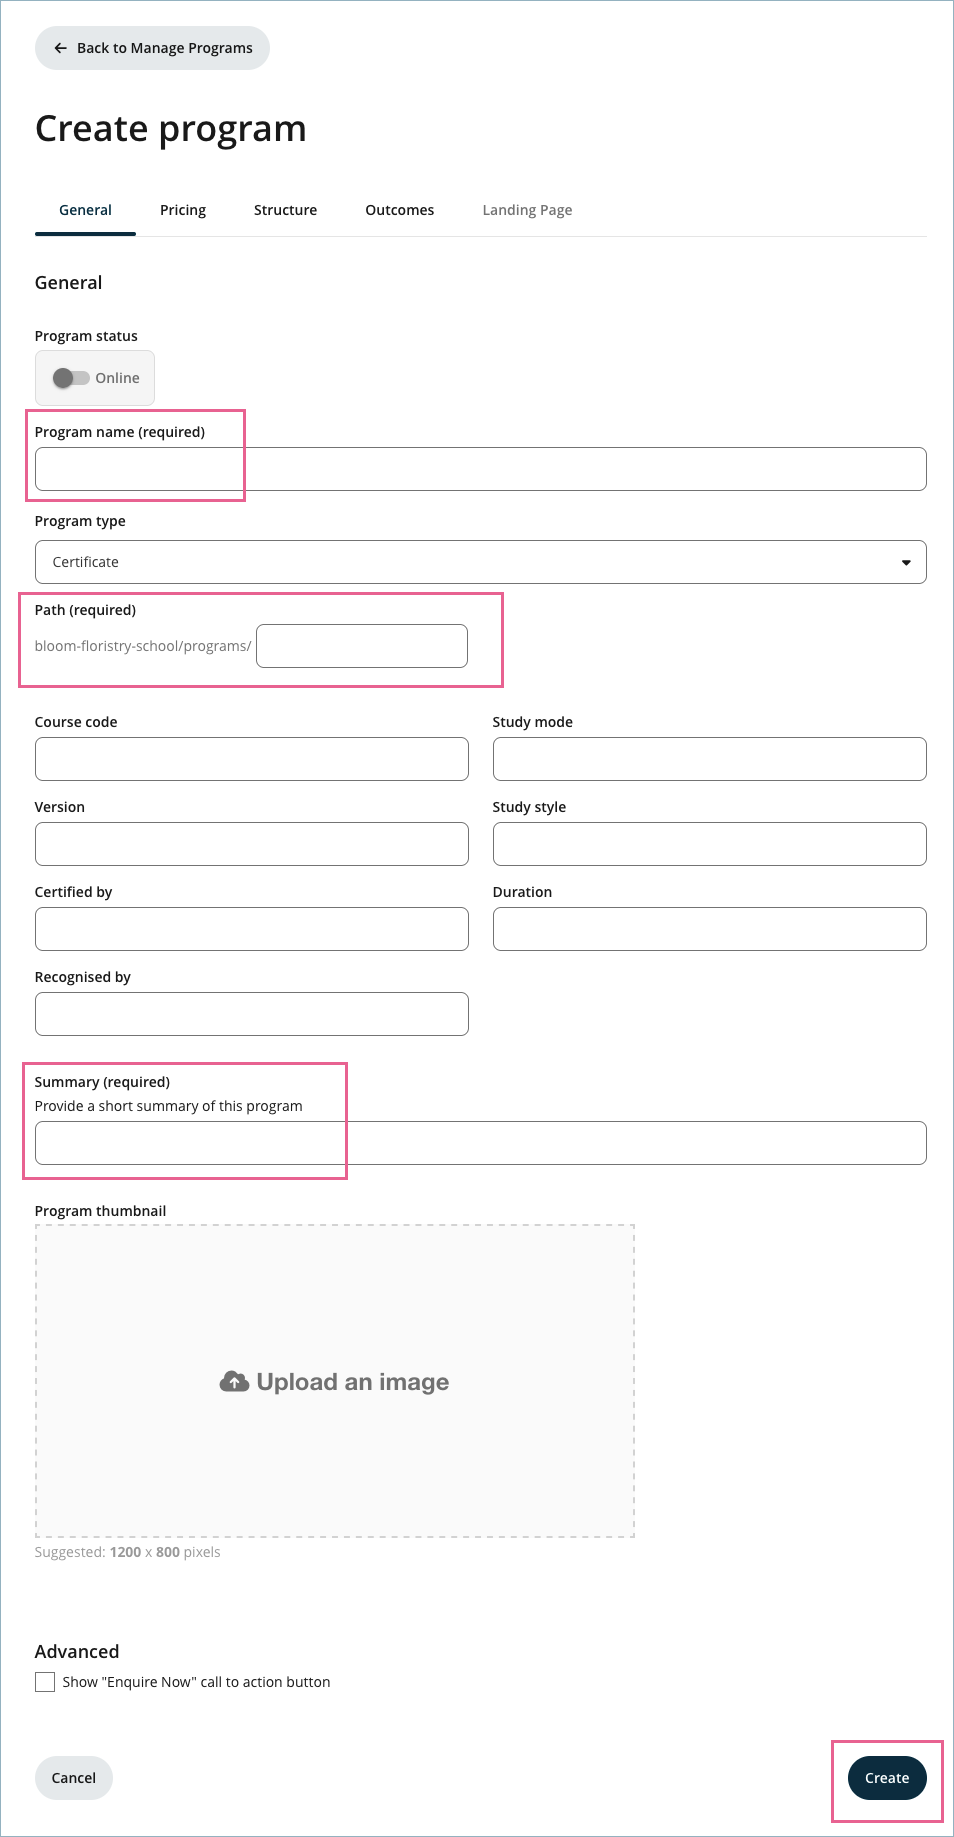
To quickly create a program, only 3 fields in the General tab need to be configured:
- Program Name
- Path (the URL for the Program’s own landing page)
- Summary
To create the program, click on the Create button.
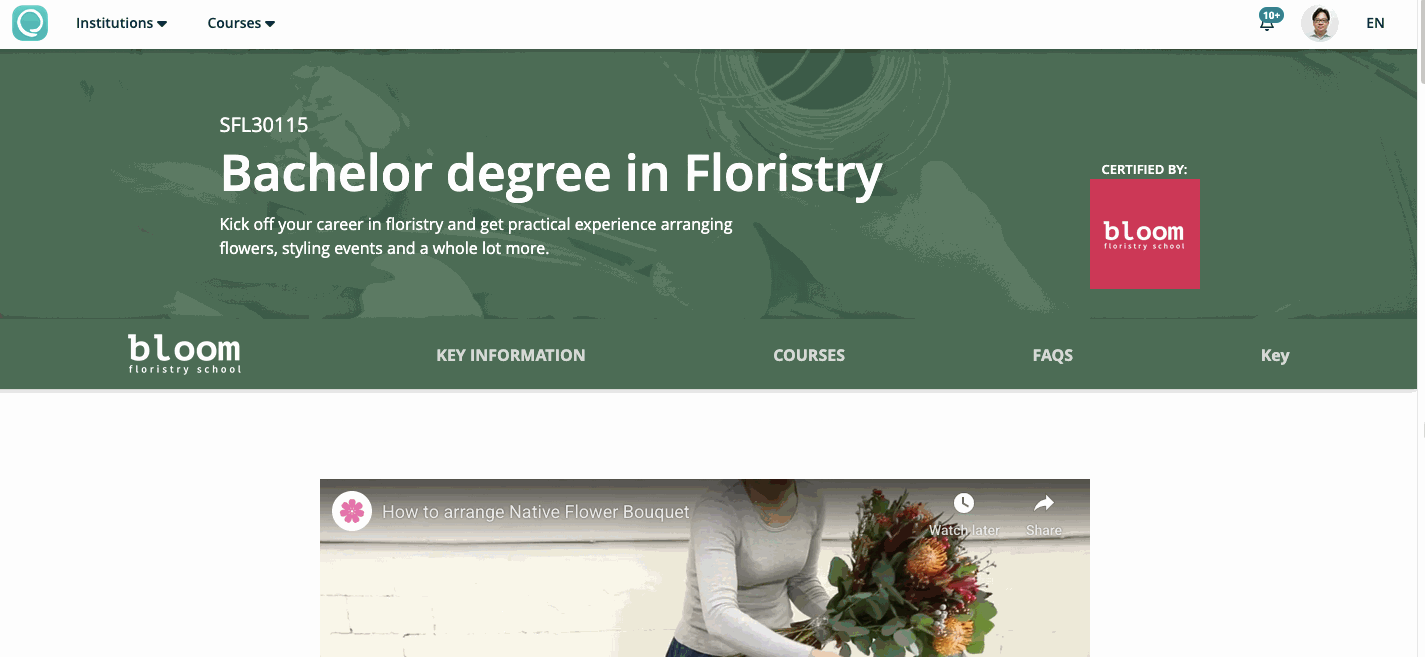
Once a program has been created, the Landing Page tab becomes available and can be selected. Each program has its own landing page, similar to a course landing page:
General
These are the options that can be configured in the general tab:
- Program status - to turn the program online or offline.
- Program name.
- Program type.
- Path - This is the URL for the program’s landing page. Please note that once it is set, it cannot be modified.
- Course code - for example: Math1, Bio1, etc.
- Study mode - for example: Online, Offline, Delivered online, etc.
- Version - for example: v1, v2, etc.
- Study style - for example: Self-paced, Scheduled, etc.
- Certified by - for example: Union of States, Certification Body 1, etc.
- Duration - for example: 11 weeks, 1 month, etc.
- Recognised by - for example: State of Edu 1, State of County 2, etc.
- Summary.
- Program thumbnail.
- Advanced - an option is available to show the "Enquire Now" call to action button.
Pricing

These are the options that can be configured in the pricing tab:
- Display - to hide or show the pricing.
- Pricing model - a few options are available:
- Free
- Free to learn, pay to certify
- Pay to enrol
- Enrolment price
 Currently, for the paid programs we support external enrolment only.
Structure
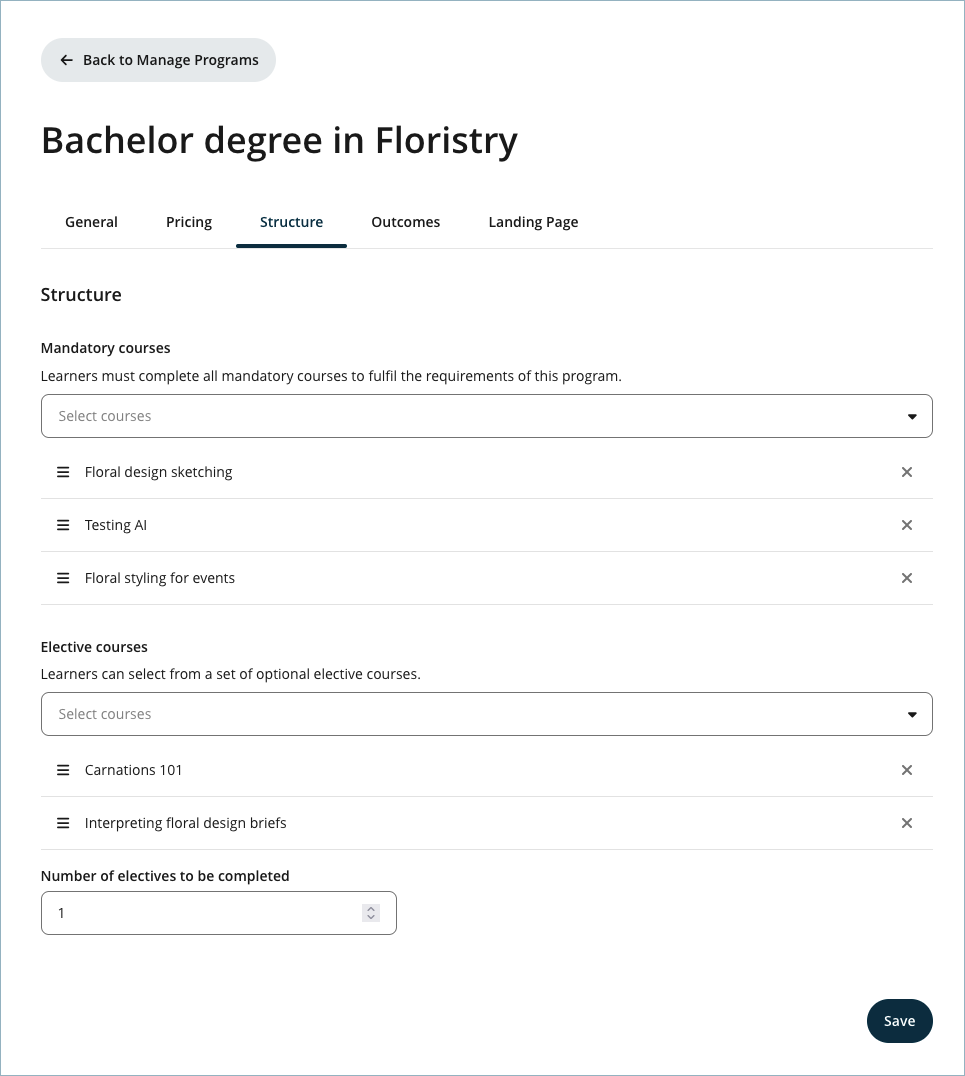
These are the options that can be configured in the structure tab:
- Mandatory courses - Learners must complete all mandatory courses to fulfil the requirements of this program.
- Elective courses - Learners can select from a set of optional elective courses.
- Number of electives to be completed
Outcomes
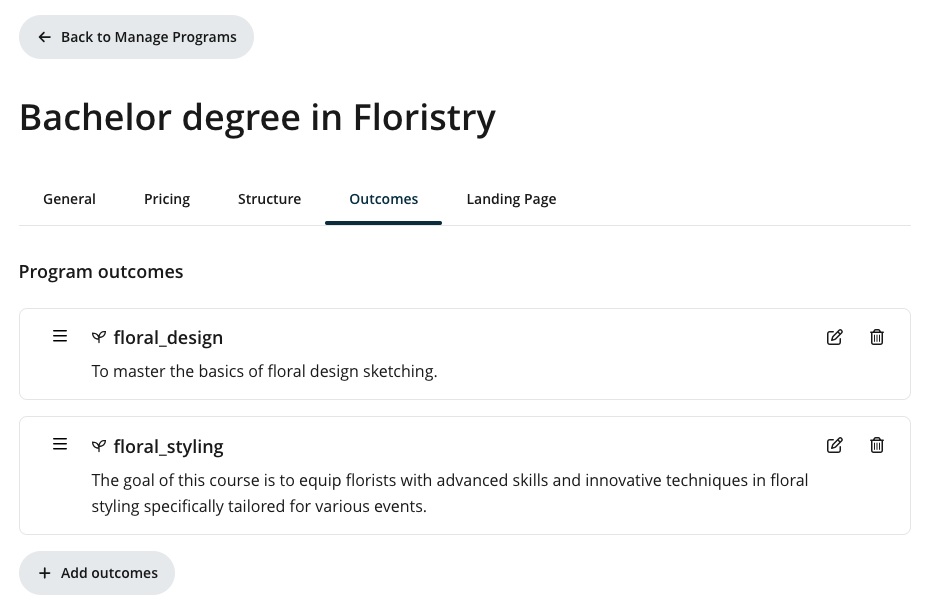
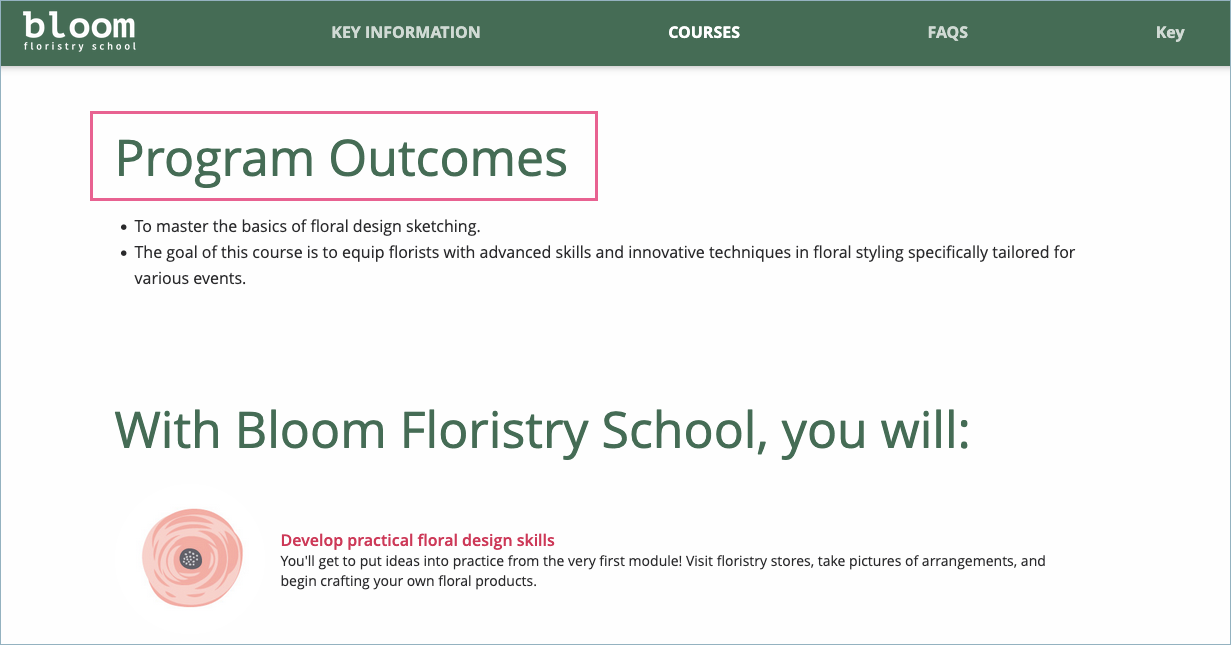
Program outcomes can be configured in the outcomes tab. To add an outcome, please follow the steps below.
Step 1
Click on Add outcomes.
Step 2
Fill in the Outcome tag and the Outcome description. Click Save to apply the changes.

Landing Page
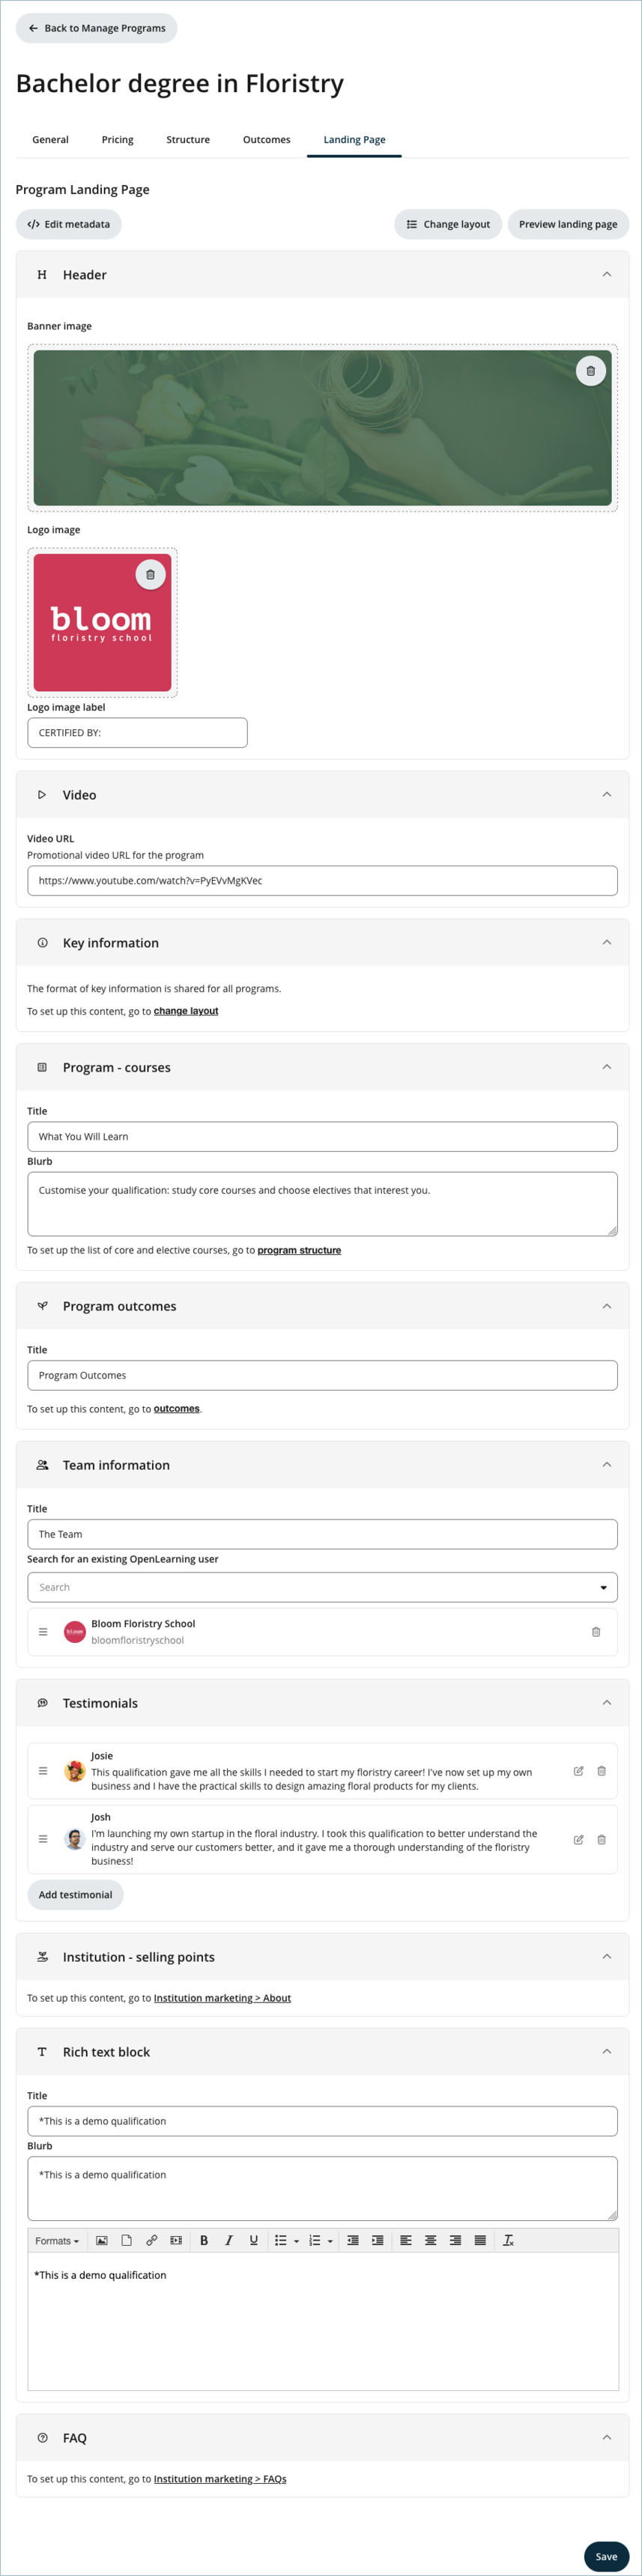
These are the options that can be configured in the landing page tab:
1. Header - Banner and Logo image for the program can be uploaded.
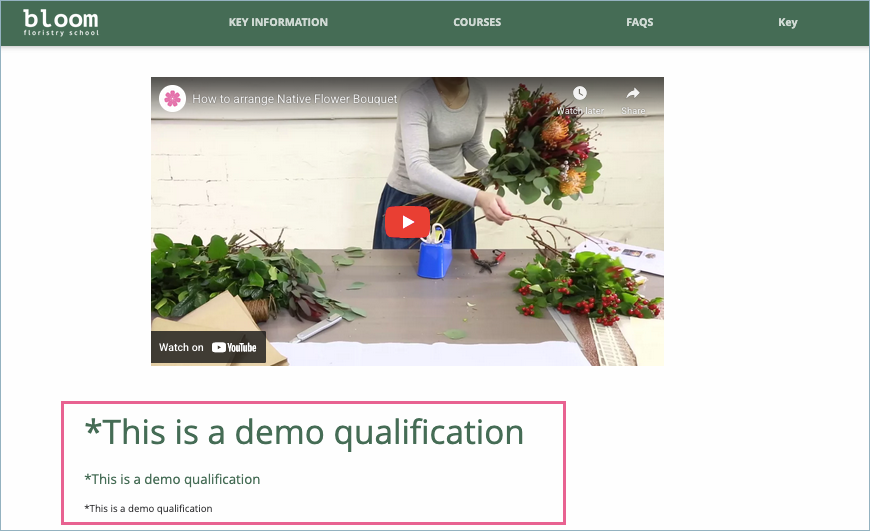
2. Video - Promotional video URL for the program. Only a YouTube video URL can be uploaded at the moment.
3. Key information - The format of key information is shared for all programs. To set up this content, click the Change layout button.
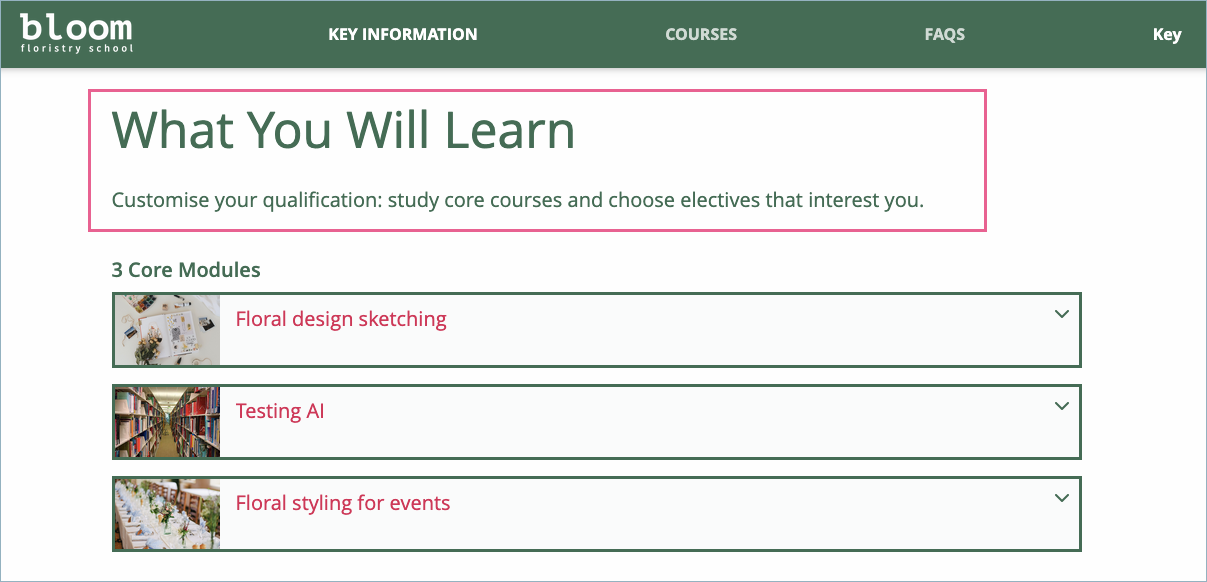
4. Program - courses. The title and blurb set here will appear above the mandatory courses.
5. Program outcomes. The title set here will appear above the added program outcomes.
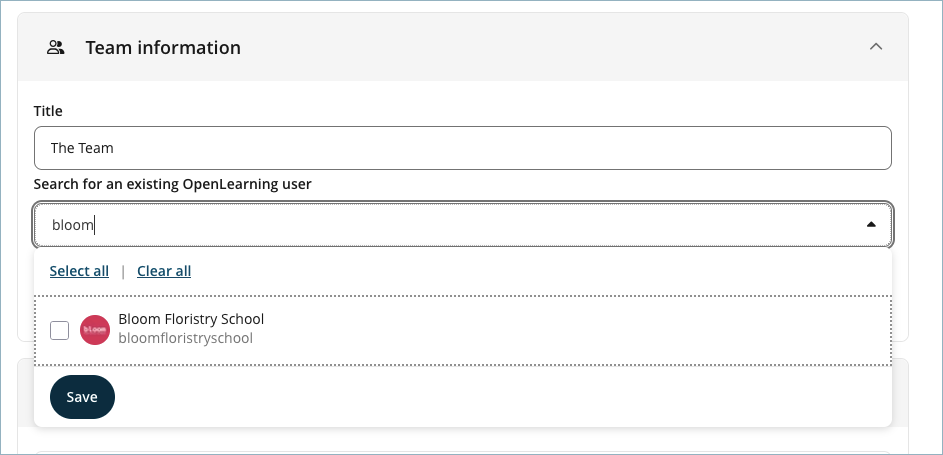
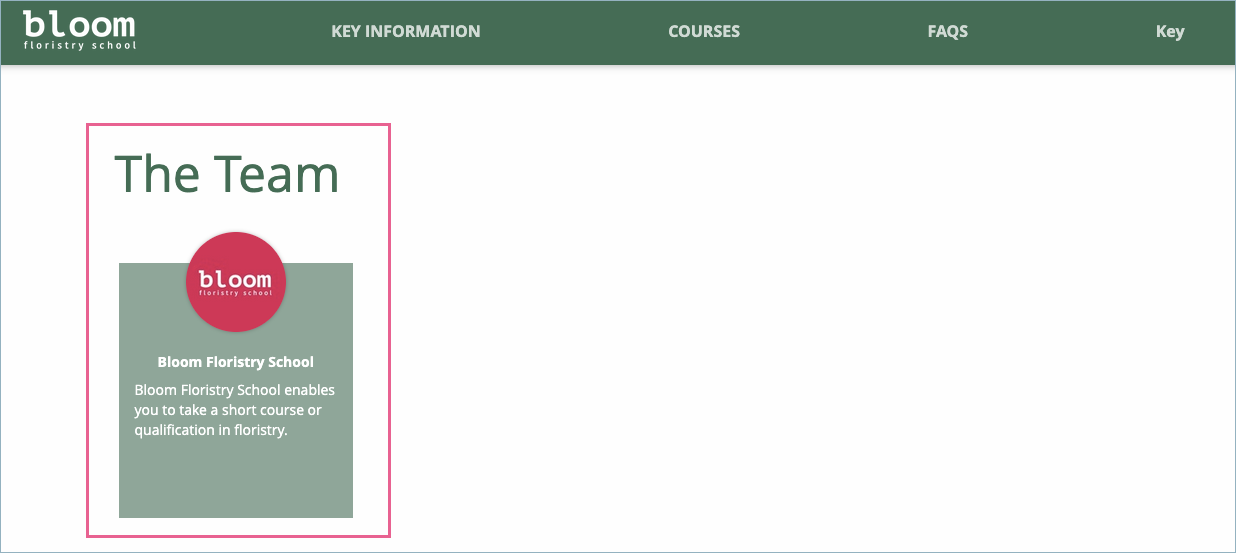
6. Team information. The title and team members can be configured in this section. To add a team member, you can search by using the name, profile name or email address.
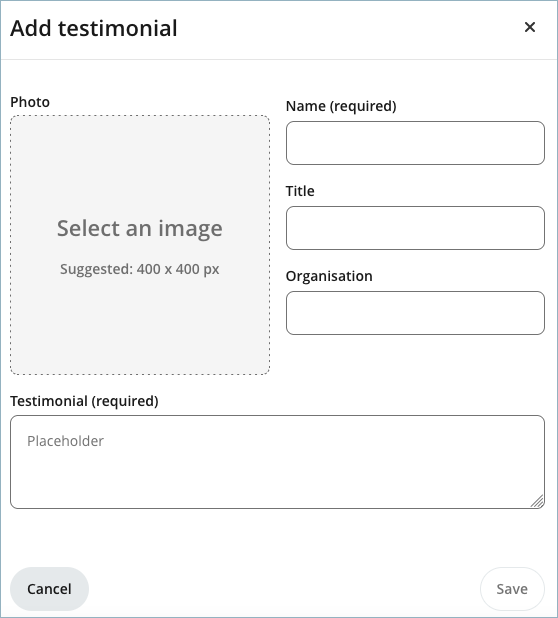
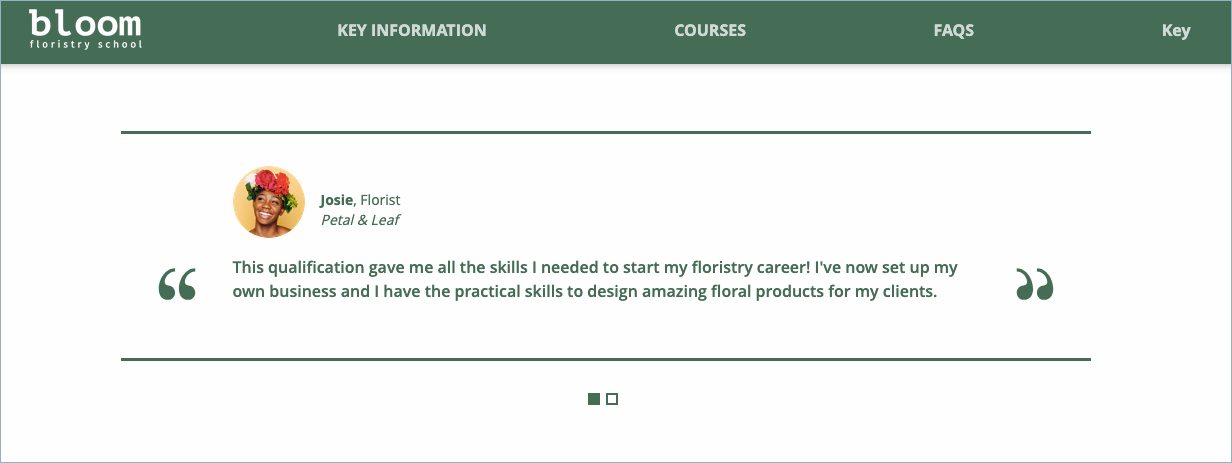
7. Testimonials. Testimonials can be added by selecting the Add testimonial button. For each new testimonial, the following details can be included:
- Name.
- Title.
- Organisation.
- Testimonial.
- Photo.
8. Institution - selling points. To set up this content, you will be redirected to Institution Marketing > About. You can then follow the steps outlined in the article How to set up institution selling points.
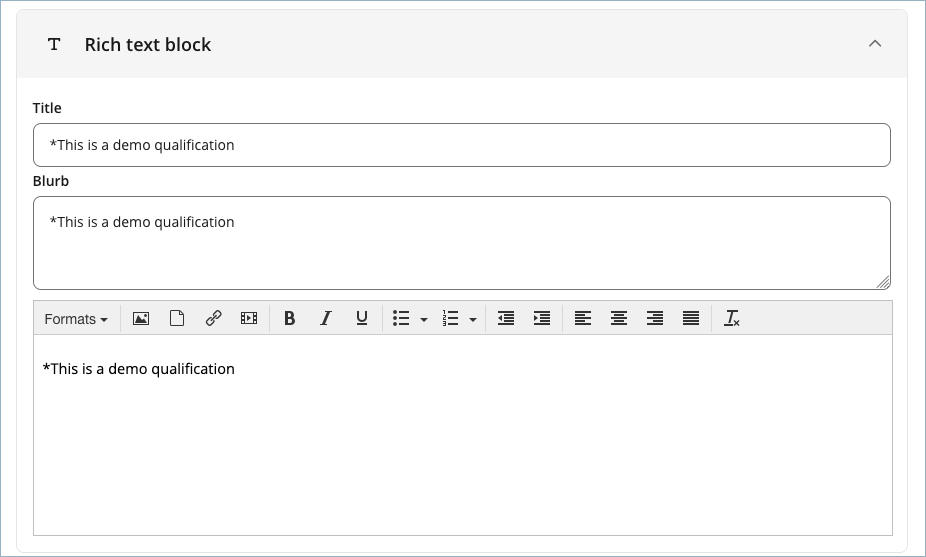
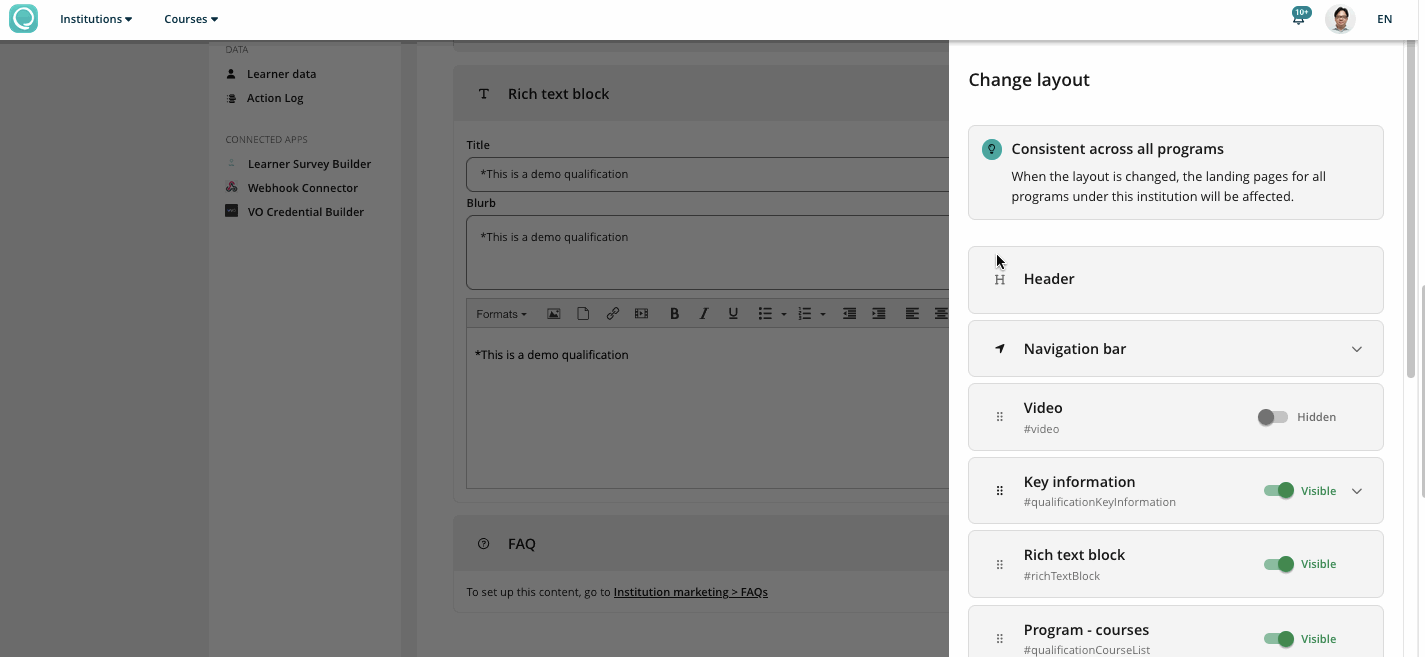
9. Rich text block. The title, blurb and description can be configured in this section. The values you configure here will be displayed beneath the promotional video, provided a video is set.
10. FAQ. To set up this content, you will be redirected to Institution Marketing > FAQ-s. You can then follow the steps outlined in the article How to set up FAQs.
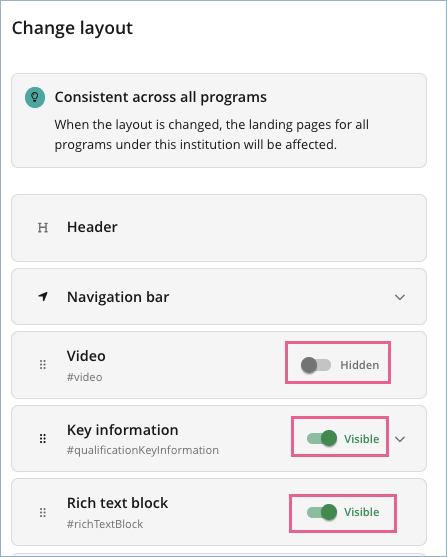
Change Layout (this setting affects all programs, not a single program)
You can use the layout settings to be consistent across all programs. When the layout is changed, the landing pages for all programs under this institution will be affected.
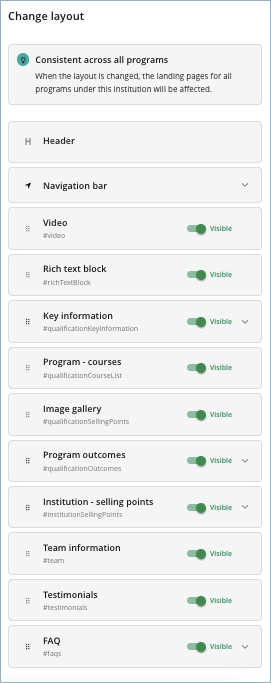
These are the items that can be configured in the change layout menu:
1. Header.
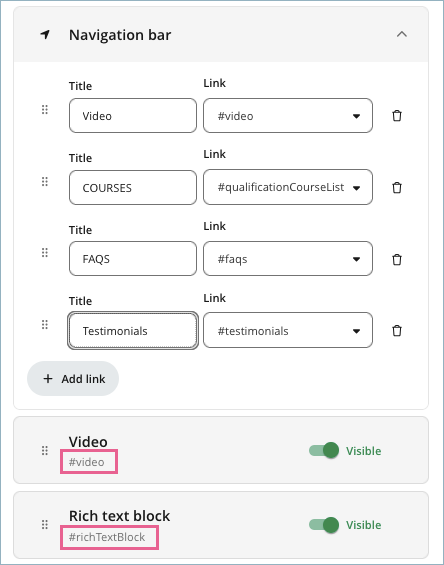
2. Navigation bar. Similar to the institution landing page, the program landing page also allows you to set a navigation bar. When a user clicks a navigation item, they will be taken to the corresponding section. Each link points to a section identified by its hashtag, for example, #video for the video section.
3. Video.
4. Key information. These are the key information that you can set in this section:
- Price.
- Recognised by.
- Study Mode.
- Start Date.
- Certified by.
- Duration.
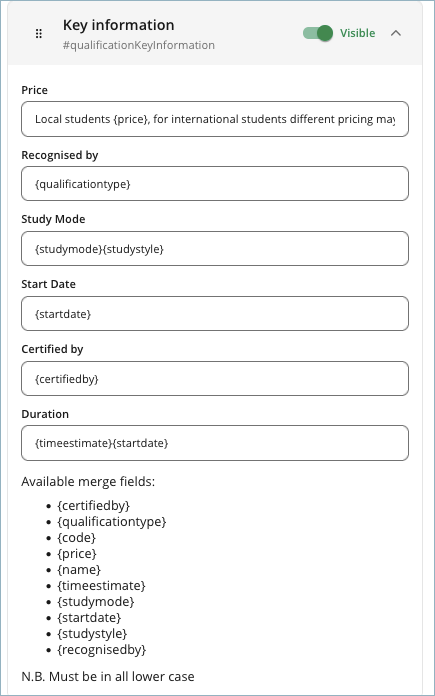
There are two options when setting the value for each field:
- Hardcoded - If you enter a fixed value, the same value will appear for all programs in your institution.
- Dynamic - You can use placeholders (variables) for each field and define how the final text should be formatted. You can also combine placeholders with fixed text as needed. For example, you might set the price field with the text "The cost is {price}". Each placeholder will then be replaced with the corresponding value configured in the program. In this case, the {price} placeholder will be replaced by the price you set in the Pricing tab of each program.
Available placeholder options:
- {certifiedby}
- {qualificationtype}
- {code}
- {price}
- {name}
- {timeestimate}
- {studymode}
- {startdate}
- {studystyle}
- {recognisedby}
Please note that each placeholder must be in all lowercase.
5. Rich text block.
6. Program - courses.
7. Image gallery.
8. Program outcomes. You can set the program outcome title here if you want the same title to appear for this section across all programs in your institution.
9. Institution - selling points. You can set the institution - selling points title here if you want the same title to appear for this section across all programs in your institution.
10. Team information.
11. Testimonials.
12. FAQ. You can set the FAQ title here if you want the same title to appear for this section across all programs in your institution.
Actions you can perform for all items in this menu, except for the header and navigation bar items, include:
1. Using the toggle button to show or hide the item.
2. Changing the order by dragging the item up or down.
What can I use Programs for?
- Group or combine several courses together where you can add more details that are applicable.
- You can accept payment(s) externally for all courses in the program so learners won’t have to manually enrol and pay for each course one by one. Note: this requires external enrolment to be set up and enrolments will be done either by:
- Manually through the Administer Learners > Learners setting page;
- Set up the integration via API or LTI and add them to your course.
- An option to categorise courses but with more details (instead of using the categories feature in the Institution portal that only gives you the option to set a title and a blurb/description).