How to use the Verified Orchestration App?
What is the Verified Orchestration (VO)?
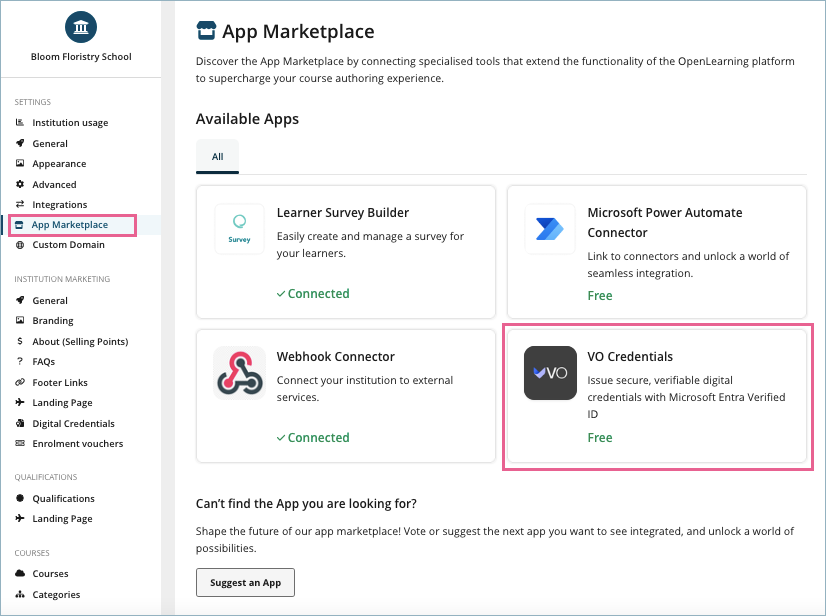
Verified Orchestration (VO) is an app available on the App Marketplace that lets institutions issue verifiable digital credentials through Microsoft Entra Verified ID. These credentials are secure, tamper-proof, and cryptographically verifiable, giving learners the ability to store, share, and present them with confidence.
Institutions can also request learners to present their VO credentials during enrolment, using them as prerequisites to confirm eligibility before granting access.
Note: This app is not available by default. To have it enabled on your portal, please contact our Customer Success team at support@openlearning.com.
How to use the Verified Orchestration app?
Step 1
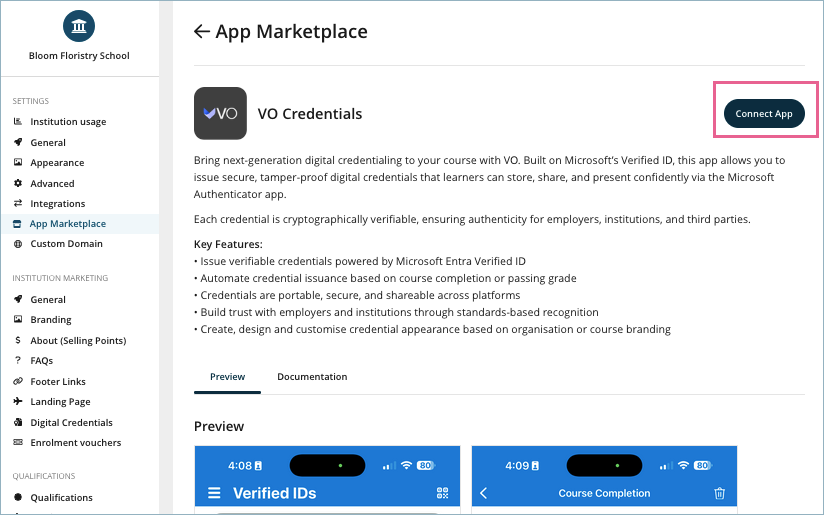
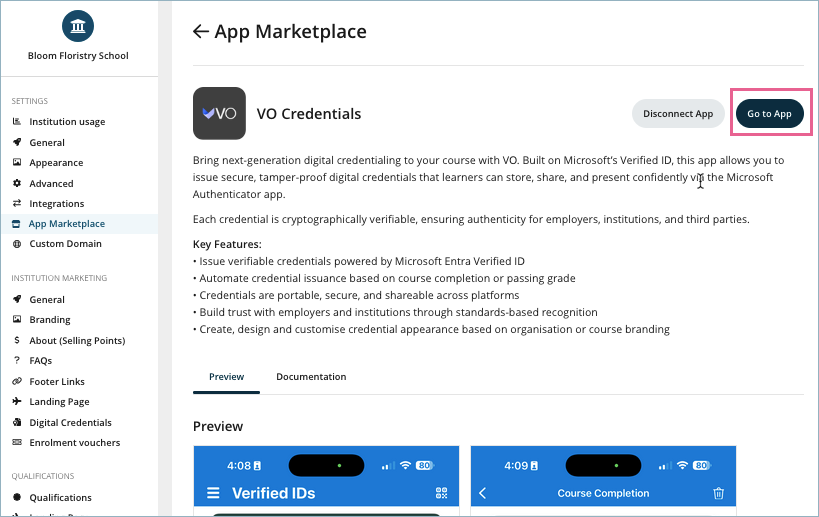
Go to the Institution Settings > Settings > App Marketplace menu and click the Verified Orchestration app from the OpenLearning App Marketplace. Click the Connect App and then the Go to App button.
Step 2
A form will appear with several fields to complete. All the values required for this form can be obtained from Microsoft Entra ID in your Azure portal.
Below are the instructions on how to obtain each required value.
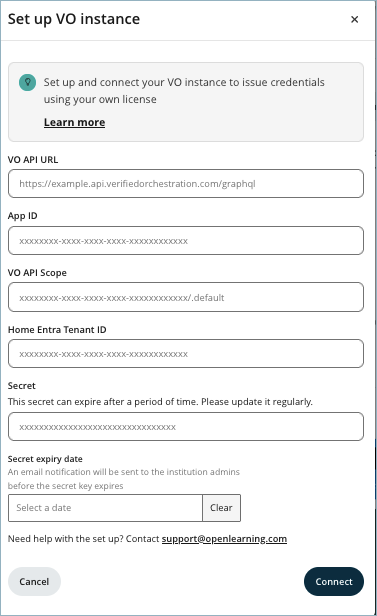
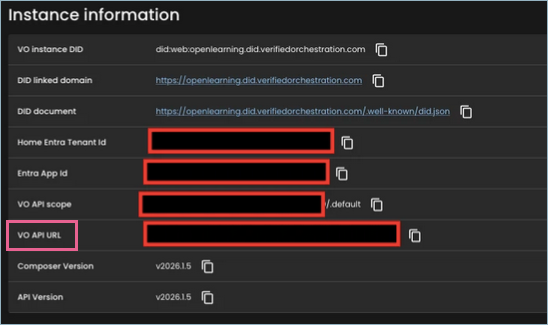
VO API URL
This is the URL of your VO GraphQL instance that OpenLearning will use to synchronise data (e.g., course credentials) and issue credentials on behalf of your VO instance.
The easiest way is to refer to the Configuration tab in your VO Composer or Dashboard.
Step 1
Go to your VO Composer Configuration Tab and select Instance.
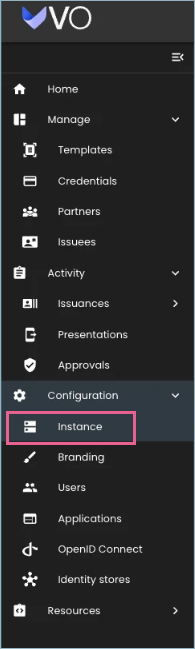
Step 2
Copy the value under the VO API URL field.
App ID
Step 1
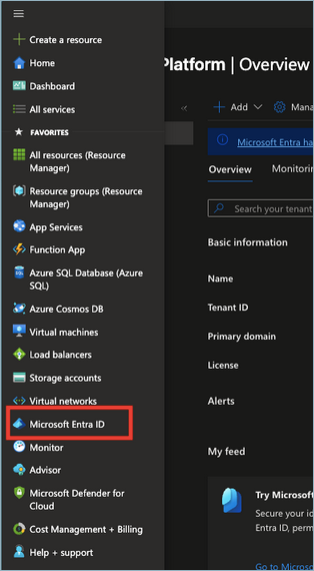
In your Azure portal, navigate to the Microsoft Entra ID menu.

Step 2
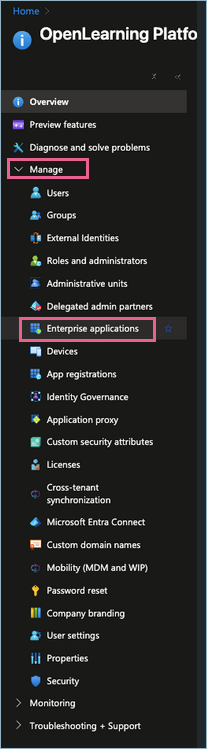
Under the Manage menu, select App registrations.

Step 3
Locate your VO registered app. You’ll see the App ID displayed next to it.

VO API Scope
This value is usually provided when you first set up your VO instance. It should follow a pattern similar to:
a12c9e45-7b8d-42f1-93de-8c6a1f4bd902/.default
The scope is simply your VO’s Azure Enterprise Application ID with /.default appended to the end.
Follow the steps below to locate this value in your Azure Portal:
Step 1
In your Azure portal, navigate to the Microsoft Entra ID menu.
Step 2
Under the Manage menu, select Enterprise application.
Step 3
Locate your VO registered app. You will find the Application ID listed there, for example: a12c9e45-7b8d-42f1-93de-8c6a1f4bd902
Then, append /.default to the end, resulting in:
a12c9e45-7b8d-42f1-93de-8c6a1f4bd902/.default
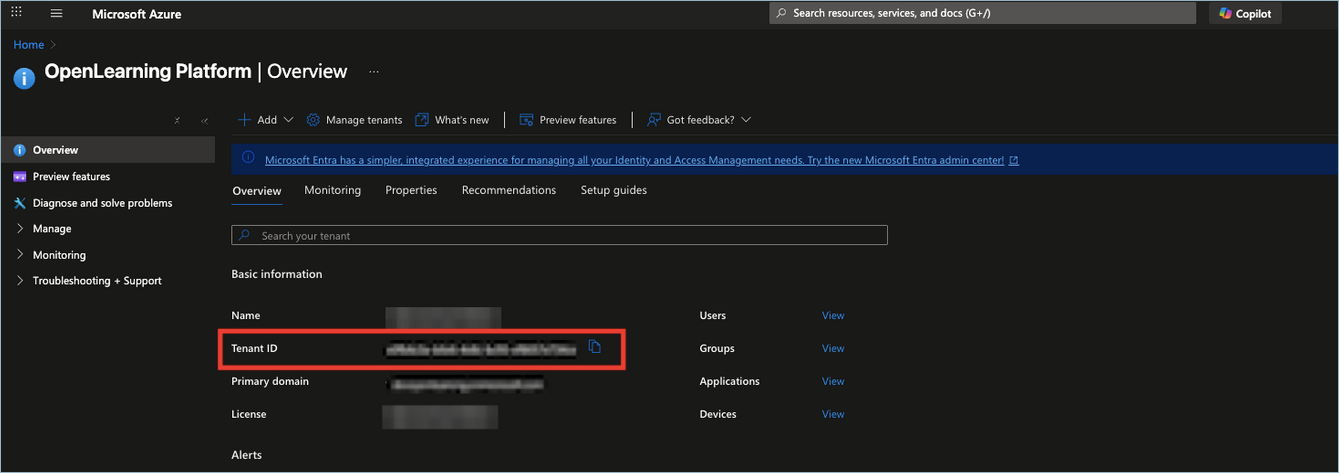
Home Entra Tenant ID
In your Microsoft Entra ID portal, go to the Overview section, where your Tenant ID will be displayed.

Secret
Step 1
In your Azure portal, navigate to the Microsoft Entra ID menu.

Step 2
Under the Manage menu, select App registrations.

Step 3
Locate your VO Registered App.
Step 4
Go to Certificates & secrets.
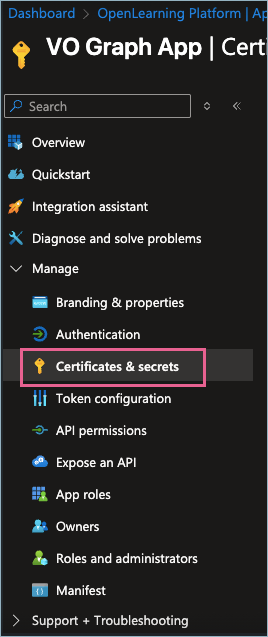
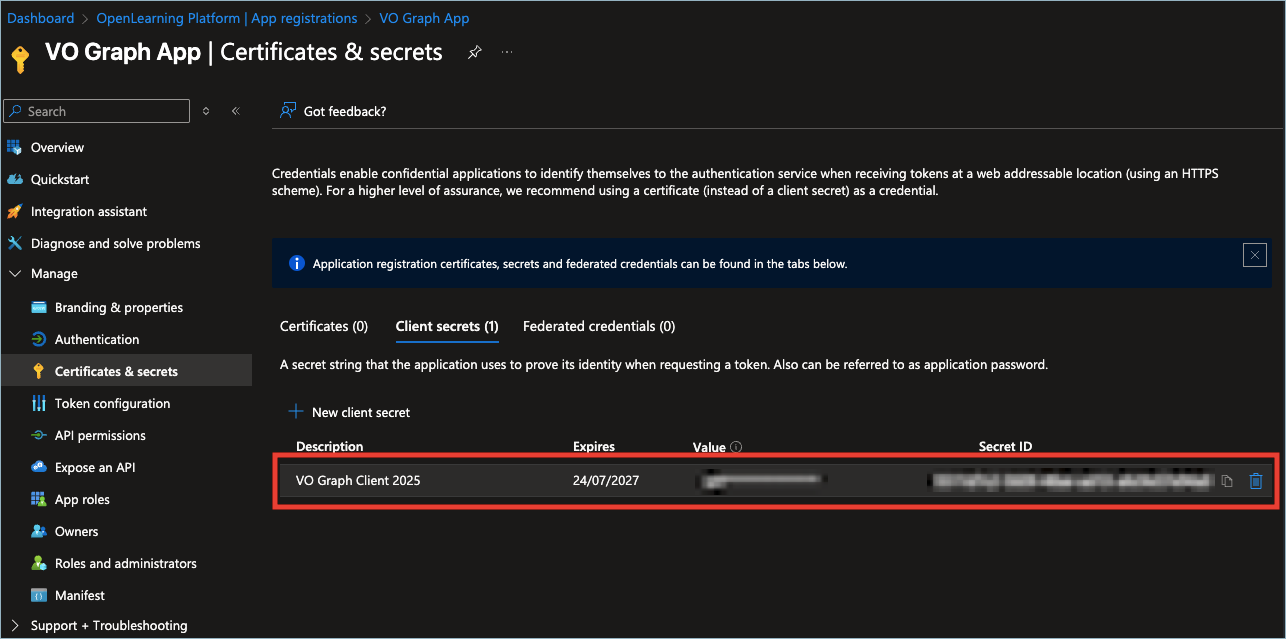
Step 5
In the Client Secrets tab, you will see your secret listed along with its expiry date. Copy the value shown there.
Secret Expiry Date
Azure secrets have expiry dates, and your VO integration will stop working if the client secret expires. To mitigate this, you can enter the estimated expiry date, and we will remind you to renew the client secret before it expires.
After renewing your client secret, if a new secret is generated, please make sure to update the Secret field accordingly.
To complete the connection between the OpenLearning VO Credentials app and your VO instance in Microsoft Entra ID, your VO instance must include the required Application Roles. To configure these roles, please follow the steps outlined in this section How to set up the required Application Roles in the Microsoft Azure Entra ID Portal?
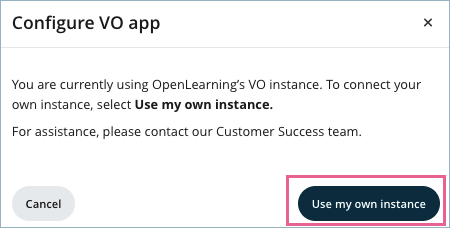
Once you’ve completed this setup form, you can connect to another VO instance by clicking the Configure button on the VO Credentials builder page.
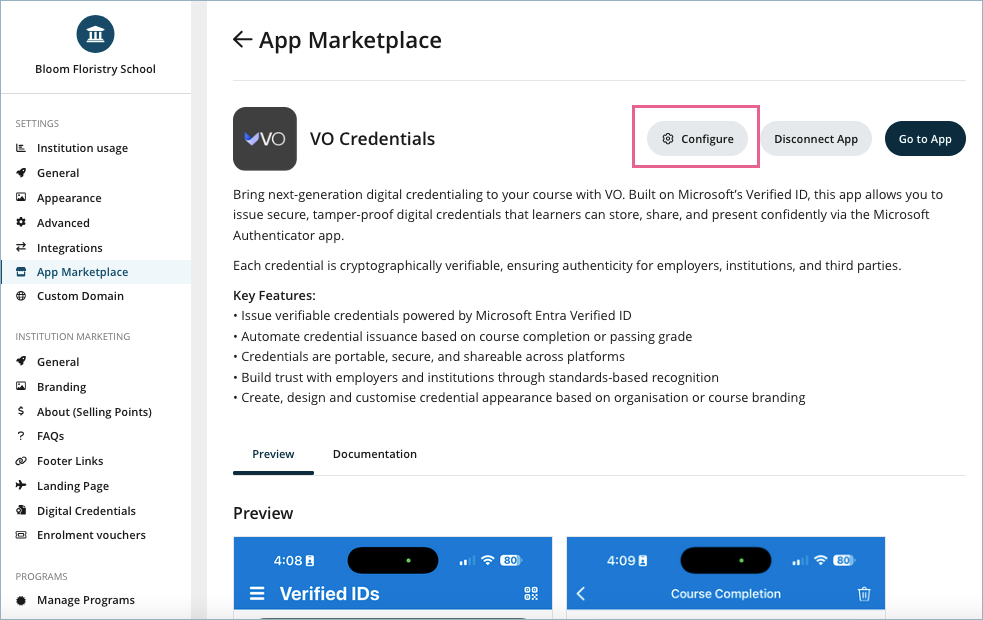
On the Configure VO app pop-up window, click Use my own instance.
Step 3
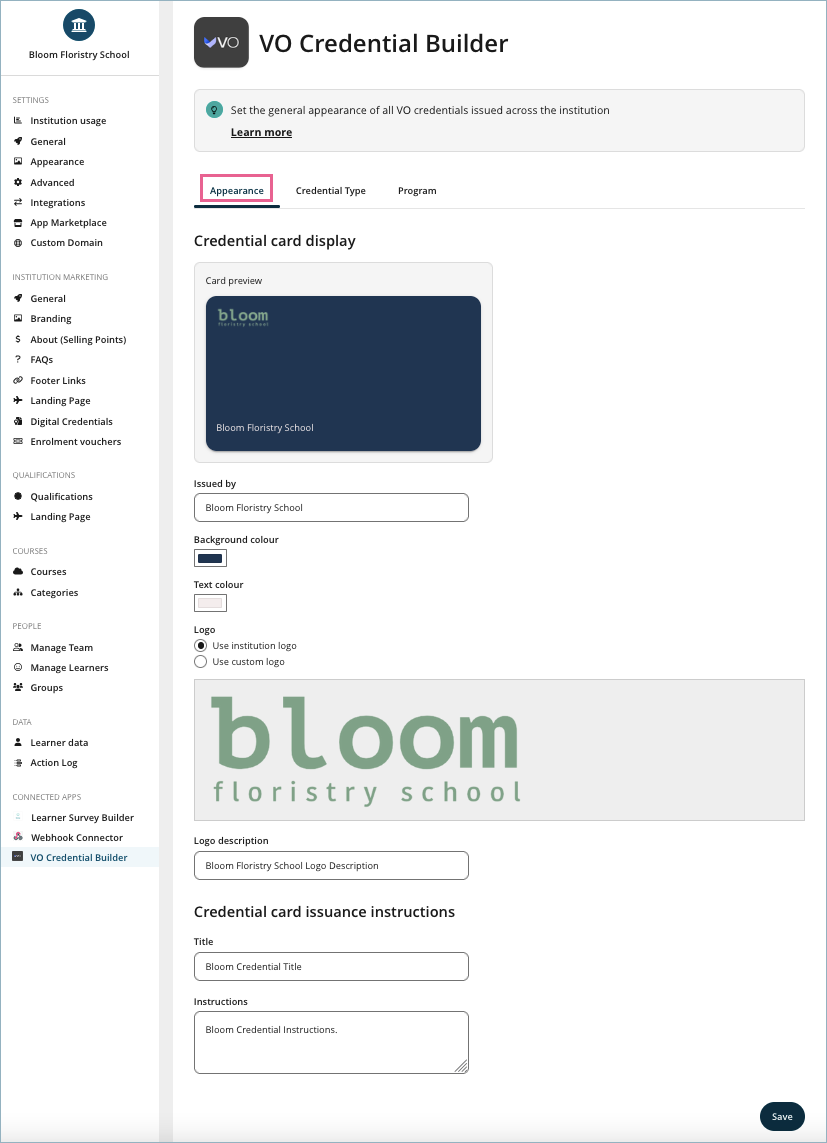
Once connected, click Go to App.
Set the institution credential appearance in the VO app settings. By default, it uses the uploaded institution logo as the logo on the credentials.
Step 4
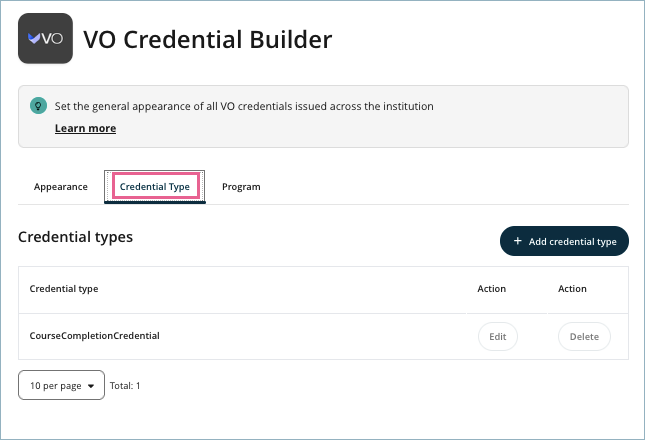
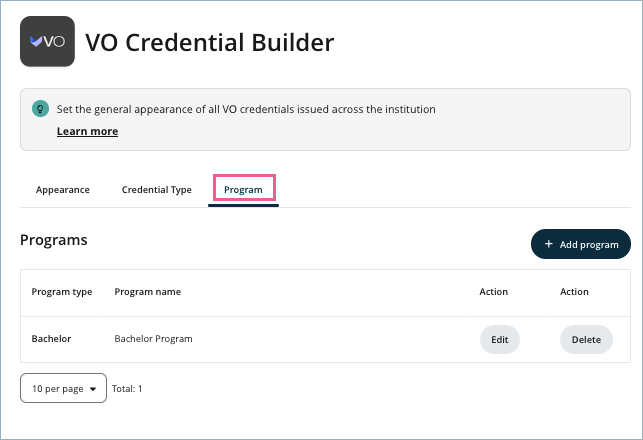
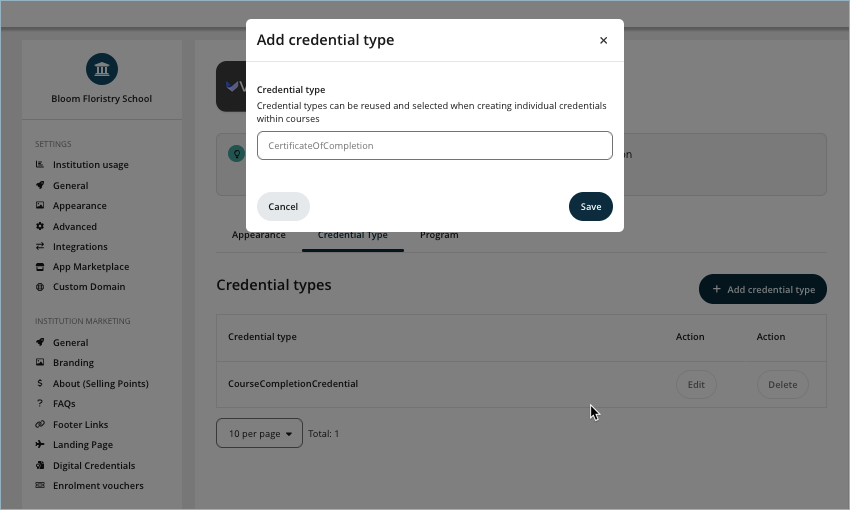
Set institution-specific credential types and program types.
Every credential issued comes with a default credential type called CourseCompletionCredential.
Institutions may add more custom credential types to the credentials they issue, and select those custom credential types as enrolment prerequisites.
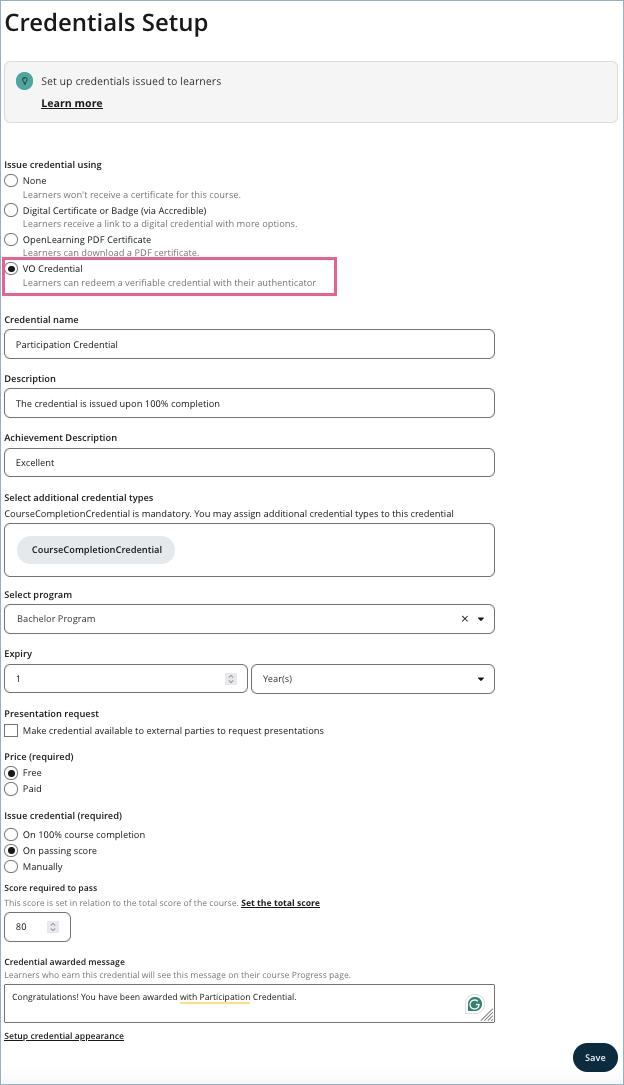
Step 5
In a course, go to the Credentials > Setup menu. Set the credential issuance type to VO credentials.
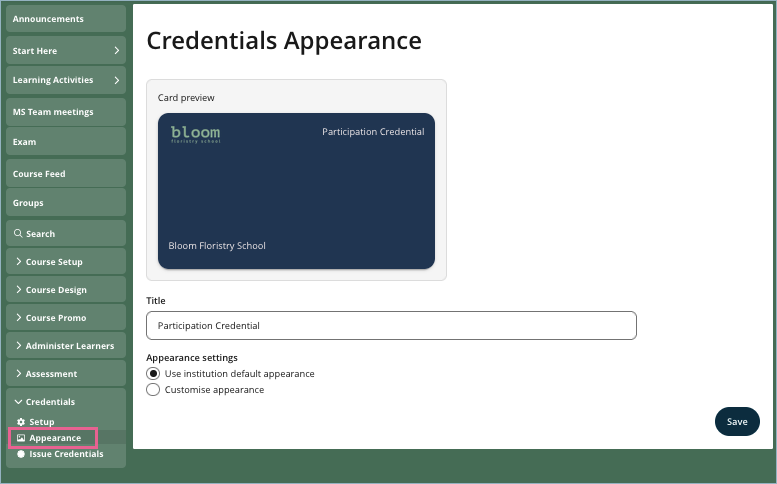
Step 6
Set course-specific credential appearance. These changes will override the credential appearance set at the institution level.
Step 7
Issue credentials to learners. There are three options for issuing a VO credential to learners:
- Automatically upon 100% course completion.
- On passing score. For guidance on setting this up, please see this article How do I set a passing score to issue the certificate?
- Manually. To issue the VO credential manually, follow the same steps as issuing an OpenLearning PDF certificate, as explained in this article How do I issue an OpenLearning PDF certificate?

How do learners redeem a credential?
When a VO credential is issued, the learner must manually redeem it to store it in their Microsoft Authenticator app.
They will be able to redeem the credential via:
- Notifications.
- Profile page > Credentials tab.
- Course > My progress page.
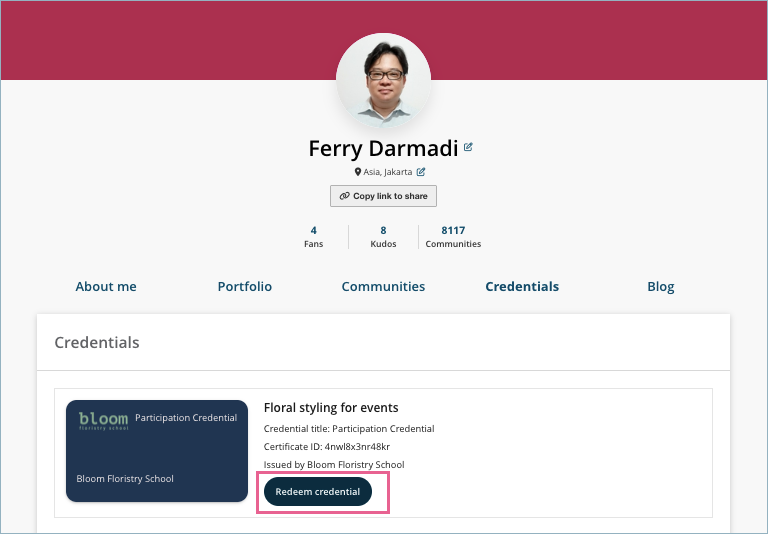
Step 1
Go to the Profile > Credentials page.
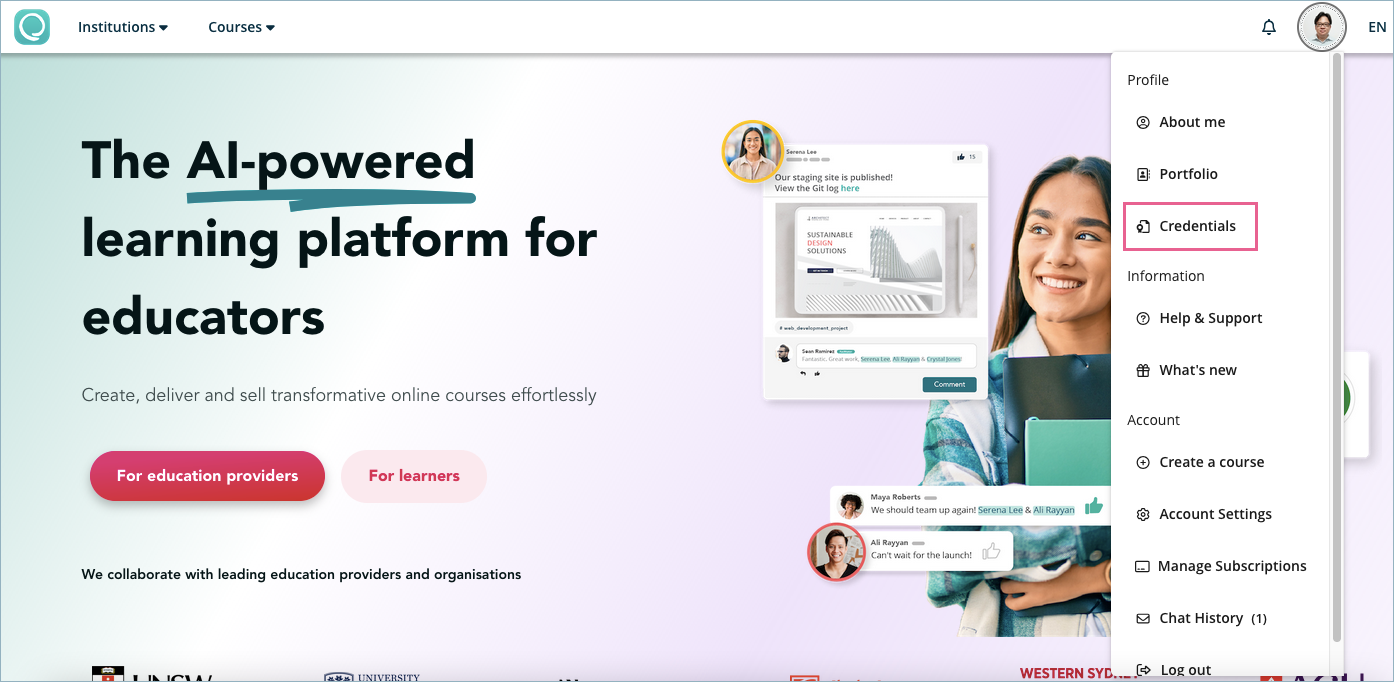
Step 2
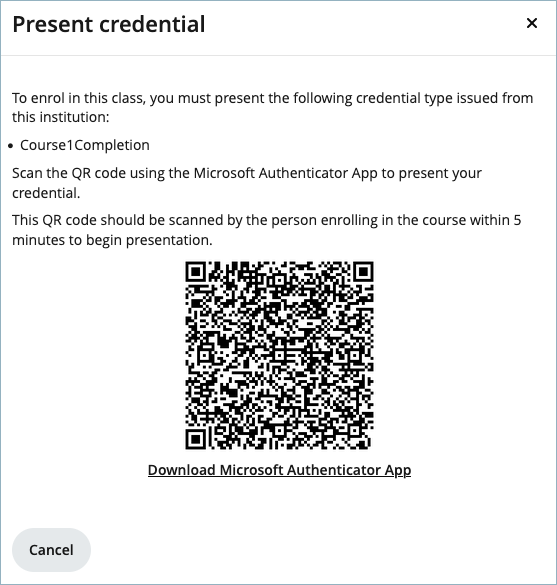
Click Redeem credential.
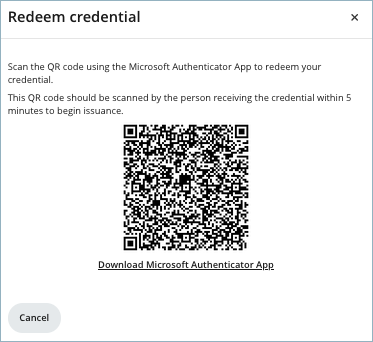
Step 2
Within 5 minutes, scan the QR code using the Microsoft Authenticator app.
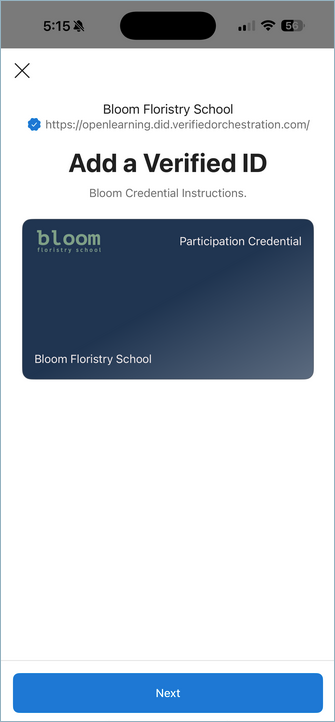
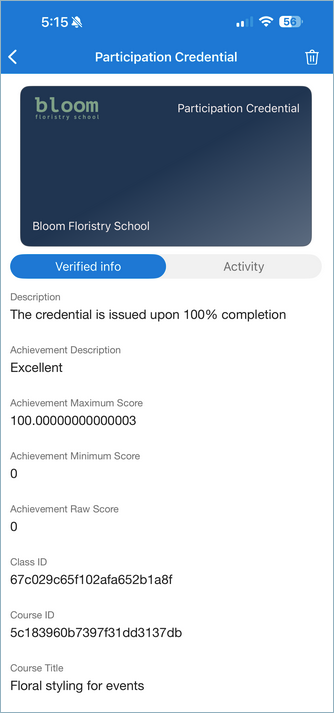
Step 3
Add the credential to your wallet.
How are these credentials verified?
Each credential issued through VO is powered by Microsoft’s Verified ID technology. They’re cryptographically signed and can be independently verified by third parties, such as employers or institutions, using the Microsoft Authenticator app or any compatible verification system.
What do learners need to receive and use a credential?
Learners will need the Microsoft Authenticator app, available on both iOS and Android. Once they receive their credential, they can store it securely in the app and share it whenever they need to.
What triggers the issuance of a credential?
VO credentials can be issued in the same way as an OpenLearning certificate or an Accredible certificate.
Issuance can be automatically triggered based on:
- 100% Course completion
- Achieving a passing grade
VO credentials can also be issued manually by a course admin.
Are the credentials shareable across platforms?
Yes. Because they follow open standards, VO credentials are portable and work across any system that supports the Microsoft Entra Verified ID Network.
Can I customise the look and feel of the credentials?
Absolutely. VO lets you design and customise your credentials to match your institution’s or course’s branding—complete with your logos, colours, and other visual elements.
Are these credentials accepted by employers and institutions?
Yes. Credentials issued through Microsoft Entra Verified ID are based on industry-recognised standards for trust and verifiability. They offer greater credibility than traditional PDF certificates and are easier for employers and institutions to verify, making them a highly trusted option.
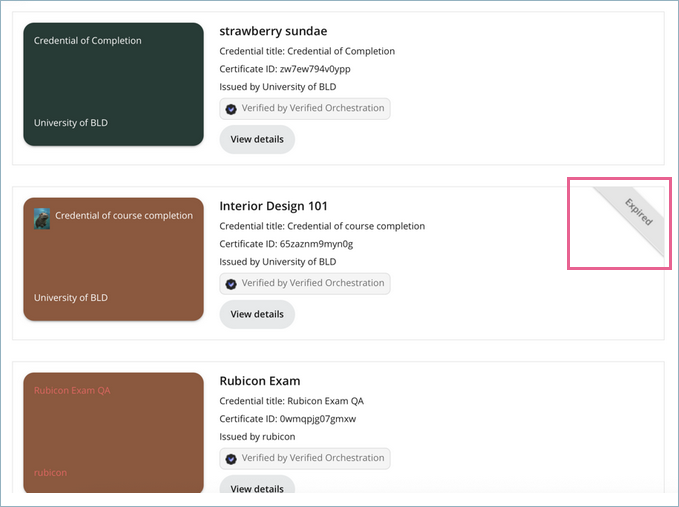
What happens when a VO credential expires?
By default, VO credentials expire one year from the date of issuance, unless stated otherwise. Once expired, the credential will be marked as Expired in OpenLearning.
How do I request a learner to present VO credentials as an enrolment prerequisite for a class?
This feature is only available to institutions with the VO app enabled.
By default, all VO credentials use a standard credential type called CourseCompletionCredential. However, you can only require learners to present a custom credential type that your institution has set up and issued.
Step 1
To set up a custom credential type, go to the Institution Settings > VO Credential Builder > Credential Type tab.

Step 2
Add a new custom credential type.
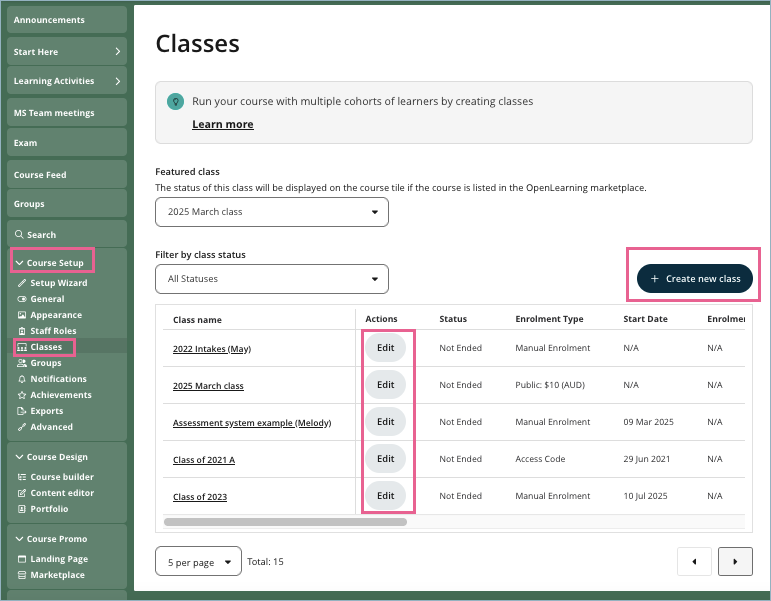
Step 3
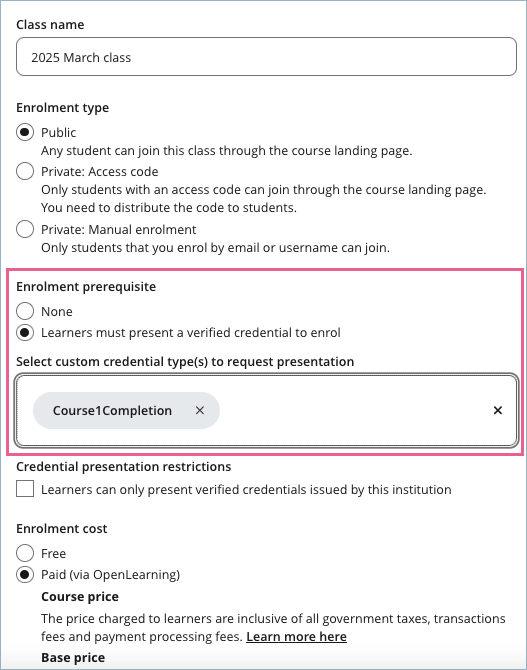
In a course, go to the Course Setup > Classes menu. Click Create or Edit a class.
Under Enrolment Prerequisite, select Learners must present a verified credential to enrol, then choose either the custom credential type you created in Step 2 or any other credential type as required.
Step 4
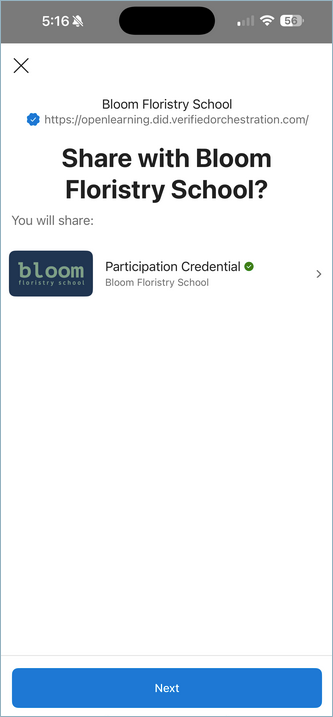
Learners who enrol in a course will be requested to present a verified credential with the selected custom credential type. This applies to the following enrolment methods:
- Public Free class.
- Public Paid class.
- Private access code.
- Enrolment vouchers.
- Manual enrolment (if pre-requisites are not ignored).
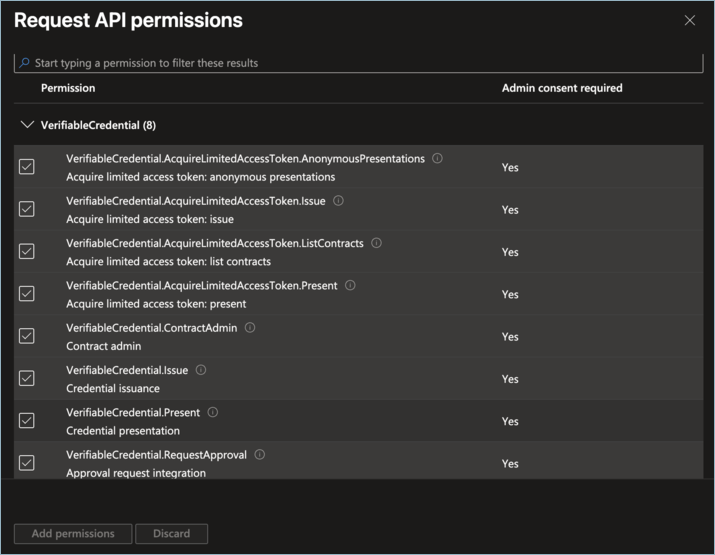
How to set up the required Application Roles in the Microsoft Azure Entra ID Portal?
To complete the setup successfully, OpenLearning will verify whether your configured VO instance has the required Application Roles. If any roles are missing, you may encounter an error message like the one shown below.
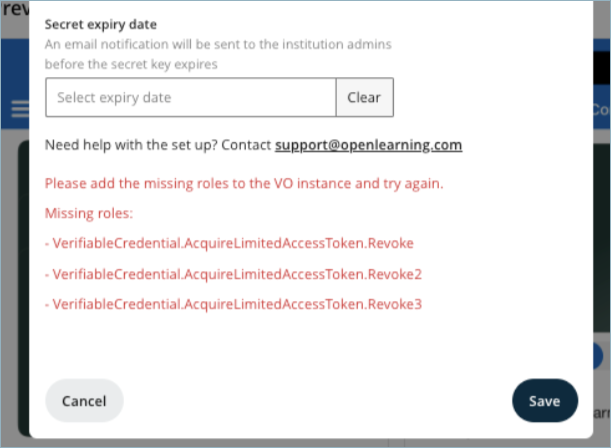
These are all the required Application Roles.
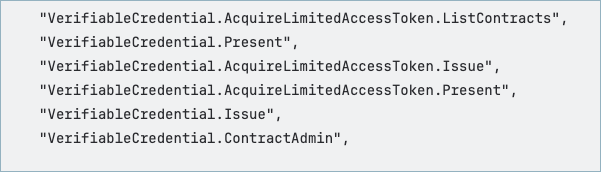
Follow the steps below to configure all the required Application Roles.
Step 1
In your Azure portal, navigate to the Microsoft Entra ID menu.
Step 2
Under the Manage menu, select App registrations.
Step 3
Locate your VO Registered App.
Step 4
Go to API permissions.

Step 5
Add the required roles by clicking Add a permission.
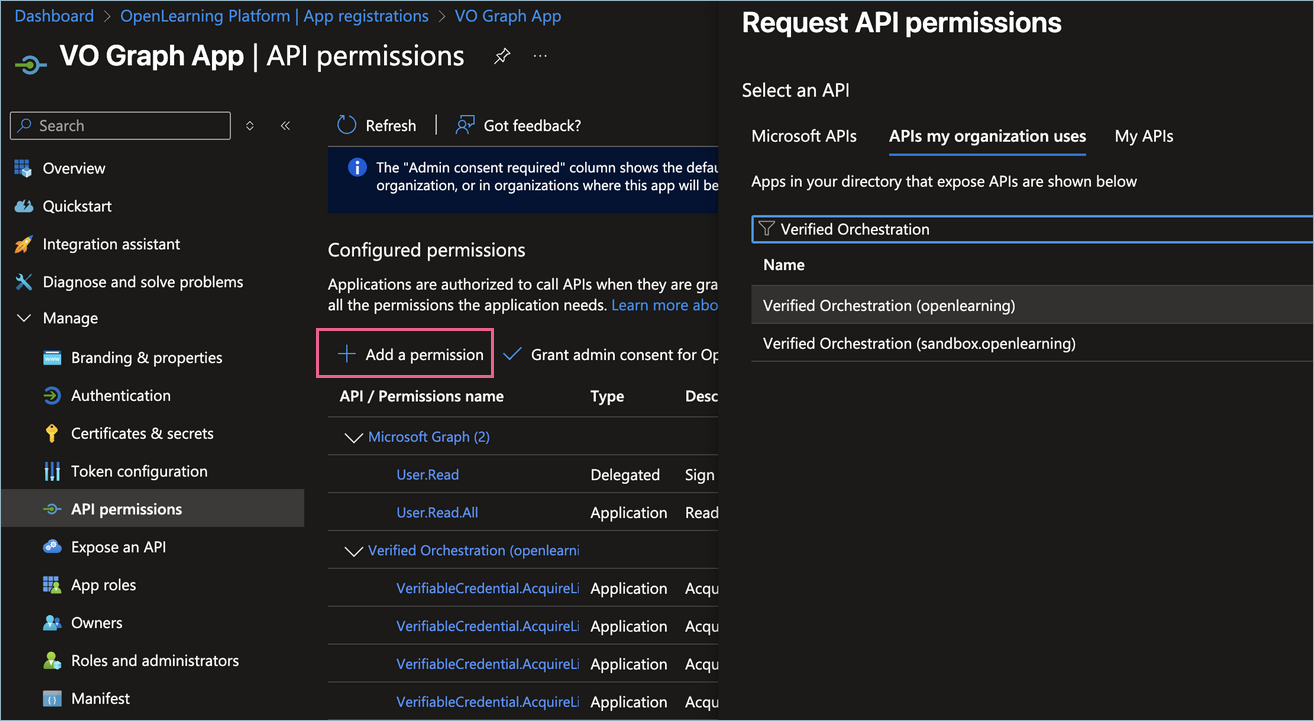
Step 6
Select all the permissions/roles to be granted.