
MS Power Automate Connector
Microsoft Power Automate (formerly known as Microsoft Flow) is a cloud-based service that allows users to create automated workflows between their favourite apps and services. These workflows can automate repetitive tasks, synchronise data between different applications, and perform various actions based on triggers.
A Microsoft Power Automate Connector is a key element in building these automated workflows. Connectors act as bridges between Power Automate and external services(back-end services or data sources) or applications, enabling them to interact with each other seamlessly. Each connector is designed to work with a specific service or application (e.g. OpenLearning) and provides a set of actions and triggers that you can use in your workflows.
When you create a flow in Power Automate, you can choose from a list of available connectors (e.g. the OpenLearning connector), and then use the actions and triggers provided by that connector to build your workflow.
Setting up Custom Connector in Microsoft (Part 1)
Step 1
Go to your Microsoft Power Automate site and from the left panel, select Data > Custom connectors.

Step 1a
If you do not see this in your left panel, click on More > Discover All . The Custom Connector should be listed. You can pin it to the main menu for easier navigation in the future.

Step 2
From the Custom Connectors page, click on + New custom connector and select Import an OpenAPI file.
Import the file (apiDefinition.swagger.json) attached in this help article.

Step 3
Add general information and Create connector as per the screenshot below:
Note: There’s a new restriction that the description must have more than 30 characters.

Step 4
Create connection. Setup in the Microsoft domain will continue in Step 10 after generating all the required information in the OpenLearning domain in Steps 5 - 10.

Setup Connector in OpenLearning
Step 5
Log in to OpenLearning and navigate to your Institution Settings > App Marketplace and click on the Microsoft Power Automate Connector app.

Step 6
Click Go to App.

Step 7
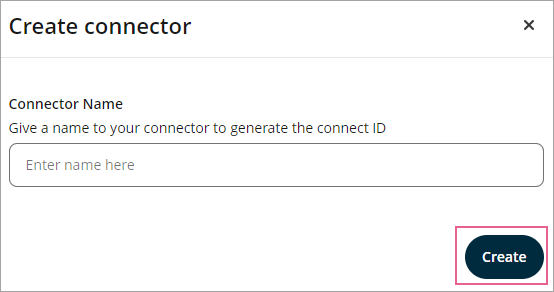
Click Create connector.

Step 9
Fill out the name and click Create.
Step 10
Click on Action > View details to reveal the required connection information.

Step 11
For API key, go to your Account Settings to generate a new API key. Please note that you shouldn't generate a new API key if your account was used to do automation via API by your institution before (in this case, it would be better to use a different account for the power automate connector).
Setting up Custom Connector in Microsoft (Part 2)
Step 12
Once the API key is generated, go back to your Microsoft account and enter the API key as the next step as per Step 3 above.

Step 13
Create a trigger for the flow.

Step 14
Fill out the required information that you get from Step 9. You could also enter the course ID or the class ID if you want to subscribe to an event that is happening at the course level or the class level.

Please refer to this article on how to get the class and course ID.
Step 15
Once completed and the flow is turned On, the subscription will appear in the connector detail in your OpenLearning portal.

Attempt the event that you wanted to capture, and you should see the log on your end.
That's it! If you encounter any issues while setting this up, feel free to reach out to our Customer Success team at support@openlearning.com for assistance.